Last modified 1 year ago
180 Views
Less than a minute read
To remove sidebar area from profile pages, Go to Spotlight > Settings > Entities tab and set the single template to "Full With".
Last modified 1 year ago
202 Views
Less than a minute read
Employee archive view displays all employees in a stacked layout. To see employee archive view, go to the frontend of your site and add "employees" to your domain name.
Last modified 1 year ago
176 Views
Less than a minute read
Employee Spotlight comes with very powerful customization module. Let's say you want to disable Job title field from all frontend views. Go to Spotlight > Settings Entities and find Job Title under Attributes section. Select "Hide from Frontend Pages" option from the dropdow...
Last modified 1 year ago
221 Views
Less than a minute read
Let's say you want to change employee slug to founders. Simply go Settings > Entities and change base slug and save changes. Make sure you visit Permalinks settings page after you saved your change.
Last modified 1 year ago
275 Views
3 min read
Last modified 1 year ago
113 Views
Less than a minute read
If you do not map a field by choosing "Do not map" option when you're importing or updating from CSV, the field is ignored.
Last modified 1 year ago
344 Views
Less than a minute read
WordPress Multisite, by default, allows sharing of plugins, themes and works on the same database. However, it does not allow sharing database tables among sites. This is by design. Each site is unique in terms of database table usage. For example, Site A and Sit...
Last modified 1 year ago
220 Views
1 min read
Last modified 7 years ago
1090 Views
4 min read
Workflows are very powerful automation tools to complete and streamline common tasks or processes. In this article, I show you how you can create your own workflows by introducing triggers and schedulers workflow components that are included in some of our plugins.
Last modified 1 year ago
569 Views
Less than a minute read
If a ticket is still open or need customers to submit their comments, you must enable comments in WP Ticket by checking Allow Comments per ticket under Discussion box. If the Discussion box is not visible, check Screen options tab (on the top right of your edit screen) if it...
Last modified 1 year ago
182 Views
Less than a minute read
This is an important step when you are creating new support agents in WP Ticket. Every agent must be linked to a WordPress user with an agent role. If there is no user created with Agent role, the dropdown will be empty.
Last modified 1 year ago
332 Views
1 min read
If you’re getting the error below when you or users submit a form, It means that there is another plugin (social share, third party data submitters etc.) or your theme on your site, messing up the integrity of your session.
There was a problem with your ...
Last modified 1 year ago
200 Views
Less than a minute read
You can connect tickets to orders by making orders field in the ticket submit form required. You must have WooCommerce and Easy Digital Down addon installed in your site to use orders field. After a customer logins, all her orders will be populated in th...
Last modified 1 year ago
223 Views
1 min read
Although both WP Ticket and Software Issue Manager WordPress plugins are used to manage issues, there are major differences in terms of how these plugins are used in real life use cases.
WP Ticket is a customer support management system designed for multi-role s...
Last modified 1 year ago
261 Views
Less than a minute read
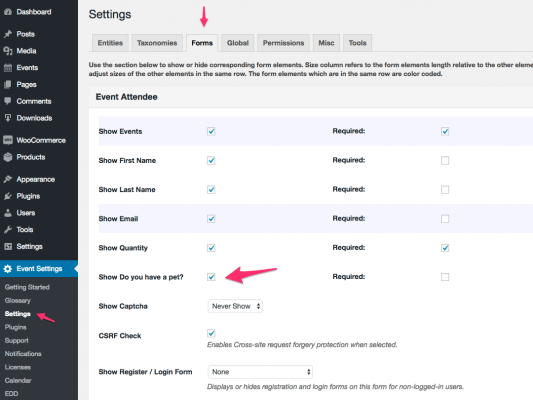
In WP Ticket, there is an option in Settings menu page > Forms tab where you can ask users to login or register before submitting customer support tickets. You can choose to show registration and login form or only login form if the registration is not allowed. When regi...
Last modified 1 year ago
157 Views
Less than a minute read
The customer support ticket submit form is displayed to all users and visitors of your site. If a visitor submits the form, the ticket's author is recorded as visitor. Visitors get an email notification after they submitted a ticket. They can search with their ticket id or e...
Last modified 1 year ago
213 Views
Less than a minute read
Faculty, staff and students can see, edit and update only their own profiles when they logged in WordPress dashboard. To allow faculty, staff and students update their own profiles, admins should follow the steps below:
Create a WordPress user for each faculty, ...
Last modified 1 year ago
206 Views
Less than a minute read
User roles define what a WordPress user can and cannot do when logged in. Campus Directory Pro comes with Campus staff built-in user role. Campus staff role can be assigned to faculty, staff or students by administrators. Users having campus staff role can:
Edi...
Last modified 1 year ago
188 Views
2 min read
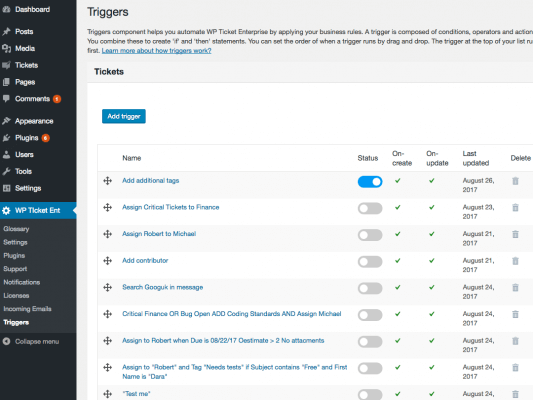
Triggers is a workflow component and can be accessed through plugin settings of the supporting plugins. It is used to automate execution of your business rules every time a record is created or updated. Major email clients include <a href="https://support.google.com/mail/...
Last modified 1 year ago
239 Views
Less than a minute read
QR codes are advanced form of barcodes and store more information. You can customize the single attendee template and by write your own code to generate barcodes.
Last modified 1 year ago
198 Views
Less than a minute read
You do not need to access to check-in page. As soon as the QR code for an event is read by a reader app. The system automatically displays the check-in page for that event and starts processing.
Last modified 1 year ago
370 Views
Less than a minute read
You can customize the event ticket template by modifying the single template for an attendee. Please follow the steps in the customization section of the W...
Last modified 1 year ago
201 Views
Less than a minute read
QR codes are created automatically for each attendee as soon as an attendee is registered for an event. You can see QR code created for an attendee clicking on the View quick link of the attendee in WordPress Dashboard.
Last modified 1 year ago
197 Views
Less than a minute read
Last modified 1 year ago
197 Views
Less than a minute read
To see all employees in circle panel grid view, go to Pages and the click on the view quick link of the Employee Circle Panel Grid page. Remember this page was automatically created by Setup assistant.


