Employee Directory Pro allows to draw organization charts of two and more separate companies that have mutually exclusive reporting hierarchies.
Organization charts are created based on parent-child relationships. In other words, every child must have a parent. If there is no connecting parent, as in the case of mutually exclusive reporting hierarchies, we must create a link node.
For example, let's assume we want to show organization charts of Company B and Company C on a WordPress page. Company B and C have their own CEO and boards but legally are formed under Company A. Although there is a legal connection through Company A, Company B and C have their own distinct reporting hierarchies. Since there is no mutual parent connecting Company B and C, we cannot create an organization chart displaying reporting hierarchies of both companies without creating a link node.
How to create a link node
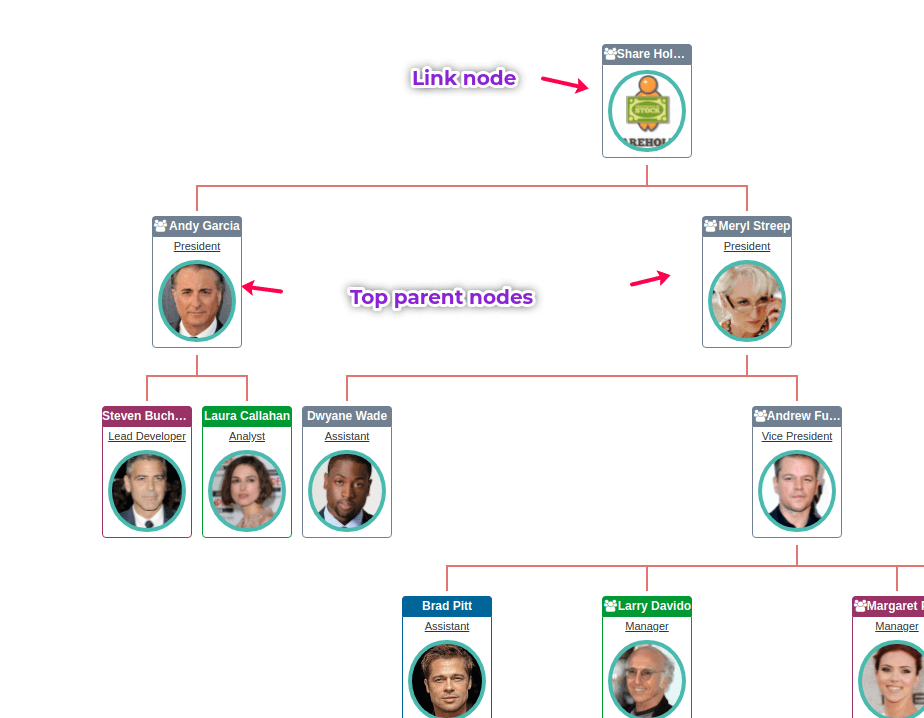
A node of an organization chart represents an employee record identified by an employee number. A link node, on the other hand, is a virtual node connecting two or more parent nodes. It is not connected to an employee record. In general, link nodes represent a group of people such as customers, share holders, legal entities etc.
Follow the steps below to connect top parent nodes through a link node of an organization chart.
- Login to the WordPress Dashboard as an employee manager or admin.
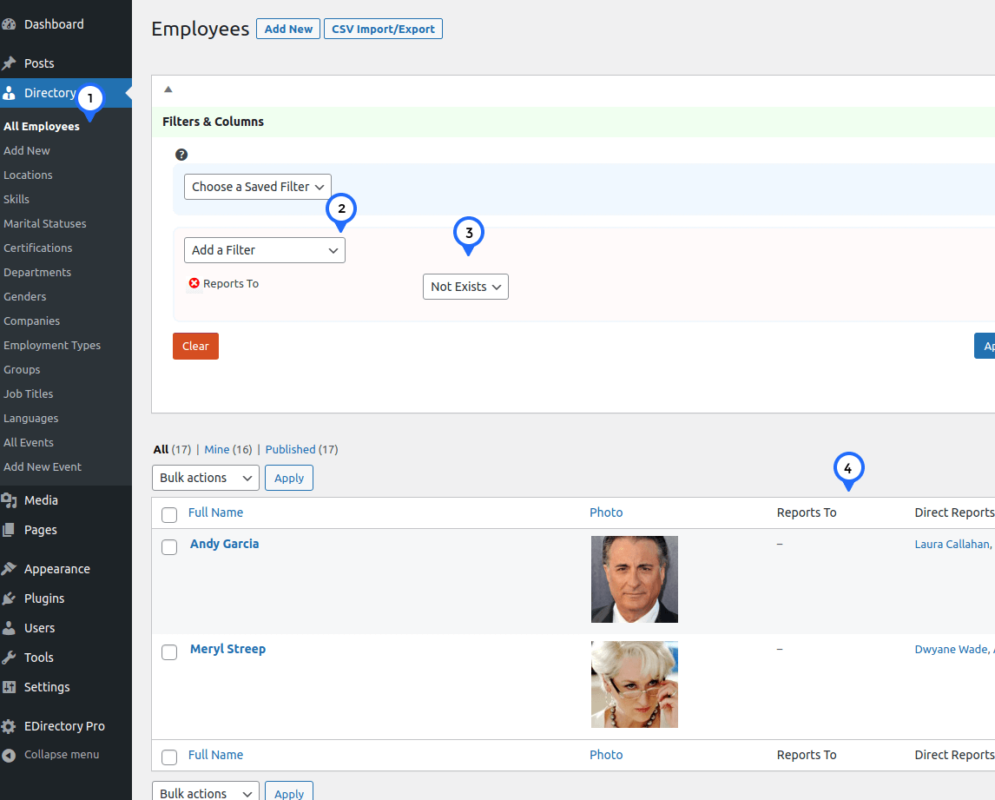
- Click Directory > All Employees menu link.
- Identify the highest parent node of Company B and C:
- Expand "Filters & Columns" section if not expanded.
- Select "Reports to" attribute from the "Add a Filter" dropdown.
- Select "Not Exists" operator from the operators dropdown.
- Click "Apply" button to filter the list of employees.
- Make sure "Reports to" column in the the employee list is empty for the highest parent nodes. If you do not see this column there, click on "Add a Column" dropdown and select this attribute from the list and click "Apply" button. (See the corresponding image)
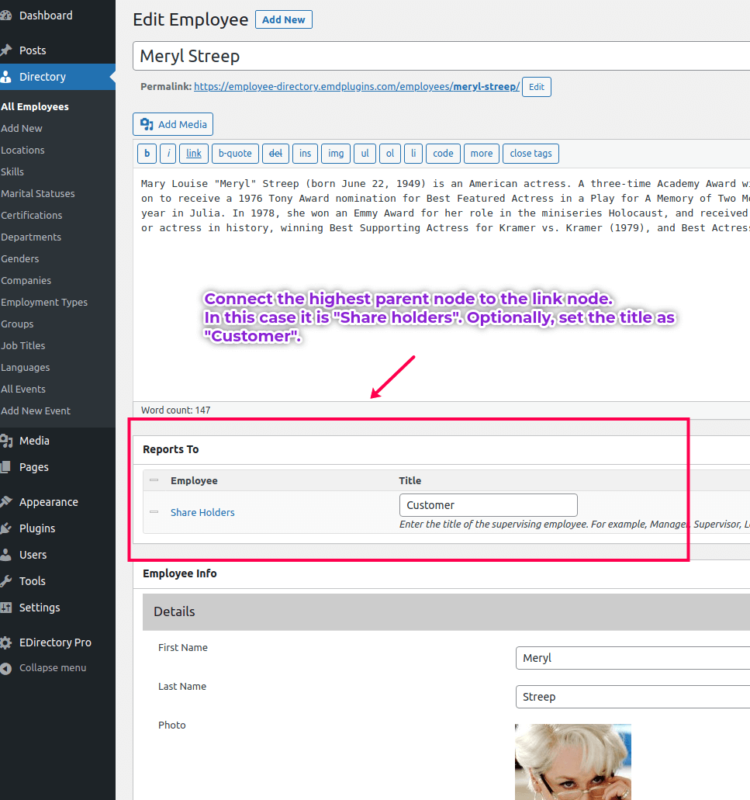
- Create a "Share Holders" Employee record. Select the name of this "link" node based on your organizational requirements. In some cases, you can use "Customers" instead.
- Edit each highest parent employee node, set their "Reports to" attribute to the link node above - "Share Holders" . If you don't see the "Reports to" meta box. Click on the "Screen Options" tab on the top right of the edit screen and check "Report to" box under "Screen Elements" group. (See the corresponding image)
- Save.
- Repeat the step above for each top parent employee node.
- Go to the page you display your company's organization chart and refresh the page. At the end, you should end up with an organization chart link two separate companies. See the corresponding image or the demo site page:


