Workflow is a set of instructions that runs in an orderly manner to apply business rules to one to many records. Some of our plugins include workflow capability using two separate, powerful tools to automate and streamline many repetitive tasks:
- Triggers
- Schedulers
Triggers
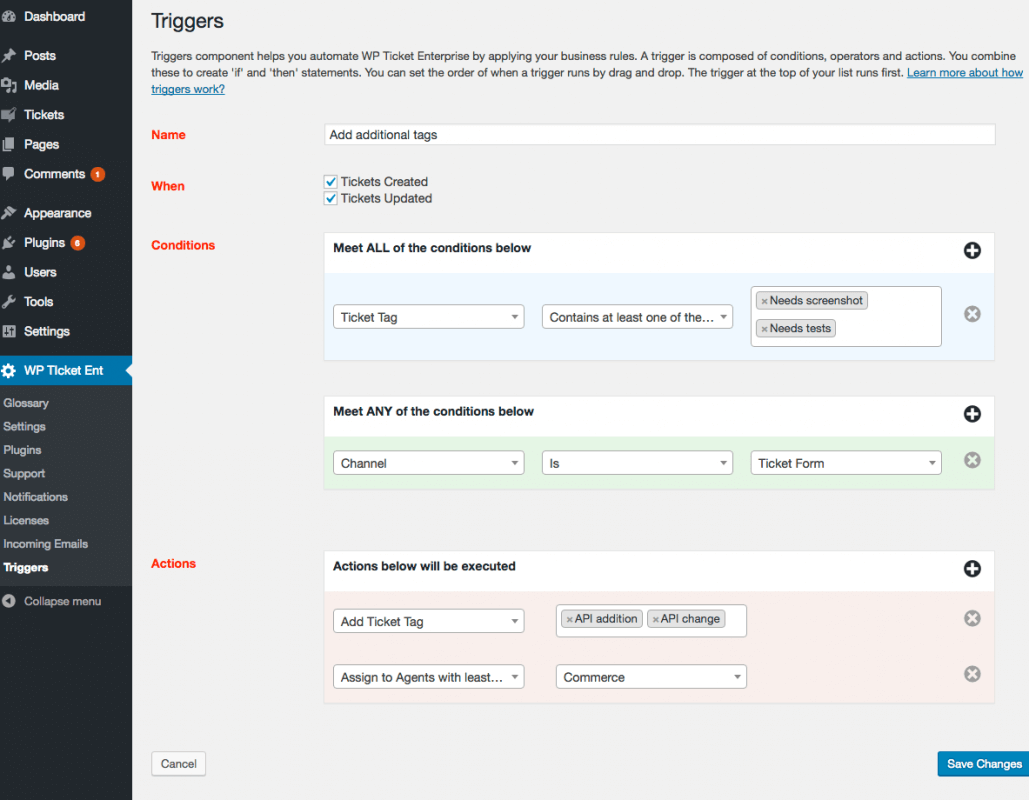
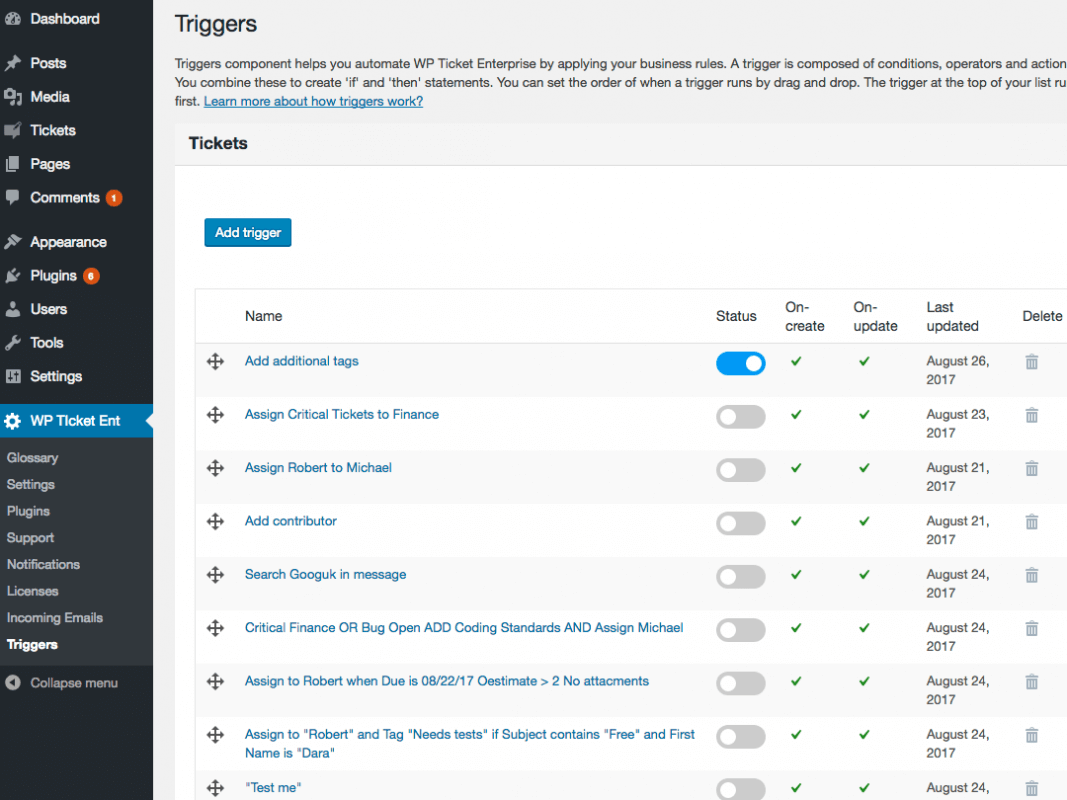
Triggers allow you to define business rules to be applied after a specified record is created or updated. You can create multiple triggers. You can also edit a trigger if you want to modify it or simply delete it if you do not need it anymore. Triggers must be activated to run in the order specified. You can change the run order of triggers by drag and drop.
For example, you can create a trigger which looks for "refund" in the subject and/or message of a support ticket after it is created and assigns it to the billing department. Another example can be to assign support tickets to a support agent working at sales department with the least number of open tickets if a message includes "Presales".
Schedulers
Schedulers, unlike triggers, run every hour and are time-based. All schedulers run at the same time. Schedulers, like triggers, must be activated to run, can be edited, deleted, and ordered by drag and drop. You can use schedulers to apply business rules to many records at once. Schedulers check for the conditions specified in the activated instances. If the conditions are met, it starts executing the actions in bulk on many records. You can run schedulers on demand to modify records in bulk as well.
For example, you want to send customizable email reminder to the attendees of an event x days before the event starts. Another example would be sending feedback request emails one day after the event ended.
Schedulers run on every record and perform the specified actions as long as the conditions are met. So it is essential to include a stop condition in the scheduler design to ensure the actions are executed only once. The common method is to add a tag to the record and include that tag in the scheduler's definition. So the next time, the scheduler runs it checks the existence of the tag and skips to the next one meeting the conditions.
Conditions and actions
Conditions and actions are the building blocks of triggers and schedulers. There are two types of conditions; ANY conditions and ALL conditions. In ANY conditions, as you may have guessed, any of the defined conditions can be true. In ALL conditions, ALL conditions must be true. You can create multiple ANY or AND conditions. If the conditions are not met, the trigger or scheduler does not run.
Actions are a set of directions to be applied to a specified record when the conditions are met. For example, if a support ticket is submitted by a VIP client OR tagged as "VIP" by an agent (ANY CONDITION), Assign the ticket to "VIP" department and tagged as "Urgent" (ACTION). Another example, if the ticket is created using "email" channel AND tagged as "Outage" (AND CONDITION), send an email notification to all customers and close the ticket.(ACTION)
Packing order is important
Each trigger or scheduler is evaluated based on the packing order. The trigger or scheduler at the top is evaluated first. Each trigger or scheduler works after the previous one is run. You can change the packing order by drag and drop. If the packing order is not set correctly, the included actions may not produce the results you expect or overwrite previously run triggers or schedulers.
For example, you have a trigger which assigns all tickets containing "Billing" in the subject to Billing department (#1) then have another a trigger which assigns all tickets coming from "Email" channel to "Email Handler" department. (#2). What will happen if you order #2 after #1? Yes, even if a ticket contains "Billing" in the subject, it will not be assigned to Billing if that ticket was received through email. The trigger #2 will reset the department to the "Email Handler". If you change the order and run #1 after #2 then a ticket containing "Billing" will be assigned to "Billing" even if the source channel is email.
How you define workflows
One of the most important part of designing a workflow is deciding what you want to achieve after the workflow is run a.k.a the workflow goal. After deciding the goal of your workflow, break it down to the individual steps that should be executed. Then go over each step and decide if a step is going to run responding to an user or time based event.
A user based event happens after a record is created or updated by a user. A time based event happens on or after a specific point in time is reached or past. For user based events, create a trigger. For time based events, create a scheduler. After defining your triggers and schedulers, put them in an order in their own group. Make sure you use the funnel method. The trigger or scheduler with largest scope must be at the top of each corresponding group to avoid conflicts or unwanted results.
Look before you leap
Creating a workflow can be very easy or complex depending on the requirements of your organization. If you're new to workflows, start with the basic ones. Make sure you test your workflow in a demo box or a demo data before moving your workflow into production. This will be your insurance policy against things might go wrong. Remember, once a trigger or scheduler is activated, it starts to run. The changes done by the activated triggers or schedulers are permanent. So make sure you have a backup of your WordPress database and incrementally take snapshots in specified intervals.


