Microsoft Entra ID (Azure Active Directory) is a service to provide identity and access capabilities for applications running in Microsoft Azure cloud and for self-hosted applications.
Microsoft Entra ID (Azure Active Directory) Addon is used to sync employee records with Employee records when these records are created, modified or deleted in Microsoft Entra ID (Azure Active Directory). To be able to sync with Microsoft Entra ID (Azure Active Directory), you need to:
- Create and register an Microsoft Entra ID (Azure Active Directory) application.
- Get application ID and authentication key.
- Assign role to application.
- Get your tenant ID.
- Test your connection.
To be able to programmatically connect to Entra ID (Azure AD), you need to have tenant (directory) ID, application ID and authentication key. Follow the steps below to complete all connection requirements.
Creating an Microsoft Entra ID (Azure Active Directory) application
- Log in to your Azure Account through the Azure portal.
- Click on "Entra" main menu link.
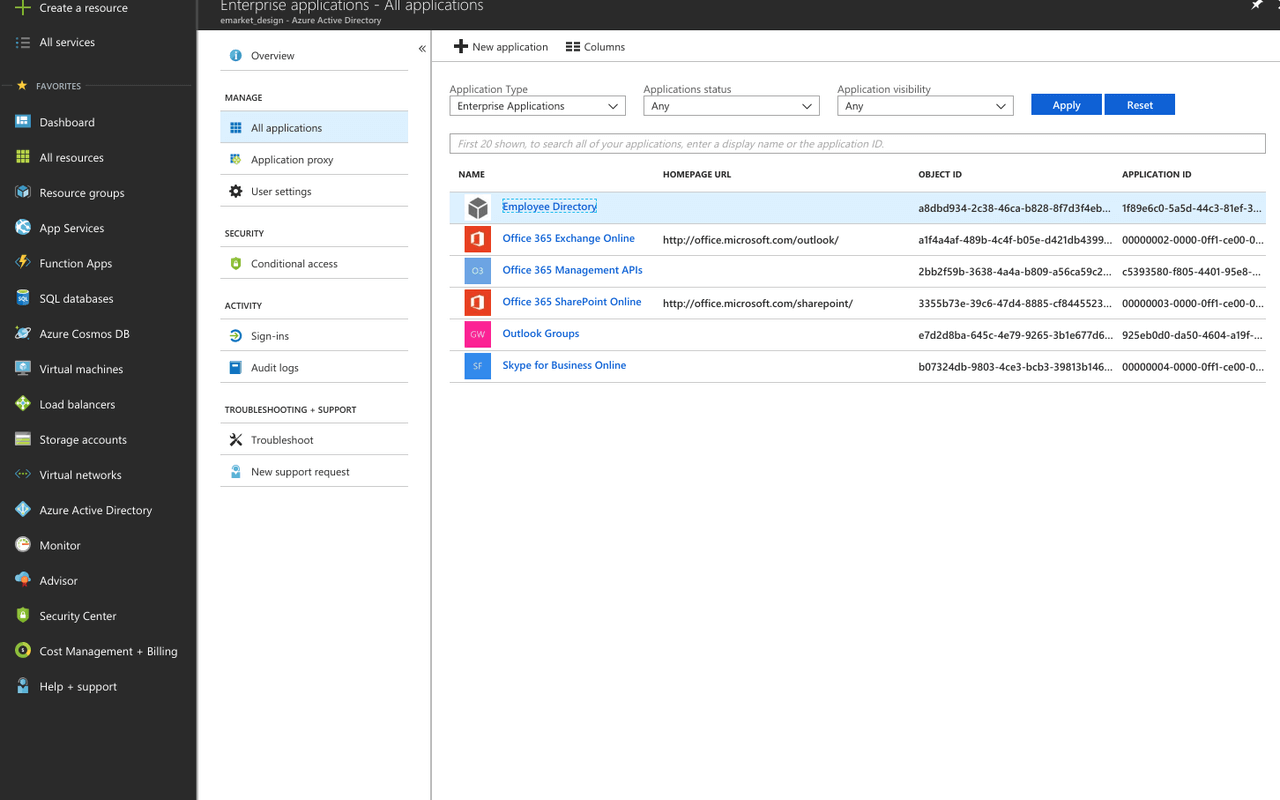
- Click "Enterprise Applications" link under "Manage".
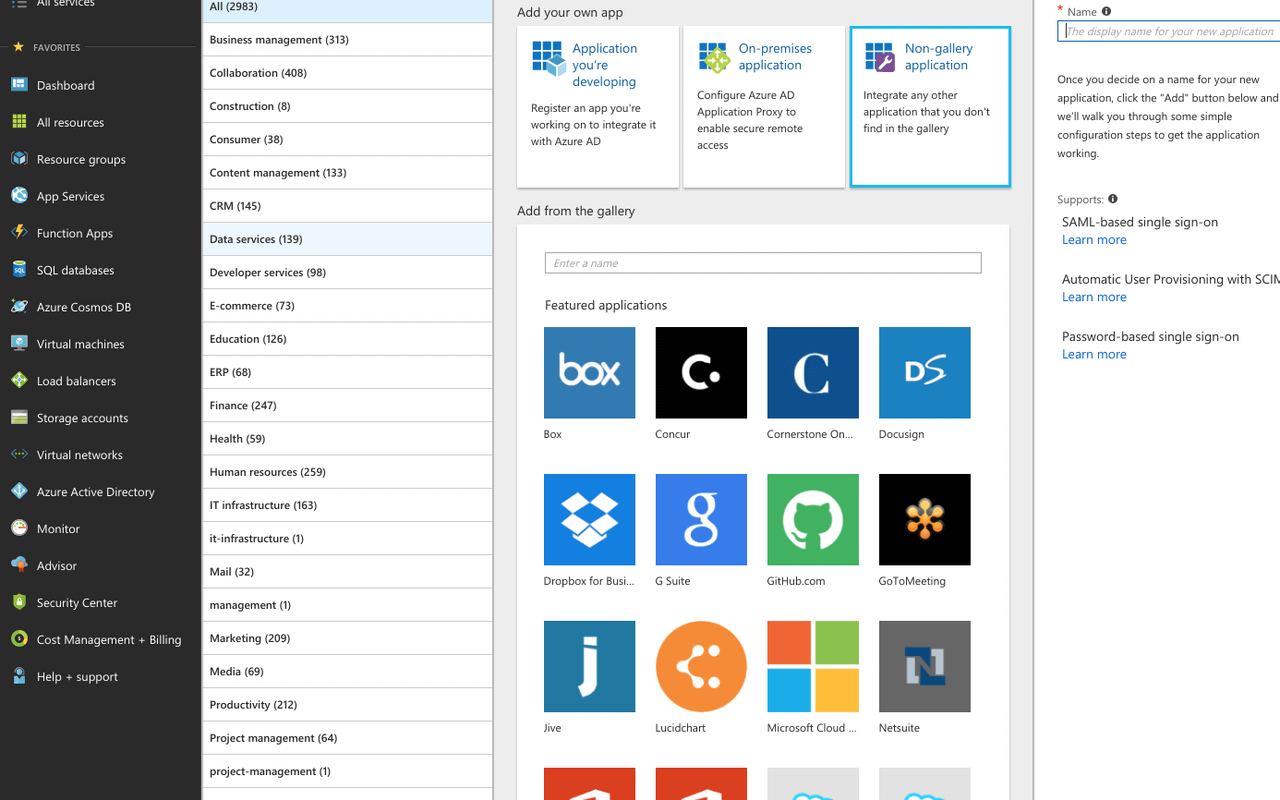
- Click on "+New application" button.
- Select "Non-gallery" application under "Add your own app".
- Enter your "Name" such as Employee Directory under "Add your own application" page.
- Click Add button and wait until your app is created successfully.
Getting application ID and authentication key
- Click on "Entra" main menu link.
- Click on "App Registrations" link under "Manage".
- Click on "View All Applications" button to see your new application and click on it.
- Click on "Settings" link.
- Click on "Keys" link under "API ACCESS".
- Fill in "Key Description" and set "Duration" fields.
- Click on Save button and wait until your authentication key is created.
- Copy the key value. You won't be able to retrieve it once you leave that page.
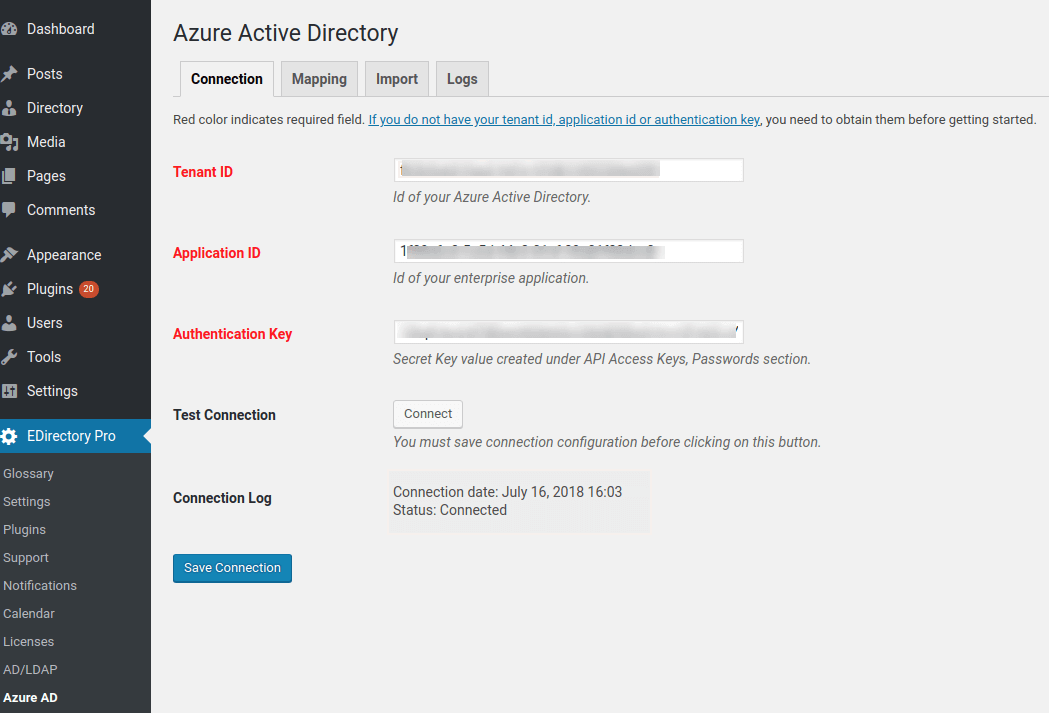
- Paste the authentication key in "Authentication Key" field under "Connection" tab of Microsoft Entra ID (Azure Active Directory) Addon settings.
- Back in the Entra ID "Settings" page. Copy "Application ID".
- Paste your application id in "Application ID" field under "Connection" tab of Microsoft Entra ID (Azure Active Directory) Addon settings.
Assigning role to application
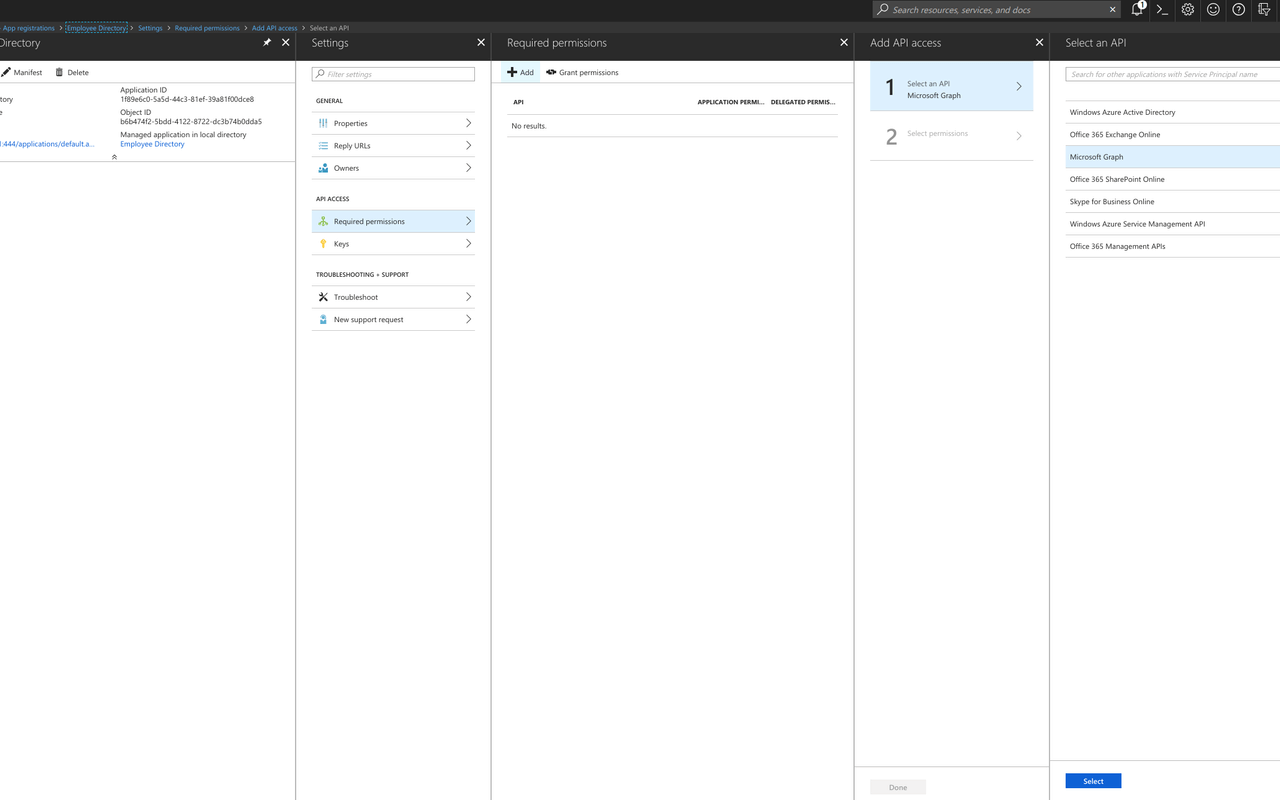
- Back in the Entra ID "Settings" page. Click on "Required Permissions" under "API ACCESS".
- Click on "Add" link.
- Click on "Add an API" and select "Microsoft Graph" under "Select an API" blade.
- Click on "Select" button at the bottom left.
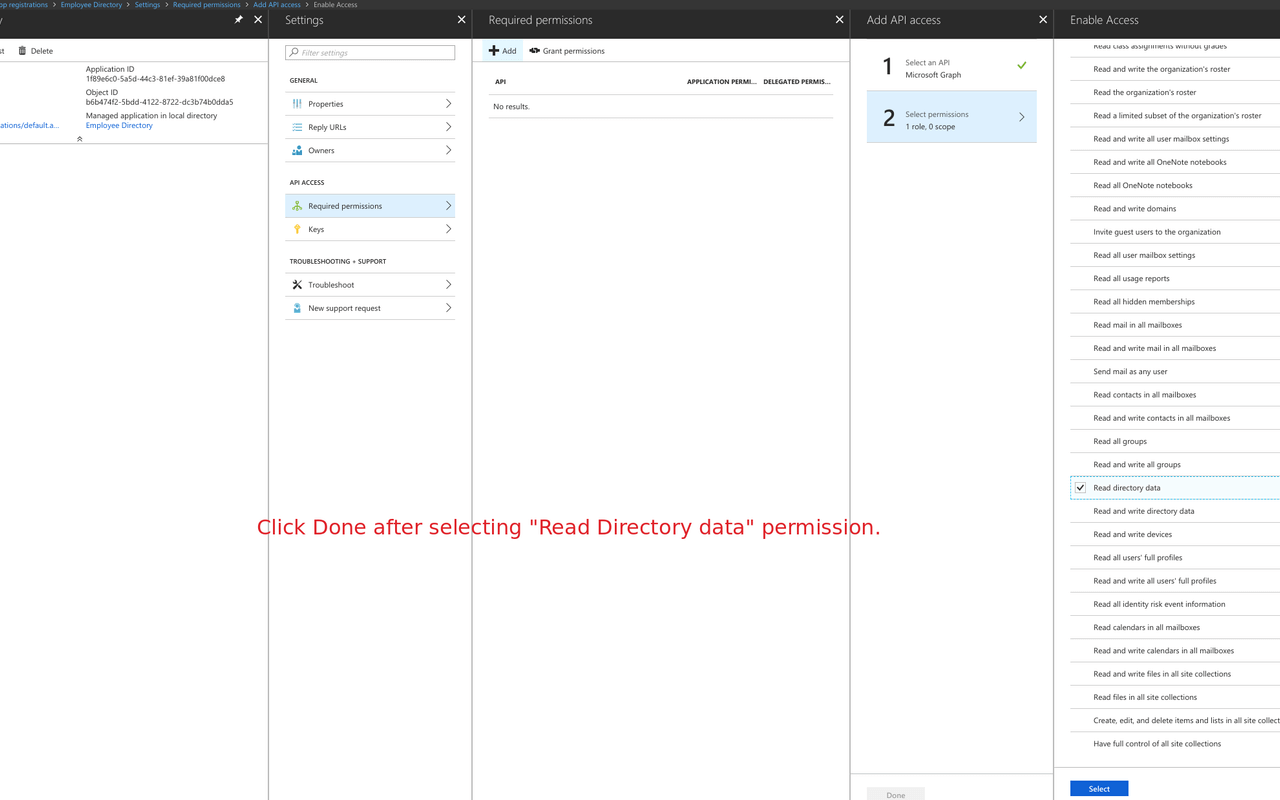
- Select "Read directory data" under "APPLICATION PERMISSIONS".
- Click on "Select" and then "Done" buttons. It will set the permission(s) to your application.
- Click on "Grant Permissions" link right next to "Add" button under "Required permissions" blade.
Getting your tenant ID
- Click on "Entra ID" main menu link.
- Click on "Properties" link.
- Copy the value under "Directory ID" field. That's your tenant ID.
- Paste it in "Tenant ID" field under "Connection" tab of Microsoft Entra ID (Azure Active Directory) Addon settings.
Testing your connection to Microsoft Entra ID (Azure Active Directory)
If you followed the steps above to get your tenant id, application id and authentication key, you should be ready connect to Microsoft Entra ID (Azure Active Directory).
- Go to "Connection" tab of Microsoft Entra ID (Azure Active Directory) Addon settings
- Make sure all required fields are filled in.
- Click on "Save Connection" button and wait until the connection is saved.
- Click on "Test Connection" button.
- If the connection is successful. You will see your connection date and status as "Connected" under "Connection Log" field.
- If the connection is not successful. You will see an error message detailing the reason under "Connection Log" field. Correct the error and try again.

 Loading...