
The Filter field lets you control which videos are shown and how they are sorted using simple filter expressions.
Each filter uses this format:
group::key::is::value;You can combine multiple filters using a semicolon (;).
Filter videos by category
tax::category::is::YOUR_TAXONOMY_VALUE;Example:
tax::category::is::music;Sort videos by date
misc::orderby::is::date;Set sort order
misc::order::is::DESC;DESC= newest firstASC= oldest first
Combine filters
Example: show music videos, newest first:
tax::category::is::music;
misc::orderby::is::date;
misc::order::is::DESC;
Notes
- Filters are case-sensitive
- End each filter with a semicolon (
;) - Do not add spaces inside filters
 Loading...
- Start by installing and activating the WooCommerce WordPress plugin.
- Next, install and activate either the WP Easy Events Pro or Enterprise edition.
- Additionally, install and activate the WP Easy Event WooCommerce plugin.
- Create your event and designate the registration type to "WooCommerce" under the "registration" tab.
- Generate a WooCommerce product to serve as your event ticket. While configuring the product, associate it with the event created in step 4 by linking it in the "Events" box.
- To test your ticketing system, navigate to the front page of your event (created in step #4) and click on the "Buy Now" button. A modal box will appear displaying the price and an "Add to Cart" option.
- Upon completion of payment, an Attendee Ticket will be generated and accessible under the "All Attendees" menu in the admin panel, complete with a QR code.
- Create a new WordPress page and insert the shortcode:
[wpee_process_checkin]. - To check in attendees, simply scan the QR code on the ticket page. This action will either redirect staff to a success page if the check-in is valid or display an error message if the ticket has already been used or is invalid.
EMD Visual Shortcode Builder is a component which allows you to create WordPress shortcodes using its intuitive interface. EMD Visual Shortcode Builder comes integrated with some of our select WordPress plugins.
You can check your plugin settings menu and see if there is a Shortcodes page there. If you have that page, it means the plugin you purchased has EMD Visual Shortcode Builder built-in.
It is very easy to exclude one or many entity records such as posts, pages, videos, employees, articles etc. from the shortcode results. In this article, we will demonstrate a way to exclude some entity records from a view using EMD Visual Shortcode Builder which comes built-in with our YouTube Showcase Pro WordPress plugin.
Let's assume, you have 100s videos on your site and want to exclude some videos from your coverflow view. In addition, you assigned the videos you want to exclude to "Categories" taxonomy using the term slugs of "test1","test2", and "test3".
Please keep in mind that the title and the slug of a taxonomy term could be different. A taxonomy term slug is the user friendly and URL valid name of a taxonomy term.
To get started, please login to your WordPress Dashboard as an administrator user and follow the steps below.
- Click on "Video Settings" menu and then "Shortcodes" page.
- Click on "Create New" button at the top to create a new shortcode.
- Select your view. In this case, we will select std_coverflow view.
- To limit the results returned, select a taxonomy. We will select "Catagories" taxonomy.
- Select "slug not in" operator".
- Enter comma separated term values. We will enter "test1","test2", and "test3" term slugs - not term titles.
- Click on the "plus" icon right next the value textbox.
- Click on "Insert Shorcode" button.
- Copy the shortcode generated clicking on the corresponding "Copy" button and paste it in a WordPress page.
- Publish your page and see the results.
After your page is published, you can assign the taxonomy terms you defined to additional videos or other entity records.

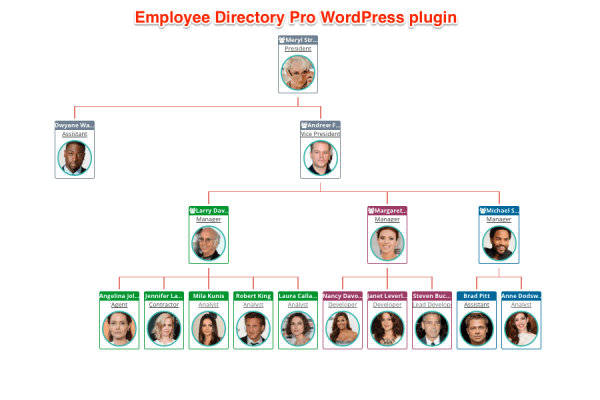
Employee Directory Pro allows to draw organization charts of two and more separate companies that have mutually exclusive reporting hierarchies.
Organization charts are created based on parent-child relationships. In other words, every child must have a parent. If there is no connecting parent, as in the case of mutually exclusive reporting hierarchies, we must create a link node.
For example, let's assume we want to show organization charts of Company B and Company C on a WordPress page. Company B and C have their own CEO and boards but legally are formed under Company A. Although there is a legal connection through Company A, Company B and C have their own distinct reporting hierarchies. Since there is no mutual parent connecting Company B and C, we cannot create an organization chart displaying reporting hierarchies of both companies without creating a link node.
How to create a link node
A node of an organization chart represents an employee record identified by an employee number. A link node, on the other hand, is a virtual node connecting two or more parent nodes. It is not connected to an employee record. In general, link nodes represent a group of people such as customers, share holders, legal entities etc.
Follow the steps below to connect top parent nodes through a link node of an organization chart.
- Login to the WordPress Dashboard as an employee manager or admin.
- Click Directory > All Employees menu link.
- Identify the highest parent node of Company B and C:
- Expand "Filters & Columns" section if not expanded.
- Select "Reports to" attribute from the "Add a Filter" dropdown.
- Select "Not Exists" operator from the operators dropdown.
- Click "Apply" button to filter the list of employees.
- Make sure "Reports to" column in the the employee list is empty for the highest parent nodes. If you do not see this column there, click on "Add a Column" dropdown and select this attribute from the list and click "Apply" button. (See the corresponding image)
- Create a "Share Holders" Employee record. Select the name of this "link" node based on your organizational requirements. In some cases, you can use "Customers" instead.
- Edit each highest parent employee node, set their "Reports to" attribute to the link node above - "Share Holders" . If you don't see the "Reports to" meta box. Click on the "Screen Options" tab on the top right of the edit screen and check "Report to" box under "Screen Elements" group. (See the corresponding image)
- Save.
- Repeat the step above for each top parent employee node.
- Go to the page you display your company's organization chart and refresh the page. At the end, you should end up with an organization chart link two separate companies. See the corresponding image or the demo site page:
QR codes are used by event staff to fast process event check-ins and check-outs. When scanned by a QR code reader, WP Easy Event WordPress plugin processes the check-in request automatically. Event tickets can be printed by the attendees or can simply be displayed on a smartphone screen on arrival at the event venue.
It is possible to include the QR code of an event ticket on your email notifications. Simply use the following format in your "Attendee Ticket" notification email content that is sent to an attendee.
[gist id="3d459f84615d7ae40948917546f77746"]Change YOURSITE-COM to your domain name where WP Easy Events is installed and activated.
EMD Form Builder is a fully-featured form builder solution for WordPress. EMD Form Builder comes integrated with our select WordPress plugins.
Using EMD Form Builder, you can modify the messages displayed to users when a form submission succeeds or fails by following the step below.
- Login to WordPress Dashboard.
- Find Plugin Settings menu of your plugin.
- Click on "Forms" page
- Hover over the form title and click on "Form Settings" quicklink.
- Go to Confirmations tab.
- Edit "Success Message" or "Error Message".
- Click on "Save Changes" button when finished.
- Go to the form page on the frontend, submit the form, and test your message.
WP Ticket Professional WordPlugin offers a fully-featured yet easy-to-use helpdesk and customer service system. In this tutorial, we will show how to set up and configure the main components of WP Ticket Pro.
For brevity sake, we assume you completed the following steps:
- Downloaded the plugin zip file to your computer.
- Uploaded the plugin zip file by clicking on the "Upload Plugin" button on Plugins > Add New > Add plugins page.
- Activated WP Ticket Pro plugin
- Saved and activated your license
Before going over each step in detail, let's define a typical WP Ticket workflow.
- Get customer support requests through the website, social media, phone, or email.
- Assign customer support requests to Agents manually or by auto-routing.
- Respond to customer support requests via the WP Ticket commenting system.
- Notify customers through email when a response is posted to a service request.
If you follow the instructions below, you will have a functioning helpdesk or customer service system where customer can submit their requests and agents respond to the requests in an efficient, consistent way. When completing each step, we recommend you to think about the workflow above to see what each step accomplishes.
- Create Manager and Agent users
- Create Service Departments
- Create and customize WP Ticket Pro taxonomies
- Create WP Ticket Pro pages
- Set up WP Ticket Pro Notifications
1- Create Manager and Agent users
To be able to create support managers, you must create WordPress users first and assign each user to either the "agent" or "manager" user role.
Please note that agents can only see and respond to support requests assigned to them. Managers can assign, see and respond to all customer support requests.
To be able to allow Support Agents and Managers to login to WordPress, you must create a user for each Agent and Manager.
- Go to Dashboard > Users and click the name of the user to view or create a new one.
- Fill in the user details.
- Click the Role dropdown, and select "Manager" or "Agent".
- Click on the "Add New User" button to save.
- Complete the steps above for every agent and manager.
After Agent and Manager WordPress users are created, you must create actual Agents and Managers and assign them to each WordPress user created. Creating an agent record allows you to set up an agent page on the front end of your website.
- Go to Dashboard > Tickets > Agents and click on Add New button.
- Fill in all required fields.
- Under the info tab, click on the "Staff user" dropdown and select the Agent or Manager user corresponding to your record.
- Click Publish button.
- Repeat this process for every agent and manager.
2- Create Service Departments
Customer Service Departments are a group of agents who are responsible for a subject area. Each service department may have an unlimited number of agents. A support ticket can be assigned to a department instead of a support agent.
To create a department, follow the steps below:
- Go to Dashboard > Tickets > Departments and click on Add New button.
- Fill in all required fields.
- Make sure a unique department code.
- Assign agents to the department by clicking on the "Create Connections" link under the Agents box.
- Optionally, set the featured image of the department.
- Click Publish button.
- Repeat this process for every customer service department.
3- Create and customize WP Ticket Pro taxonomies
WP Ticket Pro comes with Service Level Agreements (SLAs), Channels, Priorities, Statuses, Ticket Tags, and Topics taxonomies. These taxonomies allow you to group and tag individual support tickets.
Each taxonomy comes with default terms. A term is a value assigned to a taxonomy. For example, SLA taxonomy has 1h, 6h, 24h, etc. terms. You should go over each taxonomy under the Tickets menu and customize the values listed matching your business.
4- Create WP Ticket Pro pages
WP Ticket Pro comes with a step of default pages. These pages could be created using the Setup Assistant. If you accidentally closed the Setup Assistant notifications, you create these pages by clicking on the "Install Pages" button that is located under Dashboard > WP Ticket Pro > Settings page> Tools tab.
By default, the following pages created through Setup Assistant or "Install Pages" button:
- "Open a Ticket" - Used for submitting support tickets by customers.
- "Search Tickets - Advanced" - Used for searching support tickets - recommended for internal users only.
- "Search Tickets" - Used for searching support tickets by customers
- "Ticket List" - All support tickets in a tabular format
- "Registered User Submit Ticket" - Used by registered and logged-in users only to submit support tickets.
- "Registered User Search Ticket" - Used by registered and logged in users only to search support tickets.
- "Registered User Advanced Search Ticket" - Used by registered and logged in users only to searchsupport tickets - recommended for internal/trusted users only.
After the pages created, you need to display the page links to your customers by including them in your theme's menu. We recommend you to delete unused default pages.
5- Set up WP Ticket Pro Notifications
You can access the Notifications page by following the Dashboard > WP Ticket Pro > Settings page path. Click on the notification title to edit each notification setting.
WP Ticket Pro WordPress plugin comes with 4 Notification events:
- New Ticket Comment notification is sent to "The Comment Author Email", "Ticket Email", and "Assignee" when a new comment posted to a support request.
- New Ticket Assigned notification is sent to Assignee email.
- Ticket Changed notification email is sent to the customer who opened the support ticket when an agent responds.
- New Ticket notification email is sent to the submitting customer and optionally administrator or a catch-all email when a new support ticket is created in the system.
Please note, each notification email can be customized, temporarily deactivated.
If you or customer cannot get notification emails, you can check the following:
- Check if the notification active.
- Make sure all email addresses in the notification settings are valid emails.
- Check if you can send emails using WordPress. For example, every time you create a new WordPress user, you should get an email.
- Check if the appropriate "Sent to" checkbox set for notification.
The qualification of sales leads is crucial for successfully closing a sale. The sales lead qualification is defined as gathering relevant information about a person or an organization to access product/customer/market fit.
When a contact fills in your contact form, you collect information about that contact. After the contact record created, a salesperson contacts the prospect. During the conversation, the salesperson verifies the collected information, and qualifies the prospect by asking a series of questions.
One important aspect of sales leads qualification is the classification of sales lead information based on your selected groupings. Each grouping addresses a certain aspect of your sales leads qualification process and creates relationships among your leads.
WP Easy Contact Pro WordPress plugin allows creating relationships between contacts using contact taxonomies, direct relationships, and tasks. Using contact relationships, you can search through your contact and create target groups or segments. Optionally, you can use your contact relationships to score your leads.
Following contact relationship types are available when you install WP Easy Contact Pro out of the box. You can add your custom ones if you need to.
- Purchase Timeframes
Allows defining how soon a lead is able to make a purchase decision.
- Contact Tags
Allows setting arbitrary values to classify a lead.
- Ratings
Useful for quantifying a sales lead's interest, urgency, or authority to make a purchase decision.
- Sources
Useful for classification of your sales lead based on the channel they found you.
- Countries
Allows creating target groups or segments based on the country of origin.
- States
Allows creating target groups or segments based on the state of origin.
- Contact Types
Allows defining your own classification of a sales lead.
- Topics
Lets you gather information about the topic of interest, product, or service.
- Lead Statuses
Lets you understand what stage a sales lead is in your sales pipeline. For example, raw (filled in the form), assigned (assigned to a salesperson), processing (a salesperson attempting to contact or qualify, qualified (lead is ready to purchase), nurture (not ready to purchase), and unqualified (not a good fit).
- Tasks
Allows classifying leads based on the salesperson tasks.
- Related Contact (from)
allows answering the source of a sales lead. Useful when a contact shares another contact's information with a salesperson.
- Related Contact (to)
Allows answering the target of a sales lead. Useful when contact information is shared by another contact with a salesperson.
WP Easy Contact Pro WordPress plugin allows you to gather and assess your sales leads based on predefined or custom criteria to make sure your sales team doesn't miss out on valuable opportunities.
If you imported your videos directly from YouTube API, YouTube ShowCase Pro WordPress plugin allows you to update the stats of your videos on a scheduled or on-demand basis.
The following stats can be updated:
- Published At:
Displays the date that the video was published at when checked.
- Duration
Displays video duration stat when checked.
- Like Count
Displays video like count stat when checked.
- Favorite Count
Displays video_favorite_count when checked.
- Comment Count
Displays video comment count when checked.
- View Count
Displays video view count when checked.
How to setup YouTube API so that the stats get updated
You must have a YouTube API Key set and saved to be able to use this feature.
- Login to your WordPress Dashboard as an administrator.
- Click on Video Settings menu page.
- Click on YouTube API menu item.
- Check you have a valid YouTube API key.
- Scroll down to YouTube Video Stats section.
- Select "How often do you want to check stats?". Make sure your wp-cron or operating system job sceduler working.
- Click Save button to save your settings.
- Click on "Update stats now" button.
- Check the Status metric under Stats field. It will show you the number videos updated. If the number is greater than 0, it is working.
- Check "Next scheduled check" field to see the date next update.
A support ticket client area is a page that your customers see when they login. Using a support ticket client area, customers can check the status of their tickets or submit new ones. All client WordPress users must belong to the subscriber role. Clients can only see their own tickets once they login.
WP Ticket WordPress plugin allows you to create a client area in two ways.
- Using a WP Ticket shortcode on a WordPress page.
- Allowing to login to WordPress Dashboard having a subscriber user role.
Using a WP Ticket shortcode on a WordPress page
A shortcode is a piece of string that is recognized by WordPress as an indicator to enable functionality on your site. WP Ticket support and helpdesk system comes with an extensive set of shortcodes.
Using shortcodes, you can create a support ticket client area on the frontend of your site. If you don't allow your users to log in to WordPress Dashboard for any reason or would like to customize how the client area looks and feels, we recommend using this method.
- Login to WordPress dashboard as an administrator.
- Create a WordPress page
- Insert
[ticket_list]shortcode in the page - Redirect all clients having a subscriber user role to this page. For this purpose, you can use a redirection plugin or this plugin.
You can also visit this demo page to see an example of this shortcode.
Allowing to login to WordPress Dashboard as a subcriber
This method is enabled by default. As mentioned above, all customers accessing the client area must belong to "subscriber" user role. After logging in, Customers see their own support tickets and manage their support tickets.
To learn more about and watch a video of creating a client area using WP Ticket, visit this page.
YouTube Showcase WordPress Plugin Professional edition allows you to sort your YouTube videos imported to WordPress by YouTube video publish date. To be able to use this feature you must have at least 4.3 version of YouTube Showcase Pro installed.
Please follow steps below to use this feature:
- Login to WordPress dashboard as an administrator
- If you did not import your videos from YouTube. Go Video Settings and import them first.
- Go to Videos and make YouTube Published Date column .
- If you do not see any data in this column, you must go to Video Settings and update your video stats.
- If you have data in this column, create a WordPress page.
- Go to Video Settings > Shortcodes and create shortcode such as
[video_wall filter="misc::orderby::is::attr::emd_video_youtube_published;"]. - Copy and then paste the shortcode you created to the WordPress page and publish.
To see an example page we created this article, go to this YouTube Showcase Pro demo page
Using YouTube ShowCase video categories is a great way to organize your YouTube videos. You can use video categories based on the topics of your video content, solutions they provide, or any other label you want to use to group these videos together.
For example, you can use Video Categories to group your music videos based on genres such as Jazz, Techno, Electro, etc.
YouTube ShowCase video tags are another way to group your YouTube videos. Video tags are like terms or keywords. They help visitors find your video content. Each term may define a unique property of your video.
Using the music video example, you use the instruments as your video tags to label and group your YouTube videos.
The main difference between video categories and tags is that you can assign a YouTube video to at most one category. A YouTube video, on the other hand, can be assigned to multiple video tags. You can assign Video categories and tags to multiple YouTube videos.
How to assign your YouTube video to a video tag or category
- Login to WordPress dashboard as an administrator
- Click on Videos > Categories and add your Video Categories. Optionally, you can create and assign video categories later using your Video record editor
- Click on Videos > Tags and add your Video Tags. Optionally, you can create and assign terms later using your Video record editor
- Edit a video record by clicking on the video title link of a video
- While in the video editor, assign the video to a predefined category or click Add New Category link under Categories box to create a new one and assign.
- While in the video editor, assign the video to a tag by entering the term in the search box under Tags box and clicking on Add button.
- Click on Update or Publish to record your change
Having a well-maintained website is a powerful marketing tool. It not only helps you gain a competitive advantage but also improves your business reputation, authority, and brand recognition. On average, website owners generate more leads, make more sales, offer personalized customer service.
Despite all the benefits, developing a website is time-consuming, requires technical knowledge, and involves an extensive list of marketing tasks to attract the attention of search engines.
YouTube, on the other hand, is the second largest search engine and gets over 1 billion unique visitors each month. Having a YouTube channel and engaging content significantly improves your brand's visibility and name recognition. The marketing activities are not that intensive, as compared to having a custom website, but still requires a lot of work.
In this tutorial, we will use a hybrid approach and build a website dedicated to displaying a YouTube channel in WordPress.
Having a YouTube channel in WordPress, we aim to benefit from the best of both approaches while trying to avoid the disadvantages of each approach. Below are some of our objectives:
- Minimize the complexities of developing a website from scratch by using WordPress and YouTube ShowCase Pro plugin. You can see an example of such a website by visiting our live demo site.
- Store (embed) and maintain video content on YouTube, maximizing our visibility there and on Google.
- Tie YouTube video content strongly to our domain and brand by enhancing and enriching the video content on our site with additional text and multi-media content.
- Link YouTube channel and WordPress site by sending traffic to each site through external links.
To be able to follow this tutorial, you must have:
- A functioning WordPress site
- YouTube ShowCase Pro WordPress plugin installed and configured. Please also review YouTube ShowCase documentation to get started.
- Basic knowledge of How to use WordPress - we also recommend you watch a couple of videos to refresh your knowledge.
To create a WordPress site displaying your YouTube Channel, you should complete the tasks below. Please refer to the linked pages or the images attached to see the step by step instructions:
- Obtain your YouTube API key from YouTube following the included instructions on the setting page.
- Import your videos from your playlist via YouTube API and set an import schedule.
- Create video tags and categories for YouTube Videos
- Tag and categorize each video
- Use Visual Shortcode Builder to a create YouTube ShowCase shortcode. Shortcodes are used to display videos using available video views such as sliders, grid gallery, etc. Using the shortcodes, you can also filter on the videos you want to display by various options including video categories, tags, or video attributes.
- Create a WordPress page for each topic and write explanatory content for each topic page
- On each video page, include your more detailed content and excerpt as text. Excerp text is displayed on YouTube ShowCase category and tag pages when visitos click on them.
- Create a navigation menu for your topics and pages.
- Add a YouTube video search widget and other video widgets to your theme's sidebars..
WP Easy Events Pro WordPress plugin allows you to display event attendee initials on event pages as demonstrated on our live demo site:
Verify your event configuration
If you don't see attendee initials on an event page. It may be a configuration issue. We recommend you to check the following configuration options:
- Log in to WordPress as administrator.
- Make sure “Hide Attendee List” checkbox is unchecked in the event page you were referring to.
- Go to Event Settings > Settings >”Global” tab and verify “Use Avatars” checkbox is unchecked - if it is checked, WP Easy Events Pro does not display attendees not having any avatars set.
If you verified all the configuration is correct and you still cannot see the attendee initials on the front end. It may be because your attendee's "full name" field is empty.
To fix this issue for your future event registrations
- Log in to WordPress as administrator.
- Go to Event Settings > Forms
- Hover your mouse pointer over "Event Attendee" form
- Click on "Edit Layouts" quick link
- Drag and drop a form row into an empty space
- Drag and drop "Full name" field" into the empty row
- Click "Save" button
To fix this issue for your past event registrations
- Log in to WordPress as administrator.
- Go to "All Attendees"
- Look for empty "Full name" field
- Click on "Edit" quick link for each attendee having an empty "Full name" field
- Click "Save" button
Alternatively, you can modify all your past attendees in bulk by following the steps below:
- Click on "CSV Import/Export" button on the attendee list
- Click on Export tab
- Click on "Export All Attendees" button to export all your event attendees to a CSV file
- Import the CSV to Google Sheets or MS Excell
- Fill out all empty "Full name" fields
- Export the modified file to a CSV file
- While in the CSV Import/Export screen, click on "Import" tab and upload the CSV file
- Check "Update existing data based on unique field(s)." checkbox
- Click on "Import Now" button
YouTube ShowCase Pro WordPress plugin allows you to download your videos and their stats from YouTube. To be able to access your YouTube account, YouTube requires you to have a valid API key. Using this key, you can easily access your account and sync your videos and their stats to your WordPress site.
Create your YouTube Data API key
- Log in to Google Developers. You must create an account if you don't have one.
- Click on the Create Project button on the toolbar.
- Fill in the project name, other information needed, and click "Create" button.
- Go to YouTube Data API page.
- Select the project you created at #3 from the toolbar, right next to the logo.
- Click the Enable button.
- On the left sidebar, click on the Credentials link on the toolbar and select "API key" from the menu options.
- On the Credentials window, click on the pencil icon to edit. Optionally, give your key a name.
- If you'd like to restrict your key, select the "Restrict key" option from "API Restrictions". Select the YouTube API and Save.
- On the Credentials window, click on the copy icon next to the key to copy your key.
- Go back to WordPress Dashboard > Video Settings > YouTube API page and paste the key in the "Youtube Data API v3 Key" field.
- Save
Let's verify that your key works
- Enter your YouTube User name in the "Youtube Username" field or Enter one or more playlist ids in the "Youtube Playlist Ids" field.
- Save.
- Check out the "Stats" section to see if the values changed and check out your videos in the Videos.
All zip files are unzipped when you download them using a Mac and Safari browser. This is the default option. Unfortunately, this option creates a challenge for the installation of WordPress plugins because WordPress requires a zip file.
There are two options to avoid this issue:
- You can enable or disable this feature temporarily or permanently.
- You can use another browser such as Firefox or Chrome.
If you prefer option #1, please follow the steps below:
- Go to Safari > Preferences while in the Safari menu.
- Scroll down the bottom of the General tab and uncheck the checkbox Open "safe" files for downloading.
- Go to your My Account page and download the plugin zip file again.
- Verify that the plugin file is downloaded as a zip file.
- Upload the plugin zip file to your WordPress site.
For more information about how to install and activate our plugin, check out this page
Google reCAPTCHA protects your site against spam and other types of automated abuse. EMD Form Builder supports reCAPTCHA v3 and HoneyPot.
You can enable or disable reCAPTCHA v3 per form basis. You also have the option of displaying reCAPTCHA v3 to your visitors only or hiding completely and letting it work behind the scenes. Please note that hiding reCAPTCHA v3 badge is allowed as long as you include a text attribution.
Below are the steps you must follow to enable reCAPTCHA v3 on your EMD Form Builder forms.
- Apply for reCAPTCHA v3 keys: you will get your pair consists of a site key and a secret key.
- Login to your WordPress dashboard.
- Go to the plugin settings > Forms.
- Hover your mouse on the form link and click on the "Edit Settings" quick link.
- Click on "Anti Spam" tab.
- Pick your "Show CAPTCHA" option.
- Enter your site and secret key that you got at #1.
- Click the Save button.
- Check your form page to see if reCAPTCHA v3 enabled.
If you see the badge interrupting with another icon on your site, you can adjust its location by using the following code:
.grecaptcha-badge { bottom:65px !important; } This article provides step by step instruction on how to recover YouTube ShowCase Professional WordPress plugin video comments not getting displayed on the frontend but shows up on the backend video editor page.
To be able to follow the instructions, you must have access to your WordPress database using phpMyAdmin or a similar tool.
It is always a good practice to backup your database before you run any code on your database. You can always go back if you make a mistake.</p
- Login to your WordPress admin backend using your administrator account.
- Login to phpMyAdmin and select your WordPress database.
- While in phpMyAdmin, select wp_comments table.
- Click on "Inline" link and replace the query with the following SQL code:
SELECT a.* FROM `wp_comments` a JOIN wp_posts b WHERE a.comment_post_id=b.id AND b.post_type="emd_video"If your WordPress database table prefix is different than "wp_", replace all instances of "wp_" on the code above with the correct prefix before running the query.
- Click on "Go" button and see the results in the list section. This query will return all the YouTube ShowCase video record related comments.
- Checking the results, look for some missing and/or inconsistent data. Take the comments which show up on the frontend as a base. For example, if "comment_type" column is empty for the one not getting displayed, double click on the empty cell and type in "video_comments".
- Check if those missing comments show up on the frontend as well.
- Repeat this process for the missing comments.
Please check out the attached image for visual instructions.
In case, the query at Step #4 does not display your missing comments, you have a more complex issue. Please contact our support for assistance.
To update your credit card information for your subscriptions, please follow the steps below:
- Login your account
- Click on "Subscriptions" tab
- Click on "Update Payment method" link under "Actions" column corresponding your subscription
- Fill in the form with the new information
- Click on "Update Payment Method" button to save
EMD Integrator WordPress plugin is a powerful yet easy to use tool to bulk import and export data. EMD Integrator uses individual jobs to process data. A EMD Integrator job is a single processing unit either to exports or imports data
EMD Integrator can be used as an alternative or supplement to REST API in cases where a large number of data must be transferred in a short period time without overwhelming network resources.
Unlike REST API where records must be transferred via mutually exclusive requests, a EMD Integrator job processes records in batches. Batch processing increases speed and data throughput when you need to move a large number of records from one app to another.
Additionally, EMD Integrator jobs can get the data files to be processed through an internal file system or via the internet. This offers flexibility since ,using REST API, requests are always manipulated from the URI.
Using EMD Integrator WordPress plugin, you can create unlimited number of import and export jobs. A EMD Integrator job can be configured individually and run in the order you set by dragging and dropping. A job at the top of the list runs first.
If you have complex data requirements where certain segment of your data needs be transformed or cleansed, EMD Intregrator allows you create a staging area in WordPress.
For example, you receive a large number of form submissions from multiple external systems. You want to validate email addresses or simply tag and categorize each record based on your requirements before moving them to the production.
In this scenario, you can use EMD Integrator to create a staging area which integrates all external system data in a single location. This can simplify your work and help you avoid using extensive resources; writing, testing and maintaining custom code.
EMD Integrator WordPress plugin is integrated with our select enterprise edition plugins.
EMD Custom Field Builder is a very easy to use yet powerful tool to customize our WordPress plugins by creating custom fields.
Custom fields are fields which do not exist by default in the current data model of your plugin. Custom fields help you store and search values specific to your organization's needs. You can create a custom field as an attribute or taxonomy of any predefined entity.
Attribute custom fields are used to document values specific to a entity record. For example, "eye color" and "height" are properties which define a person entity.
On the other hand, taxonomy custom fields are used to create connections between other record types (entities) and/or categorize records of the same type. For example, if a person works at multiple projects, a "project role" taxonomy may be used to document a person's role in a specific project.
As another example, if you are in a restaurant business, you can create a "favorite menu item" attribute to document a customer's frequently ordered dish. You can also document a customer's favorite table location at your restaurant by creating a "favorite seat" taxonomy which stores multiple table locations.
All created custom fields appear on the "Details" tab of the single view and "Custom Fields" box in the admin dashboard editor of the associated entity record.
Using EMD Custom Field builder, you can create:
- Unlimited number of fields for an entity.
- Unlimited number of taxonomies for one to many entities.
Any custom field you added before using EMD Custom Field Builder will be automatically created in the custom fields page under your plugin settings.
Please also keep in mind that, once you create a custom field, you can use the same field in your forms, import data specific to that field from external systems (EMD CSV importer/exporter or another connector addon must be installed/purchased) and create shortcodes using that field (you plugin must support EMD Visual Shortcode Builder).
How to create create a custom attribute or taxonomy
- Click on Custom Fields page under your WordPress plugin settings after logging in as an administrator.
- Click on "Create New" button to get started.
- Fill in the required fields first:
- Singular Label: Insert a singular noun which names one person, place, thing, or idea.
- Type: Select Attribute or Taxonomy. An attribute is a characteristic or property of person, place, thing, or idea. For example, name, description or, color. A taxonomy is a noun used to classify or group persons, places, things, or ideas. You normally use a taxonomy to relate records of an entity to itself or other entities. For example, contract types, departments, or venue types.
- Entity: Pick an entity from the dropdown. You can select multiple entities for taxonomy types.
- Plural label: Insert the plural of the singular label you used for your custom taxonomy. This is only required for taxonomies.
- Hidden Function Type: Select the type of function to be used. This is only required for hidden function display type.
- Fill in other optional settings based on your requirement. Each field type has its specific configuration settings. Most display types allow to set a default value for your custom field or taxonomy or make it required.
You can also set the validation required for data entry such as minimum/maximum characters/words allowed. See Field display types section below for more information about available custom field validation types. - Optionally, set "Visibility and Role Accessibility" settings. Visibility defines if the custom field or taxonomy will be enabled, disabled or shown in the admin area only.
Role Accessibility defines if the field or taxonomy will be accessible by a certain WordPress user role.
Attribute Types
EMD Custom Field Builder provides extensive list of attribute types. You can use these types when creating your custom fields.
The following attribute types are included:
-
-
- Plain Text
- AlphaNumeric
- Letters Only
- Letters with Punctuation
- No WhiteSpace
- Password
- Decimal
- Digits Only
- Integer
- Credit Card
- IP Address V4
- IP Address V6
- Mobile UK
- Phone UK
- Phone US
- Postal Code UK
- Postal Code CA
- URL
- VIN Number US
- Zipcode US
- Date
- DateTime
- Time
- Textarea
- Wysiwyg Editor
- File Uploader
- Hidden Constant
- Hidden Function
- Username
- User Email
- User IP Address
- User Firstname
- User Lastname
- User Display Name
- User ID
- Current Date (MM-DD-YYYY)
- Current Date (DD-MM-YYYY)
- Current Year (YYYY)
- Current Month Name (January)
- Current Month (01)
- Current Day (01)
- Now (YYYY-MM-DD HH:mm:ss)
- Current Time (HH:mm:ss)
- Unique Identifier
- Sequence
- Checkbox
- Checkbox List
- Radios
- Select
- User List
- Color Picker
- Country List
- State List
-
Taxonomy Types
EMD Custom Field Builder allows unlimited number of custom taxonomies. You can use your custom taxonomy types to categorize and/or link records of the same or different types.
The following types are supported:
-
-
- hierarchical taxonomies (have descendants) like categories
- Non-hierarchical taxonomies (have no descendants) like tags.
- Single select - users can only select at most one value.
- Multiple select - users can select multiple values.
-
Import, export or reset custom fields
Migrating from one instance of your plugin (development or stage) to another instance (test or production) is very easy using EMD Custom Field Builder. You can also use this feature to get periodic backups of your custom field meta data.
Use "Export" button at the custom field list page to export all your custom fields to a text file. You can use this option for taking manual backups as well . The created file is in JSON format and named as in "plugin-name_currentdate" format like "empd_pro_cust_fields_09_01_2020.json".
Use "Import" button at the custom field list page to import all your custom fields to a text file. If the custom field name exists, EMD Custom Field Builder automatically updates the field with the new values. If the custom field name does not exists, EMD Custom Field Builder creates a new field.
EMD Custom Field Builder is available in our select WordPress plugins. Please check either the software features or pricing page of your WordPress plugin to see if EMD Custom Field Builder is included or supported.
EMD Integrator WordPress plugin allows exporting data to external systems on demand or schedule. External systems could be your in-house or cloud based applications that can consume files in JSON format. JSON is a data transfer file format which wildly available in many systems.
This feature also helps you sync multiple connected systems such as intranets and extranets or staging and production environment without writing additional code. To able to sync data, you must have two or more systems running the same application and EMD Integrator WordPress plugin. For example, you may want to sync employee records produced in your intranet system to your extranet.
You can set the data export frequency as:
- Hourly
- Twice daily
- Daily
- Weekly
- Monthly
To support sensitive or temporary data, EMD Integrator comes with "auto data exclusion" feature. Using this feature, you can not only exclude certain attributes but also certain records when exporting your data.
For example, you can have some temporary data records such as interns, subcontractors in your intranet directory but you don't want to sync these records with your extranet since the data may not be relevant after certain period of time.
In more complex cases where you need to exclude data based on the external system targeted, you can set one to many exclusion terms. The default exclusion term is "Exclude".
After setting the exclusion term(s) in the EMD Integrator Export job configuration, you must set the same term(s) in the "EMD Integrator Exclude" taxonomy of a record and repeat this process for every record to be excluded.
EMD Integrator Addon is a WordPress plugin that can import or export data stored in our WordPress plugins from/to the external sources.
If your data is stored in one to many legacy data stores, spreadsheets, NoSQL databases, you can use EMD Integrator Addon to import your data to WordPress. The only requirement is the import data file must be in JSON format.
JSON is a very common, an open-standard file format that uses human-readable text to move data from one data store to another. Most modern data stores have JSON export capabilities.
For example, MySQL can export data in JSON format using SQL:
SELECT CONCAT('{"emd_employee":[',
GROUP_CONCAT(JSON_OBJECT(
"post_title",concat(`first_name`,' ',`last_name`),
"post_author","admin",
"post_status", "publish",
"post_date", DATE_FORMAT(now(), '%Y-%m-%d %T'),
"emd_employee_number",`id`,
"companies", company,
"departments", department,
"office_locations", location,
"emd_employee_lastname", `last_name`,
"emd_employee_firstname",`first_name`,
"emd_employee_email", `email_address`,
"jobtitles",`job_title`,
"emd_employee_phone", `business_phone`,
"emd_employee_mobile",`mobile_phone`,
"emd_employee_primary_address",`address`,
"post_content", `notes`
) SEPARATOR ',')
,']}') as employees_json
FROM employees INTO OUTFILE '/var/lib/mysql-files/employees.json'
The code above creates a JSON file called employees.json for "emd_employee" WordPress post type.
EMD Integrator Addon includes powerful yet easy to use processing logic which enables not only data inserts but also updates and removal (temporary or permanent). EMD Integrator Addon can start import operations on demand.
If the data you import keep changing on a certain frequency, you can schedule imports:
- Hourly
- Twice daily
- Daily
- Weekly
- Monthly
If the data source you use produces many fields, you can choose the ones you need. You can import from unlimited number of data sources if your data is distributed in many data stores or networks.
In a more complex scenario, you can update certain columns from one stores and the rest from another. EMD Integrator also allows you to set data import sequence with a simple drag and drop.
To synchronize a Microsoft Active Directory/LDAP field value to your WordPress plugin field, you must create a mapping. A mapping is an individual data synchronization instruction.
Each mapping is evaluated at the run time to assure the data is moved correctly from a Microsoft Active Directory/LDAP server source to the target plugin entity.
To complete a mapping, you must select a target WordPress field, the primary LDAP field and optionally one to many secondary LDAP field(s).
If you want to set a constant value for a WordPress field, you can use "Use Default Value Only" option of the primary LDAP field dropdown and set a default value for the mapping.
Before you map fields, it is important to follow the best practices below.
Mapping for unique and required values
- Blue color indicates a required field. Any Microsoft Active Directory/LDAP field value corresponding to this field cannot be empty or null. You must have a mapping created for all required fields.
- Red color indicates a unique field. Any Microsoft Active Directory/LDAP field value corresponding to this field cannot have duplicate values. For example, every employee must have a unique employee number or username. There cannot be another employee with the same employee number or username. You must have a mapping created for all unique values.
Creating WP Author field mapping
- WP Author is mapped to WordPress admin user by default.
- WP Author can be mapped to a field corresponding to a WordPress username or user email.
- If Microsoft Active Directory/LDAP username value is empty, null or does not exist in WordPress, the default WP Author value on the import tab is used. In the IMPORT tab, you can set the default value to whichever WordPress user you prefer.
Setting custom field mapping
- To map a custom LDAP field which is not listed in the dropdown, enter the field name in the textbox after clicking on the dropdown and then selecting it.
- To sync a custom field which does not exist in WordPress or listed in the WordPress field dropdown, pick "Custom Field Placeholder".
Setting default values
- To set a default value for a field, select the "Use Default Value Only" option from the Primary LDAP field column and fill in the corresponding "Default Value" field.
- To set a value for an incoming empty or null LDAP field value, fill in the corresponding "Default Value" field.
- To set a default value for an image or file field, fill in the default value field with the URL of the image or file.
- To set a default date value, the date format must be in YYYY-MM-DD such as 2019-12-20.
- To set a default value for a relationship field, you must find the POST ID of the entity record corresponding to that relationship. For example, if you'd like to set all employees who do not have a manager set in your Microsoft Active Directory/LDAP server to a manager, fill in the "Default Value" field to the POST ID of the manager employee record.
- To set a default value for a taxonomy field, you must fill in the SLUG of that taxonomy in the corresponding "Default Value" field.
Secondary LDAP fields
You can set one to many secondary LDAP fields in your mapping to provide a fall back value for the corresponding primary LDAP field.
If the primary LDAP field of a mapping is empty or null, Microsoft Active Directory/LDAP addon checks the secondary LDAP field(s) to see any value available to assign.
If multiple secondary fields are set, the value assignment is based on the order of the secondary field(s). For example if you select field A first and then field B, the value check is completed based on the field A first then the field B.
If the secondary field(s) and the default value of a mapping are both filled out, the value of a set secondary LDAP field(s) gets validated first before the default value is assigned.
Employee Directory Pro WordPress plugin comes with EMD Form Builder. EMD Form Builder is a powerful online form building tool. Using EMD Form Builder, you can not only modify pre-built forms but also create new ones from scratch.
In this article, we will create a corporate event submission form so that event organizers can submit event information without logging in to our site. We want all events submitted through our form to show up on the corporate event calendar as well.
To accomplish this task, we need to:
- Create a new submit form.
- Modify the form layout.
- Create a WordPress page for the form
- Submit an event.
Creating an event submission form
- Login to the WordPress Dashboard as an administrator.
- Go to EDirectory Pro menu and click on the Forms page link.
- Click on "Create New" button.
- Fill in the required fields (color coded as red) under General tab :
- Name: Submit Corporate Events
- Type: Submit
- Entity: Events
- Click on Submissions tab and pick Success (green) button type.
- Click Save button.
Modify the form layout
- Under EDirectory Pro menu, click on the Forms page link to see the form list.
- Hover over "Submit Corporate Events" form title and click on "Edit Layout" link.
- Drag and drop the fields you like from the left to the right to the layout as shown in the screenshot.
- Optionally, you can change field labels by editing the label of a field.
- Once you're done, click on Save button and then X button to exit.
Create a WordPress page for the form
- On the forms list, click on "Copy" button corresponding to the "Submit Corporate Events" form to copy the form's shortcode
- Click on Pages menu and "Create New" button.
- Paste the short code copied at the step #1 and publish the page.
- See the form created on the frontend of your site. It should be similar to the one in the demo site.
Submit an event
If you completed all the steps above successfully, you should be ready to test your form.
- Log out of the WordPress dashboard.
- Go the event form page
- Fill in all the fields and click on Submit button.
- Log in the WordPress dashboard as admin.
- Click Directory > All Events page to see all your events.
- Confirm that the event record you submitted was created. You should be able to see the same event listed on the event calendar as well.
See the EMD Form builder page to learn more about the features available.
YouTube ShowCase Pro WordPress plugin comes with EMD Form Builder Lite which allows to customize pre-built Video Search form. To customize the Video Search form, follow the steps below:
- Login to WordPress Dashboard as administrator.
- Click on Video Settings Menu and Forms page.
- Click on Video Search form "Edit Layout" link
- Customize the form to your need; change field labels, drag and drop the field to reorder, delete one or more fields etc.
- Save and click X button to close the layout editor.
- Copy your custom form shortcode to a WordPress page.
- Publish the page.
You can offer YouTube video search functionality to your site visitors by including "Video Search" widget on your sidebar.
To accomplish this task:
- Go to Appearance menu after logging into WordPress dashboard.
- Click on Widgets submenu link.
- Drag and drop "Video Search" widget to one of the sidebars available in your theme. Remember if you move the "Video Search" widget to "EMD Widget Area", it will show only in the YouTube ShowCase video pages.
These types of issues may happen for multiple reasons. One common reason you get a 404 error is your permalinks are not set properly.
- Login to your WordPress Dashboard.
- Go to Settings > Permalinks Make sure **Post name ( http://yoursite-domain/sample-post/ )** sellected.
- Save Go to record list and pick one record.
- Hover over the title field and pick View from the quick links.
- See if you can view the record on the frontend properly.
If the steps above does not work, you have a WordPress installation or configuration issue not related to the plugin.
Active Directory/LDAP addon for Employee Directory WordPress plugin offers support for organizations composed of multiple independent sub-organizations or business structures.
For example,
1- Your organization's data is distributed in multiple active directory servers, you need a solution to sync from these servers and merge all the records in a unified location.
2- You want to have the ability to create employee records which do not exist in active directory and prevent these records from getting deleted or updated during syncing from active directory.
Active Directory/LDAP Addon meets and exceeds the needs above by allowing organizations to:
- Pull data from unlimited number of active directory servers.
- Configure each server connection independently
- Set the order of import operations by drag and drop
- Create some records in Employee Directory manually or using bulk import from CSV and sync the rest from Active Directory at the same time.
- Get insight on each run though extensive auditing and debugging at the record level
The bio field and tab of an employee profile page can be hidden from your visitors by following the instructions below:
- Login to WordPress Dashboard.
- Go to EDirectory > Setttings > Entities > Employees
- Find Attributes section and select "Disable" or "Show only in Admin" from the Visibility column corresponding the Bio field
- Go to EDirectory > Setttings > Tools.
- Put a#bio-tablink{display:none} in Custom CSS field.
- Click on Save changes button.
In this article, I will provide step by step instructions on how to sell event tickets using WP Easy Events and WooCommerce WordPress plugins.
Let's say you have a Yoga studio and want to sell tickets to your Vinyasa Flow 2-3 class. You decided to have a membership program which offers tickets to your classes at a discount based on your customer's membership level. The members will be able to purchase tickets at Silver, Gold and Platinum membership levels.
If a customer has no membership he or she has to purchase tickets at the full price. We want our customers purchase tickets before the event start and bring their tickets to the event location so that staff members can check them in using the QR code on the ticket. The class will be offered on every third Monday of every month for the next 24 months.
You will need to download/purchase and install the following software before you start this exercise:
- WordPress
- WP Easy Events Starter, Pro or Enterprise edition
- WP Easy Events WooCommerce Addon (included in the Enterprise edition)
- WP Easy Events QR Code Addon (included in Pro and Enterprise editions)
- WooCommerce WordPress plugin
To be able to implement this scenario, we need to:
- Create one to many Organizers
- Create one to many Venues
- Create one to many Performers
- Create our Yoga class event
- Create a ticket product in WooCommerce
- Link WooCommerce ticket to our event
- Create a recurring event
Creating Organizers for your events
Organizers are people who are responsible for planning and execution of events. WP Easy Events WordPress plugin allows to create one to many Organizers and link them to your events as needed. Events can be hosted by multiple organizers. Organizers have their own pages.
In our Yoga Class, we will have only one organizer at this time but we are planning to have classes with other Yoga Studios as well.
If you're the only organizer and you don't want to display a separate Organizer page, you can disable Organizer option under the Event Settings > Settings > Entities > Events > Attributes section. In this case, skip the instructions below.
To create an event organizer:
- Log in to your WordPress Administration Panel.
- Click the 'Events' tab.
- Click the 'Add New Organizer' link to see the Organizer Edit screen.
- Fill in all the required fields, add Event categories, tags etc..
Creating Event Venues for your events
Event Venues are places where your events happen. WP Easy Events WordPress plugin allows events happening at multiple locations. You can create your venues once and link them to your events as needed. Venues have their own pages displaying upcoming events at that location.
To create your event venue:
- Log in to your WordPress Administration Panel.
- Click the 'Events' tab.
- Click the 'Add New Venue link to see the Venue Edit screen.
- Fill in all the required fields, add Event categories, tags etc..
Creating Performers for your events
Performers are people who provide services at your events. Services could be speaking, entertaining or any other activity. Events may feature one to many Performers. Performers have their own pages displaying the upcoming events they will be performing.
If you're the only performer and you don't want to display a separate Performer page, you can disable Performer option under the Event Settings > Settings > Entities > Events > Attributes section. In this case, skip the instructions below.
To create a performer:
- Log in to your WordPress Administration Panel.
- Click the 'Events' tab.
- Click the 'Add New Performer link to see the Performer Edit screen.
- Fill in all the required fields, add Event categories, tags etc..
Creating a Yoga Class event page
- Log in to your WordPress Administration Panel.
- Click the 'Events' tab.
- Click the 'Add New' sub-tab or the “Add New” button in the event list page.
- Under the edit screen, fill in your event description.
- Under "Event" panel, fill in the fields under "Details" tab.
- Under "Event" panel, click on "Registration" tab.
- Select WooCommerce for Registration Type.
- Fill in 'Attendee Instructions' for the instructions displayed on the event registration form.
- Fill in 'Attendance Text' for the instructions displayed on the event tickets.
- As needed, set event category and tags. Event categories and tags link your events to Venues, Organizers, Performers and other Events. Using Event categories and tags, customers can see the offerings on your site related to a certain term. Please note that to display event organizers, venues or performers specific to your event, you must link them to you event.
- Click on "Create Connections" links on Organizers, Performers and Venues panels to link the corresponding records which created in the previous sections to our Yoga Class event.
- If you have other Yoga Class events that are directly related to this event and you want to display them on the event page, link their records by clicking on "Create Connections" link under "Related Event" panel.
- Fill in the excerpt section for the summary of your event. This text is displayed at the event archive, category and tag pages as well as the front teaser section of the event page.
- When you are ready, click Publish. If you do not have publish privileges, the "Submit for Review" button is displayed.
Creating WooCommerce event ticket
To be able sell tickets using WooCommerce WordPress plugin, we need to create an event ticket as a product. Since we would like to offer discounts for members, we need to create a variable product type.
If you don't want to offer discounts on different membership levels or keep it simple, just create a Simple Product.
To add a variable product, create a new product or edit an existing one:
- Go to WooCommerce > Products.
- Select the Add Product button or Edit an existing product.
- Select Variable Product option from the Product Data dropdown.
- Create event ticket attributes
- Create event ticket variations
If you're not familiar with WooCommerce, you can follow the instructions in the following section to create attributes and variations for your Yoga Class event ticket.
Creating Ticket product attributes
Click on the Attributes section to create attributes before creating variations. You can create custom attributes specific to your Yoga Class or use global attributes that are site wide.
To use a global attribute:
- Select one from the dropdown and Add.
- Choose Select all to add all attributes to your ticket.
- Make sure to check the Used for variations checkbox to use the attribute for your variations.
- Save attributes
Custom attributes specific to product
- Select Custom product attribute, and Add.
- Name the attribute such as Membership.
- Set values separated by a vertical pipe (e.g., Silver | Gold | Platinum)
- Make sure to check the Used for variations checkbox to use the attribute for your variations.
- Save attributes
Creating Variations for your ticket
- Go to Variations section.
- Select Add variation from the dropdown and click Go button.
- Select attributes for your variation. Click the triangle icon to expand the variation panel.
- Set the Regular Price.
- Check Enabled and Virtual boxes.
- Set SKU for your variation for accounting.
- If you plan to offer different number of ticket per variation, you should check Manage Stock and set the Stock Quantity field.
- If you want to set the number of tickets at the ticket level, click on Inventory tab, check Enable stock management at product level box, and set the
- Click on Save Changes button to save variations.
Linking the event ticket to Yoga Class event
To be able to sell ticket to our Yoga Class, we need to link the event ticket product to our Yoga Class event. This task can be done either from the WooCommerce event ticket product page or event page.
If you're at the WooCommerce page,
- Find Events panel.
- Click on Create Connections link.
- Click on the Yoga Class event record.
If you're at the Yoga Class event edit screen,
- Find Woo Tickets panel.
- Click on Create Connections link.
- Click on the Yoga Class event ticket product record.
Creating the recurring events of Yoga Class event
To be able create recurring events of our Yoga Class at the third Monday of every month for the next 24 months, we need need to convert our event to Repeatable event.
- Edit Yoga Class event
- Find Repeating Event panel
- Check Repeat this Event box
- Repeat every Day Week Month Year
- Set On Day of the week First Second Third Fourth Fifth Last Mon Tue Wed Thu Fri Sat Sun
- Set Ends After occurrences.
- Click Update button under Publish box.
What happens next
After following the directions above, your Yoga Class event page should look like:
Click to see the event page created in this exercise.
Please note that one big advantage of WP Easy Events WordPress plugin is that it allows event ticket sales from not only event pages but also from venue, organizer, performer pages.
Once customers purchase event tickets, they will get an email having a link to the event ticket page similar to:
On this page, customers can print or download their event ticket. Every event ticket has a QR code which has information on the event registration. Using a QR Code Reader/Scanner (freely available most App Stores), staff members can easily check in customers to our Yoga Class.
If you’re an Administrator and you’d like to make someone a support Agent or Manager on your site, follow the steps below after logging in WordPress Dashboard:
- Go to Users > Add New. Fill in the required fields and choose a password for the user.
- Check "Send this password to the new user by email" box if you want to notify the user. The user will get the login information in the email. Users can change their password and any other info by editing their profile after they logged in.
- Select the role you want to give the user using the dropdown.
- Go to Tickets > Agents and create and new support agent
- Fill in the required fields and select the user created using the "Agent User" dropdown.
- Publish.
Employee Directory EMD Integrator addon allows bulk synchronization of employee and company event(Pro only) records from any source using JSON formated files on a scheduled basis.
To be able to successfully synchronize your records, you must have the following conditions met:
- JSON file must be in the correct format.
- JSON file must include the unique and required fields.
- JSON file must be stored in a directory accessible from your web server.
- JSON file must have at least read permission for your web server user.
We recommend implementing a test run in your development or staging environment and check your integration logs for any possible errors before migrating the process to your production server.
All the features and addons available for a plugin are documented in the pricing page of that plugin.
Please follow the steps below to see if a feature or an addon is available in a particular edition of a plugin:
1- Go to the pricing page of the plugin you're interested by clicking on " Get XXX". XXX is the plugin name.
2- On the pricing page, find the "Features & Add-Ons" section. This section lists all the features and addons available for an edition of the plugin.
3- Scroll down until you see the row which has the feature or addon you want.
4- Check the icons on the right side of the feature title for each corresponding plugin edition:
- Yes, this feature or addon is available.
- No, this feature or addon is NOT available or included. If it is an addon, you can purchase it by clicking on "Get this addon" button.Not Included
- Yes, this feature or addon is available BUT not as powerful as the higher level edition.Limited
When we receive a support request from you, we follow the process below :
- Check if the issue is supported or not supported by our service.
- Identify the root cause of the issue.
- Reproduce the issue in our demo site to see it is a site specific issue or an issue affecting all our customers.
- Fix the issue or recommend a solution.
Our objective is to solve your support request as soon as possible. To help us reach our objective and serve you better, we need detailed explanation of the issue.
We want to solve your support issue to your satisfaction. Help us help you by providing quality information on your issue.
Copy and paste the following questions to your support ticket and provide response to each question.
1- Do you see the same issue happening in the live demo site of your plugin?
Please go the demo site of your plugin and check if the same issue occurs there. If yes, please provide the link of the demo site page where the issue can be reproduced.
2- Where and how did the issue happen?
Let us know the URL, operating system (windows, mac, linux etc.) and the browser you were on when the issue happened. If you'd like us to login to you site, purchase a work order.
3- What did you expect to happen?
Provide a detailed explanation of what you expected to happen versus what actually happened. If multiple errors happened, make sure to start a separate paragraph for each error.
4- Did you try to fix the issue?
If yes, provide the steps you took and what happened. You can follow our instructions to see if a third party product causing the issue.
5- Do you have a screenshot or video?
An image or video sometimes explains more to us than anything else.
6- Do you have any error log(s)?
Error logs sometimes include detailed explanation of the issue and help us identify and fix the issue faster.
Please open a separate support ticket for each separate issue.
Your license key is sent to you on your purchase receipt email.
Alternatively, follow the steps below to access your key and activate or deactivate your license:
- Login to your account.
- Under Purchase History tab, find the product you purchased.
- Click "View Details and Downloads" link to download the plugin zip file.
- Upload the plugin zip file and activate your plugin.
- Go back to "Purchase History" tab.
- Click on "View Licenses" link under "License Keys" column.
- Click on "Key" button under "Key" column to view your license key.
- Copy your license key.
- Find plugin settings and Licenses page.
- Paste the license key you copied and your plugin's license box.
- Save.
- Click on "Activate License" button.
- If your license is valid, you will see "Green" bar with your license expiration date.
- Click "Deactivate License" button to deactivate your license.
Microsoft Entra ID (Azure Active Directory) is a service to provide identity and access capabilities for applications running in Microsoft Azure cloud and for self-hosted applications.
Microsoft Entra ID (Azure Active Directory) Addon is used to sync employee records with Employee records when these records are created, modified or deleted in Microsoft Entra ID (Azure Active Directory). To be able to sync with Microsoft Entra ID (Azure Active Directory), you need to:
- Create and register an Microsoft Entra ID (Azure Active Directory) application.
- Get application ID and authentication key.
- Assign role to application.
- Get your tenant ID.
- Test your connection.
To be able to programmatically connect to Entra ID (Azure AD), you need to have tenant (directory) ID, application ID and authentication key. Follow the steps below to complete all connection requirements.
Creating an Microsoft Entra ID (Azure Active Directory) application
- Log in to your Azure Account through the Azure portal.
- Click on "Entra" main menu link.
- Click "Enterprise Applications" link under "Manage".
- Click on "+New application" button.
- Select "Non-gallery" application under "Add your own app".
- Enter your "Name" such as Employee Directory under "Add your own application" page.
- Click Add button and wait until your app is created successfully.
Getting application ID and authentication key
- Click on "Entra" main menu link.
- Click on "App Registrations" link under "Manage".
- Click on "View All Applications" button to see your new application and click on it.
- Click on "Settings" link.
- Click on "Keys" link under "API ACCESS".
- Fill in "Key Description" and set "Duration" fields.
- Click on Save button and wait until your authentication key is created.
- Copy the key value. You won't be able to retrieve it once you leave that page.
- Paste the authentication key in "Authentication Key" field under "Connection" tab of Microsoft Entra ID (Azure Active Directory) Addon settings.
- Back in the Entra ID "Settings" page. Copy "Application ID".
- Paste your application id in "Application ID" field under "Connection" tab of Microsoft Entra ID (Azure Active Directory) Addon settings.
Assigning role to application
- Back in the Entra ID "Settings" page. Click on "Required Permissions" under "API ACCESS".
- Click on "Add" link.
- Click on "Add an API" and select "Microsoft Graph" under "Select an API" blade.
- Click on "Select" button at the bottom left.
- Select "Read directory data" under "APPLICATION PERMISSIONS".
- Click on "Select" and then "Done" buttons. It will set the permission(s) to your application.
- Click on "Grant Permissions" link right next to "Add" button under "Required permissions" blade.
Getting your tenant ID
- Click on "Entra ID" main menu link.
- Click on "Properties" link.
- Copy the value under "Directory ID" field. That's your tenant ID.
- Paste it in "Tenant ID" field under "Connection" tab of Microsoft Entra ID (Azure Active Directory) Addon settings.
Testing your connection to Microsoft Entra ID (Azure Active Directory)
If you followed the steps above to get your tenant id, application id and authentication key, you should be ready connect to Microsoft Entra ID (Azure Active Directory).
- Go to "Connection" tab of Microsoft Entra ID (Azure Active Directory) Addon settings
- Make sure all required fields are filled in.
- Click on "Save Connection" button and wait until the connection is saved.
- Click on "Test Connection" button.
- If the connection is successful. You will see your connection date and status as "Connected" under "Connection Log" field.
- If the connection is not successful. You will see an error message detailing the reason under "Connection Log" field. Correct the error and try again.
You can disable sensitive fields such name, phone, email etc. from the frontend.
1- Login to WordPress Dashboard
2- Go to Quote settings > Settings > Entities tab > Quotes
3- Under Attributes section, disable the one you do not want to display to public. Options available for each field are:
Enable: Display this attribute on everywhere
Disable: Remove this attribute from everywhere
Show only in Admin: This attribute is still enabled on admin area. If you want to hide this attribute on the frontend forms go to Forms tab.
Creating a video wall in your site's sidebar is supported in YouTube Showcase Pro WordPress plugin. You can create a video wall either in EMD Widget Area which is displayed only in YouTube Showcase pages or in any WordPress page.
Please follow the steps below:
- Go to Appearance > Widgets after logging in WordPress Dashboard.
- Drag and drop an instance of Custom HTML widget to either EMD Widget Area or any area in your theme's sidebar.
- Optionally set the title of the widget.
- Enter the following code:
<style>div.emd-container div.panel-body, div.emd-container figure.panel-body { padding-bottom: 56.25%; padding-top: 25px; }
 div.emd-container .widget_custom_html figure.panel-body .video-img-caption { font-size: 9px; }
 div.emd-container .widget_custom_html div.youtube-duration{display:none} </style>
[video_wall filter="misc::posts_per_page::is::10; misc::has_pages::is::false; tax::video_tag::is::front;"] - Click Save
How to customize the shortcode
The shortcode we used above displays top 10 videos matching "front" tag and removes pagination support. If you use only
[video_wall]
shortcode, there will be pagination support where users will be browse the next set of videos with each click.
How to customize the look
We used font-size:9px for the video caption in the code above. You can increase or decrease this value based on your need.
See examples
Video wall on a WordPress Page
Video wall using EMD Widget Area
Employee Journal WordPress plugin is an addon to Employee Directory Pro WordPress plugin. Employee performance reviews are only accessible to manager level employees. Managers can simply edit the profile of an employee to get started.
Employee Journal streamlines employee performance review process using an optional 5 tier user role based permission system. Each performance review tier corresponds to a management level. Managers have access to the employee reviews below their level but can not access to the higher level employee reviews. In other words, a manager can see the reviews of employees reporting to her but can not see her manager's reviews. If your organization does not need 5 tier system, you can use default single tier employee and employee management roles.
Employee performance review types can be grouped by a category and subcategory. Each review category can further be color coded to help visually distinguish different types of reviews.
Managers can also use template tags to customize performance review content. The tags used in performance review content are automatically replaced after a journal entry is saved. Additional files or images can be attached to each performance review.
A confirmation message is displayed as soon as a performance review entry is saved. Once saved, a performance review entry cannot be edited by the reviewing manager. However, managers can view or search the saved performance reviews by multiple criteria.
Managers are allowed to print employee performance reviews by selecting the ones needed and clicking on the Print button. Every review entry is printed on its own PDF page. This is very handy feature if you'd like to discuss specific performance reviews by having a scheduled one-on-one meeting.
Employee performance review system administrators can create new reviews, edit existing ones and have full access to the system setup. In the plugin setup and configuration page, administrators can set the contents of notification messages for:
- Confirmation message
- New entry message
- Follow up message
- Reminder message
All notification messages are sent via email when their corresponding triggering event occurs, on demand or on a schedule. In addition, admins can set the number of days reminder messages will be sent before the review followup date.
Each message content can be customized to meet specific organizational requirements using template tags. Administrators can also select a list of WordPress users who will be notified when a new employee performance review entry is saved. Employee Journal saves the logs of all message sending activity for auditing or testing purposes.
eMD Integrator Addon is used to sync records from multiple sources to our applications or from our applications to multiple targets in batch mode. There is no limit on the number of data sources or targets you can sync with. The default sync file format is JSON.
You can use eMD Integrator Addon to:
- Set up a secondary application which users can access whenever your primary application is experiencing downtime or maintenance.
- Limit access or updates to certain information in a secondary site.
- Perform backups on certain intervals
- Pull data from any number of data sources to our apps
- Push data produced or transformed by our apps to any number of data sources
Another usage example is only allowing access to certain information in one application or making it read-only while offering full access and update on the other one. For example, in your intranet, you can allow users access and update all information. However, on your extranet, users cannot make updates or access to certain information such as employee numbers, salaries or commissions.
Each integrator instance is called a job. There is no limit on the number of jobs you can run. You can create either an import or export integrator job.
An import job can pull records from a single export file. Multiple import jobs can be created to support multi-source import operations. You can choose which columns to be imported in each import job.
An export job is used to create a file which can be processed by one to many import jobs. You can create multiple instances of an export job optionally selecting different columns in each one.
Integrators are run in the order set. The integrator at the top of your list runs first. You can drag and drop integrator jobs on top of each other to set their relative execution order.
eMD Integrator Addon allows visual identification of integrators similar in purpose or scope using contextual colors. For example, you can assign a color to import or export files coming from a certain system or app.
Import and export job run stats are provided to help you debug each integrator run. The number of records that were inserted, updated, ignored or deleted are represented in a tabular format. If a job did not run successfully, the reason is displayed in the status column.
Integrators are run on a schedule basis using WP Cron. WP Cron must be enabled and running on each application instance for successful execution.
The following run frequencies are allowed:
- Hourly: Runs at the start of the next hour.
- Twice daily: Runs on midnight and midday every day.
- Daily: Runs at midnight on corresponding days.
- Weekly: Runs at midnight on corresponding days.
- Monthly: Runs at midnight on corresponding days.
- Yearly: Runs at midnight on corresponding days.
What you need to do to get started
- Purchase Expert Service initial hour and login to your account. The login information will be sent to you via the purchase receipt email.
- Open a support ticket. In your ticket:
- Explain your need in detail, provide screenshots or video if you can.
- Provide the login information (user name, password) to your site. At a minimum, we will need to access to WordPress directory either directly from the operating system or WordPress dashboard.
- Provide your availability based on Eastern Standard Time(EST) if we need you.
How we will proceed
- After receiving your purchase confirmation and login information to your site, we will:
- Identify the issue.
- Estimate how long it will take us to fix it or develop the features you need.
- Provide you a fixed price if the resolution time exceeds the initial hour. You need to purchase the required support hours to start up the project.
- Start working on your site after your approval and payment(if necessary).
- Document the resolution.
- Ask for your confirmation that the issue is resolved or the features you requested meet your need.
- If you confirm the solution we provided is accepted by you, we will close the project.
Please note that in case you do not prefer to go forward with the project, the initial support hour is not refundable. If the project implementation exceeds the time frame estimated by our solution specialist, you do not get charged for additional hours.
Your decision to purchase additional Expert Service support hour(s) means you read, understood our support policy, and are in agreement with us on possible solutions.
Today's consumers are bombarded with the abundance of information. This information overload continues to increase customer, employee or partner expectations for quality content at a consistent rate anytime, anywhere.
Organizations, not able to produce, organize and present their content effectively and efficiently, are increasingly facing the harsh reality of not only loosing their brand reputation and equity but also their competitive advantage. If search engines determine that a certain content is "low quality", it gets deindexed harming domain reputation and ranking,
Knowledge Center Enterprise makes it easier to create a centralized repository to improve the quality, delivery and consistent consumption of organizational content. It is designed to help improve the consumer experience and search-ability of your content.
Knowledge Center Enterprise is a powerful, modern, best-in-class knowledge base and management solution. As a WordPress plugin, Knowledge Center Enterprise takes advantage of powerful capabilities of WordPress as a platform and strong ecosystem that comes with it.
Producing content using WordPress is very intuitive, does not require any technical knowledge and well documented. Users can play different content production roles. Depending on a role a user plays, he or she can access, edit, delete or publish content.
Knowledge Center Enterprise adds knowledge manager and agent roles. Agents and managers are responsible for healthy production and consumption of knowledge base content. The capabilities of these roles can be customized to match organizational needs or business model.
In addition, content can be restricted to certain roles or enhanced using file attachments or images or presented in any language. Knowledge Center Enterprise allows users share content in multiple social media networks and rate all content types using many methods.
Knowledge Center Enterprise shines with its integrated powerful knowledge base dashboard. Knowledge base dashboard provides insight on popularity, quality and compatibility of content with certain user segments. Knowledge managers can identify missing or inadequate content types or areas by tracking the user searches and corresponding results over time.
These capabilities deliver increased productivity and lower operation costs. The following is a summary of features of Knowledge Center Enterprise offers and how customers, employees and partners will benefit using it.
| Feature | Organizational Benefit | Impact on Customers, Employees and Partners |
|---|---|---|
| Predictive answers through Omnisearch | Minimize the time to find and access information | Users will find information faster by entering the search terms related to their need. Omni search will search through knowledge base returning articles, videos, audios, or tweets matching the criteria. This will increase on-demand support opportunities reducing support costs |
| Centralized repository for knowledge | Provide a consistent presentation of company or institution brand | The logical progression of our content will be easy to follow and understand. Users will be able to drill down and across related content with ease. |
| Social media and search engine friendly presentation | Improve company or institution website’s standing in the global community as well as in search engine rankings | The content presentation will be optimized to attract more search engine traffic. Users will be able find and access content using search engines. Users will be able to share content with others through integrated social media sharing capability. |
| Shared assets; images, audio and video files, tweets and more | Increase quality interactions among members, partners and customers | Users will be able tocollaborate with each other refining or expanding the knowledge base. This will increase self-service rate and expand user community. |
| Versioning, history and audit trails | Provide traceability from content production to consumption | Users will be able to track who made the latest change and access to previous revisions of any content. |
| Device independent content access | Allow access to content on demand using any device | The content will be presented in a more user friendly way to mobile and desktop users regardless of the device they use. |
| Content analytics | Ability to get insight on quality of content, popularity by user segment, identifying missing content | Using the integrated dashboard, knowledge managers or editors will be able to decide what type content is more popular, frequently searched, needs improvement or missing. The integrated content rating capability will provide insight on how contend is received by different segments of user community. |
| Better content production workflow and information quality | Increase customer loyalty and advocacy with consistent, relevant and accurate response | Users will access to content summary, average read times and popularity statistics before they choose to read the details. This will minimize information overload, confusion and increase better information consumption. Subject area experts or editors will be able to approve the content before it is released for user consumption. This will increase the user trust and speed of user adoption. |
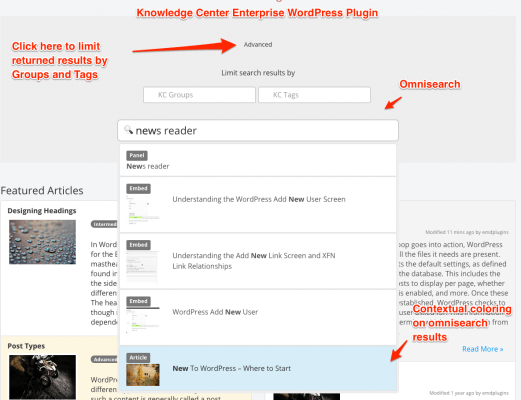
There is online documentation. You can search our self service knowledge base or open a support ticket if have any questions as long as you have a valid license.
We do not encrypt software. However, modifying source code in any way cancels your support license since we cannot reproduce the software based on its design. If you need a new feature, you should contact us. If it is something we think should be included in our software, we develop it free of charge or co-sponsor the cost. Otherwise, you start up a project funded by your organization. Many of the features can be customized without changing the source code or the design.
For customizing software, please refer to the documentation:
https://docs.emdplugins.com/docs/campus-directory-professional-documentation/#article425
Starter edition provides Project pages. In every project page, there is a project issues section as shown in the demo site below:
https://simcom.emdplugins.com/projects/persian-cat-1-0-0/
The project issue section displays all issues related to that project. You can put your project page links in a menu item and allow users to browse the project they are interested in.
To be able allow public users to see issues and projects, you must remove access restrictions. The default is everything private.
In WordPress Dashboard,
1- Go to SimCom > Settings > Entities > Issues
2- Check on Remove access restrictions on frontend
3- Save
This will make all issues accessible from public.
Repeat the same for the projects, picking Projects in the step #1.
Pro and Enterprise Editions allow you pick and choose which projects or issues can be public or private and offer more advanced listing options such data grids.
Learn more:
https://emdplugins.com/plugins/software-issue-manager-wordpress-plugin/
eMD Microsoft Active Directory/LDAP addon is used to integrate our WordPress plugins to LDAP based data stores. eMD Active Directory/LDAP addon allows using LDAP search filters when syncing from Microsoft Active Directory or LDAP servers.
LDAP search filters may be composed of one to many search filter components. You can define search filters under Import tab of the plugin settings. To be able to use LDAP search filters, you must be using at least v2.0 of eMD Microsoft Active Directory/LDAP addon.
Search filters can be used to limit the number of records received from the connected eMD Microsoft Active Directory/LDAP source. Large organizations with many departments or parent child type of multi company structures may have thousands of groups and even more users. Instead of using the default filter which gets all the available records, using a more specific LDAP search filter, you can only get the records that are relevant to your project.
In addition to a text area which is used to define your search filter, a test count button is included to help you check the number of records returned using your search filter.
Using eMD Microsoft Active Directory/LDAP addon, you can construct user or group based search filters. To get started pick a search filter type based on how your organization is configured in your Microsoft Active Directory or LDAP server. The syntax or algorithms that is used in LDAP search filters may change based on the vendor so make sure you check the documentation available before constructing filters.
Group Search Filters
LDAP terminology defines groups as a collection of users sharing a common attribute. Groups can include actual human users as well as computers, applications or system users. Group filters can help you set the scope of the search to human users.
Group filters are used to limit the search to certain groups or to select groups that include actual users. Based on the results, eMD Microsoft Active Directory/LDAP addon populates the Group Names dropdown where you can additionally narrow down your search scope.
For example, the following search filter limits the groups to be returned to the users in object category of groups and the ones belonging to only to the directory user or directory managers.
(&(objectCategory=Group)(|(cn=directory-users)(cn=directory-managers)))
Please note the usage of & symbol is to express AND operator and the usage of | symbol is to express OR operator. AND operator means all specified filters must be true to return a record. OR operator means at least one specified filter must be true for a record to be returned. Usage of parenthesis helps specify the order of the evaluation for all expressions; evaluate innermost to outermost parenthetical expressions first and evaluate from left to right in any case.
User Search Filters
User filters are used to restrict the scope of your LDAP search to certain users sharing a common attribute.
For example, the following filter returns all records matching users belonging to emarketdesign company and tagged with a word containing Marketing but not located in Miami.
(&(objectCategory=Person)(cn=*Marketing*)(memberOf=cn=emarketdesign,ou=users,dc=company,dc=com)(!(ou:dn:=Miami)))
Please note that the usage of * wildcard symbol to filter any word. We also used NOT operator to exclude the users located in Miami from our search. NOT operator is expressed with ! symbol and additional parentheses.
You can also use user LDAP search filters for testing purposes. For example, before running a full initial sync, you can pull your own or team data to make sure the structure is correct and the filter works as expected.
For example, the following filter returns users in eMarket Design working in Marketing department and have Dara Duman or Safiye Duman as their managers.
(&(ou=Marketing)(|(manager=cn=Safiye Duman,ou=Marketing,dc=emarketdesign,dc=com) (manager=cn=Dara Duman,ou=Marketing,dc=emarketdesign,dc=com)))
More on Search Operators
Search operators are used to narrow the focus of the search. We used some of the search operators in the examples above. The following is a list of all search operators available in LDAP searches:
- Equality (=): returns records having attribute values that exactly match the specified value. For example, cn=Dara Duman
- Substring (=string*string): returns records having attributes including the specified substring. For example, cn=*Duman brings Safiye and Dara Duman
- Greater than or equal to (>=): returns records containing attributes that are greater than or equal to the specified value. For example, createTimestamp>=20180101000000Z matches the records with createTimestamp value that is greater than or equal to 20180101000000Z
- Less than or equal to (<=): returns records containing attributes that are less than or equal to the specified value. For example, createTimestamp<=20180101000000Z matches the records with createTimestamp value that is less than or equal to 20180101000000Z
- Presence (=*): returns records containing one or more values for the specified attribute. For example, manager=* returns all records with manager value set.
- Approximate or Like (~=): returns all records like the specified string. For example, an equality filter of (givenName~=Dara will match any entry in which the givenName attribute contains a value that is approximately equal to Dara.
Escaping Search Operators
If a search expression contains an asterisk, left parenthesis, right parenthesis, backslash, or NULL character, it must be escaped to return correct records:
- * must be escaped with "\\2a". For example, eMarket*Design value with special character must be escaped as in (cn=eMarket\\2aDesign)
- \\ must be escaped with "\\". For example, c:\\File value with special character must be escaped as in (cn=\\5cFile)
- () must be escaped with "\\28" for ( and "\\29" for ). For example, Dara(3rd) value with special character must be escaped as in (cn=Dara\\283rd\\29)
- null must be escaped with "\00". For example, 0004 value with special character must be escaped as in (bin=\\00\\00\\00\\04)
You can use up to 2 development/testing licenses. The first development license is free of charge. The additional dev licenses are provided at 50% discount of the original price.
The software must be installed in a subdomain of your main domain and cannot be used for production. For example, if your domain is example.com, you can use it at test.example.com. You need to let us know the subdomain where the software will be installed in advance.
Knowledge Center Enterprise edition comes OmniSearch functionality. OmniSearch allows users to search your content based on:
- Title
- Excerpt
- Content
The following knowledge bases content types are searched automatically.;
- articles
- panels (short articles)
- documents (collection of one to many articles with custom header and footer)
- embeds (video, audio, tweets, presentations etc.)
Users can exclude keywords from search results using "-" operator in the search box. For example, If you search "Plugins - updates", it will return all content matching "Plugins" but will exclude the ones containing "updates" term.
In addition, users can limit their search based on one to many category and tag terms. Clicking on the "advanced" link above the OmniSearch box displays tags and category selection drop-downs. Subsequently, using the dropdowns, user can limit their search results to certain topics or terms.
If you have a valid license key and you'd like to use it in a temporary site before you move your permanent site, you do not need to purchase a separate key. You can use the same license key in multiple sites by deactivating the license key in one site and then activating it in another site.
For example, if you plan do to configure your system in a staging environment (Site A) and plan to migrate to your production environment (Site B), follow the steps below
- Activate the license key at Site A
- Configure your system at site B
- When you're done. Login to your emdplugins.com account
- Find your purchase from the Purchase History tab and click on View Licenses link
- In the license management screen, click on Manage Sites button
- Click Deactivate Site link
- Enter Site B url in the input box and click Add Site button
Most well written themes work with our plugins without additional configuration or coding.
Here are the top 10 popular themes as displayed in wordpress.org. They work without any configuration or coding with our products.
Note: We're not affiliated with any of the themes below. We just picked them by the order they were displayed and tested them.
- Twenty Seventeen By WordPress.org
- EMD17 By eMarket Design - A child theme of Twenty Seventeen
- Twenty Sixteen By WordPress.org
- Twenty Eleven By WordPress.org
- OceanWP By oceanwp
- Bulk By Themes4WP
- Sydney By athemes
- Twenty Twelve By WordPress.org
- Twenty Ten By WordPress.org
- Total By Hash Themes
Please use the following shortcode to display support tickets belonging to a certain author(user):
[support_tickets filter="misc::author::is::USERID;"]
USERID is the id of WordPress user.
In some usecases, you may need to display support tickets belonging to a logged in user. The following shortcode displays the tickets of a logged in user:
[support_tickets filter="misc::author::is::current_user;"]
You do not need to memorize all of this if you purchase Visual Shortcode Builder addon which lets you create simple to advanced shortcodes visually. In most Pro plugins, Visual Shortcode Builder is integrated and available in any WordPress page toolbar using VSB button.
If you're using Employee Directory and Spotlight in a site open to public, you need to take measures to protect your user information. By default, all email addresses are protected by anti spam function. Anti spam function converts email address characters to HTML entities to block spam bots. The selection of characters is random and changes each time the function is called.
For example, [email protected] address is displayed in the html source code as:
"mpeacock@exa..".
In addition, the search form sessions are protected from Cross-Site Request Forgery (CSRF) attacks. If our plugin detects that your session integrity is compromised, it will refuse to return results from your site.
However, if someone uses your directory search form manually, they can get the results and download or copy them to another file. There are multiple strategies to prevent or limit unauthorized search:
- Only expose certain fields: All sensitive information such as salaries, marital status or email addresses can be turned off from the plugin settings.
- Do not expose search operators to public: Use the type of search form which does not include search operators. Search operators are included in a dropdown next to a form field and include the function such as like, unlike, word. These functions can be used to search a large volume of records. Excluding search operators forces users to come with a more educated search criteria.
- Ask for login/registration to search: Using the plugin settings, you can force the user to register or login to your site. This helps you get more information about the user.
- User role based field access: Employee Directory comes with field level security. For example, you can display an employee's salary to the users belonging to managers but not employees.
- Make certain fields required for searches: For example, if you make name field required, users need to know a person's name to search additional information about that person.
The YouTube video thumbnails are created when you first uploaded your video to YouTube. The availability of a video thumbnail is always up to YouTube. If the video thumbnail is not available, YouTube Showcase WordPress plugin lets you pick another thumbnail of a different resolution.
If you have a video which shows its thumbnail in the Starter edition but not in Pro edition, it means your configuration for the thumbnail resolution for that video is NOT the same in the PRO edition.
The starter edition uses "Medium" quality thumbnail resolution by default. The value is set by Video Image Resolution field.If you set the same resolution in the PRO edition, you will get the same thumbnail.Remember, both plugins get the thumbnails from YouTube.
You were able to display video thumbnail in the starter edition because"Medium" quality or the thumbnail of a certain resolution was there to begin with. What is going to happen if it is not there? The PRO edition gives you 9 options to pick from vs. the starter edition only provides 3.
What's going to happen if the thumbnail exist but not in the same resolution you want? If the resolution is low, the image is going to be blurry or not appealing to your visitors. the PRO edition lets you upload your own image in this case. The starter edition does not have this feature.
In the PRO edition, you can set small and large video thumbnails individually as well. This feature is very handy and lets you display smaller images in the teasers such as navigation thumbnails or widgets. It directly affects the experience of mobile visitors or the visitors connecting to your site using low-speed internet connection. The larger images load slower and take more bandwidth than smaller images.
To be able to display videos of a certain category, you should create a shortcode.
For example,
[video_gallery filter="tax::video_category::is::beyonce-knowles";]
The shortcode above displays "video gallery" view for the videos belonging to the video category with the slug of "beyonce-knowles". Remember the slug is the link not the name of the category. Please visit the page below to see the shortcode in action:
How to create Shortcodes in YouTube Showcase Pro
There are many views available in the Pro edition. For example;
[std_coverflow filter="tax::video_category::is::beyonce-knowles;"]
The shortcode above displays the same category using coverflow view.
You do not need to create shortcodes manually. You can create shortcodes of any complexity using video shortcode builder button. Please watch the video in the page below to learn how we created the shortcode above:
https://ytshowcase.emdplugins.com/shortcodes/
There are multiple ways available in Visual Shortcode Builder to change the sort order of your YouTube videos.:
- Using the post date as you create new videos using WordPress Dashboard.
- Using drag and drop of videos in WordPress Dashboard Video List screen: Learn how to Drag and Drop Videos
- Using CSV bulk import feature and setting the order of videos in Google Spreadsheet or any other spreadsheet.
- Using Shortcodes and setting "Order by" attribute which gives you to sort videos by:
- Date
- Id
- Author
- Title
- Parent Id
- Last modified date
- Menu Order
- Random
- Comment Count
- None
A scheduler is a time based workflow component available in our select WordPress plugins. You can test a scheduler before activating it by following the steps below:
- Go to the scheduler list screen under plugin settings.
- Find the scheduler you want to test.
- Click on "Check" button on a scheduler record.
- Evaluate the number of matching records displayed.
EMD AD/LDAP addon allows importing users belonging to certain groups configured in base DN. If you're using Active Directory, your groups must be in "objectCategory=group". If you're using Open LDAP, the groups can be any of the following:
- objectClass=posixGroup
- objectClass=groupOfUniqueNames
- objectClass=groupOfNames
- objectClass=group
If you do not see the groups that you want to be imported, it means either your Base DN is not correct or the groups are not configured properly in Active Directory or LDAP server. Base DN (e.g. "dc=domain,dc=tld") is the top level of the AD/LDAP directory tree. Base DN is used to define the highest level of the AD/LDAP search scope where your groups are configured. You can check if your configuration is correct using any LDAP browser after binding to your base DN.
Yes, you purchased it and are ready to get started. It was looking just the way you wanted in the demo site. Once you started doing it the same way in your site, you ran into a road block and decided to open a support ticket.
It happens and you are not alone. We're here to help. Before we get started working to gather, we have a few suggestions for you.
Calm down and relax. We will get through this.
Sometimes, when things do not go the way we wanted, we get frustrated. It's human nature. When we get frustrated, it is not easy to clarify what we need, when we need it and how we need it. So relax, take a deep breath and focus you on what you need.
Nothing is personal. We're your friend and on the same team.
We're here to help you. That how we get paid for a living. Your satisfaction is our priority and success. We want to start our conversation in a good way. However, we need to treat our customers the same way. That's why we have policies that we ask you to accept before you make a purchase. When we respond to your request, we follow our agreements as a base line. So nothing is personal.
Clear communication is the key. Let's leave the drama out the door.
The thing is we cannot see and hear you. We all read a piece of text and try to understand the issue. Once we understand the issue, we aim to resolve it as soon as possible. Your time is important to us. Please keep in mind that our success is dependent on what and how you write. So it is very important that you clearly spell out what you need.
Accept the fact that there are steps to follow to get what you need.
We're a software vendor. We are responsible for delivering the software to you after your purchase. We are also responsible for making sure that our products work in most usecases. We show that our software works in our demo sites. If it is not working in our demo sites, we are responsible to make it work.
However, to make things work on your site, you need to install and configure the software you purchased. The installation and configuration of any software may require certain knowledge as well as patience. You should be willing to read the documentation, follow the instructions given to you and report the results if you want to do it yourself.
It is not easy if you are a beginner and take some time to get the handle of all. Keep working at it, you will love the results of your work. If you prefer someone else to do it for you, we offer software installation and configuration service. Simply say you need this service in your support ticket. It is as easy it gets.
In the end, we want you to be happy. We want to have a long lasting relationship. Your success is our success. We mean it. We just want you to know that.
Active Directory/LDAP addon allows to sync a Microsoft Active Directory/LDAP service to our plugins. The syncing operation is currently from Microsoft Active Directory/LDAP service to WordPress. In other words, any WordPress changes or additions are not synced back with Microsoft Active Directory/LDAP service.
To be able to perform a successful sync operation, you must:
- Connect to a Microsoft Active Directory/LDAP service
- Create and save a mapping between the plugin fields and Microsoft Active Directory/LDAP service fields
- Set update and removal policy
- Start syncing on demand or enable WP Cron and set syncing frequency
The following provides information on the fields which you can use to create and maintain a syncing operation.
|
Active Directory/LDAP Connection Parameters The fields below need to be provided to successfully connect to Microsoft Active Directory/LDAP servers. |
|
| Host/Domain Controller(s) | Separate with semicolons, e.g. "dc1.company.local;dc2.company.local". The first domain controller is used by default. All other DCs are only used if first one failed to connect or failed to authenticate the user. |
| Port | Default port for non-secure LDAP is 389 |
| Use TLS | Secure the connection between WordPress and AD/LDAP servers using TLS. |
| Network Timeout | Time in seconds after connection attempt to AD/LDAP server times out. Defaults to 5. |
| Base DN | Base DN (e.g. "dc=domain,dc=tld"). The top level of the AD/LDAP directory tree is the base, referred to as the "base DN". This option is to define the highest level of the AD/LDAP search scope. |
| Connection Account | This name can be one of the following:
|
| Connection Password | The password for the connection account. |
| You must enable PHP LDAP support to connect to your Active Directory or LDAP server. Members of the groups selected here will be imported. | |
| Default WP Author | The default WordPress user which will be used in import operation. |
|
Data Mapping Rules The fields below need to be provided to successfully sync data between Microsoft Active Directory/LDAP servers and the supporting plugin. |
|
| Employee No | This field must be mapped to a unique identifier an employee record in Active Directory/LDAP. In other words, the duplicate values are not allowed in this field. |
| Title | This field corresponds to a field which maps to the full name of an employee in Active Directory/LDAP |
| WP Author | This field must be mapped to a field which corresponds to a WordPress user name if employees are allowed to update their own profile information. Otherwise, it recommended to create a system WordPress user and user that user name. |
|
Data Integration Rules The data integration rules how Active Directory/LDAP fields will be merged. |
|
| Enable Updates | If this field is not checked existing records are not updated. Updates are performed based on the unique fields. If the unique field does not exist in WordPress a new record is created. The new value is ignored if it is blank or null. |
| Record Removal |
Defines the removal policy for the records not existing in AD/LDAP Service. The available options are;
|
| Import Frequency |
Set how often you want to perform import from AD/LDAP service. WP Cron must be enabled. The available options are;
You can also trigger a data sync using by pressing the Import Now button. You must save import configuration before clicking on this button. |
If there is no thumbnail available for your YouTube video, Google returns default, blank image. There are a couple options to fix this issue:
- If you own the video, go to YouTube Video Manager and set a custom thumbnail.
- Set a poster image in YouTube Showcase. YouTube Showcase, by default, displays the video's poster image first.
- Try another thumbnail resolution for the video by selecting lower or higher resolution using Video Thumbnail Resolution field in video edit screen in WordPress Dashboard.
Please note that if YouTube returns multiple blank images, it could be time consuming to fix them manually. In these cases, you can use Operations button in the video list screen to start CSV Importer/Exporter. You can then export your videos to a CSV file, set the thumbnail resolution for the videos using your favorite (Google Spreadsheet is recommended) spreadsheet and import them back using the update option in the import screen.
Below is the extract of our subscription policy from our terms and condition of sale. Click to see all of our Terms and Conditions of Sale.
eMarket Design LLC. reserves the right to reject a subscription order for a Service at any time.
If your membership plan or subscription involves a recurring payment of a fee, unless you notify us before a charge that you want to cancel or do not want to automatically renew your membership or subscription, you understand it will automatically continue and you authorize us (without notice to you, unless required by applicable law) to collect the then-applicable fees and any taxes using any credit card we have on record for you.
Subscription Agreement
Certain Services will only be provided to you upon your acceptance of a Subscription Agreement with eMarket Design LLC. or an authorized third-party. Subscription begins as soon as your initial payment is processed. The Subscription Agreement or a link to the Subscription Agreement will be presented to you for your review during the subscription process. Information provided by you to fulfill a subscription order is subject to eMarket Design Privacy Policy.
Fees
eMarket Design LLC. reserves the right to charge fees for access to any Service.
You will not be charged a fee for a Service unless you subscribe to that Service. You must be of the age of majority in your jurisdiction of residence to subscribe to a Service.
The fees for Service (plus any applicable taxes or other additional charges, such as administration, transaction or access fees), accepted methods of payment and accepted frequencies of billing (such as one-time, every four weeks, monthly or annually) will be specified at the time of subscription. All fees, unless otherwise specified, are in United States dollars.
For periodic subscriptions to Services, you will be automatically billed (i.e. charged or debited) or invoiced on or around the periodic anniversary date of your subscription to the Service, and periodically thereafter in accordance with the billing cycle selected at the time of purchase. You will be automatically billed (i.e. charged or debited) at the time of purchase for one-time purchases.
You are responsible for providing and maintaining current, complete and accurate billing and delivery information. You must contact eMarket Design LLC. immediately with any changes to your billing or delivery information to avoid any interruptions to your Service.
eMarket Design reserves the rights to levy an administration charge if your method of payment is invalid (e.g. an expired or otherwise invalid credit card). You will remain responsible for all fees and for all costs incurred by eMarket Design in connection with the unpaid fees, including but not limited to collection agency fees or chargeback fees. You authorize us to obtain updated expiration dates if applicable and we reserve the right to charge the fee to the renewal credit cards.
By subscribing to a Service, you agree to pay the subscription fees specified at the time of purchase, using the method of payment chosen, and billed/charged at the frequency provided.
Term
If you purchase a periodic subscription to a Service, your subscription will continue until it is cancelled.
You must open a support ticket at our site after logging in or cancel your subscription at your account page or cancel your subscription at a third page offering this feature. We don't accept email based unsubscription requests due to the security reasons.
Modifications by You
You may make certain changes to your Service, including but not limited to the frequency of billing, delivery dates, products, and other particulars of the Services that you have subscribed to. Refunds, reconciliations and charges will be applied in accordance with the terms specified in these Terms and Conditions or your applicable Subscriber Agreement at the sole discretion of eMarket Design.
- Manage your purchases
- See what and when you purchased
- Manage your licenses
- Activate or deactivate license key on your sites
- View the license key you purchased
- Upgrade your license
- Complete pending purchase
- Download the lastest version of your plugin
- Open a support ticket
- Generate your invoice
- Manage your subscriptions
- Update your payment method
- View your invoice
- Cancel your subscription
- Update your profile
- See the status of all your support tickets
- Go to AD/LDAP settings page > Mapping tab
- Click on the blue + button to add a new field
- To add a custom LDAP field which is not listed in the dropdown, enter the field name in the textbox after clicking on the dropdown and then select it.
- Click Save Mapping button
The Reports To field is designed to map Manager field in Microsoft Active Directory and other LDAP servers. The Manager field is a distinguishedName (dn). Therefore it is in the format of "CN=FirstName LastName,CN=Users,DC=emarketdesign,DC=com".
If you don't have a Manager field set up in your Microsoft Active Directory or LDAP server, you can always create a custom field with this format and map it in the AD/LDAP Settings > Mapping tab in AD/LDAP extension.
Organization charts are designed to display overall structure of an organization and the relationships between people holding different jobs or positions. To be able to create an organization chart in Employee Directory Pro, you must have the following at minimum:
- Employee profiles are created and published.
- The reporting relationships between employees must be set using "Reports to" connection box in the employee profile editor.
- A WordPress page with organization chart shortcode created and published.
Creating Employee Profiles
You can create employee profiles in 3 ways. Please follow the links below for detailed instructions on how you can enter employee profile data:
- Manually entering data using WordPress editor
- Bulk importing employee data from CSV
- Bulk importing and syncing employee data from Microsoft Active Directory or LDAP server
Creating reporting relationships
Employee to manager relationships are created using "Reports to" connection box in employee profile editor. "Reports to" connection does not allow more than one manager connection. However, assigning every employee to a manager does not ensure that the organization chart will be created successfully. The overall employee relationship data must validate too.
To be able to create an organization chart in Employee Directory Pro, you must have the data representing the reporting hierarchies between employees entered correctly. Your reporting data must conform to the following rules:
- All employee records to be included in your chart are in published status.
- All employees except one employee or organization or group with the highest rank (Customer,CEO, President or Board of Directors) must have a manager or supervisor set. In other words, no orphan nodes are allowed.
- An employee can report to at most one manager. This rule is enforced if you entered your employee relationship data using WordPress editor. If you entered your data using other methods, your data must conform.
- All department employees must report to the same department manager. This is required to create departmental organization charts. For example, you can not connect an employee working in HR to a manager in Marketing. The profile editor allows this relationship to be created. However, when you want to create the marketing or human resource organization chart, the chart will not display correctly.
Remember organization charts represent the hierarchies in an organization. If there is no hierarchy exists or the hierarchical links are broken, the organization charts can not be drawn. If your organization chart is not getting displayed or does not represent your organization, it means employee relationships are not entered correctly. It is time to validate.
Validation of reporting relationships
The validation of reporting hierarchies ensures that you entered the employee relationship data correctly. We recommend the following methods:
- Validate the direct reports of managers or supervisors using "Direct Reports" columns of Employee list in WordPress dashboard.
- Validate the direct reports of managers or supervisors by exporting the Employee Relationships to CSV and opening it in Microsoft Excel or Google Spreadsheets.
Using "Direct Reports" column
- Click on All Employees Or Directory menu link after you logged in to WordPress Dashboard as administrator or employee manager.
- Drag and drop "Direct Reports" and "Departments" columns right next to Title column from Filters & Columns section and click Apply.
- Select department from the "Add a Filter" dropdown and set it to a department.
- Validate each employee working at the department reporting to the same manager using the "Direct Reports" column.
- Go through each manager and make sure all direct reports are correctly entered.
- Fix incorrectly entered relationships by editing the employee records not matching your organizational structure.
Using Employee Relationship export to CSV
- Click on All Employees Or Directory menu link after you logged in to WordPress Dashboard as administrator.
- Click on "Operations" button right next to Add New button.
- Click on Export tab.
- Find "Employee Relationships" section and click Export button while "Direct Reports (manager)" value selected from the dropdown. A CSV file is going to be exported.
- Import the CSV to Google Spreadsheet or Microsoft Excel
- Sort by "Reports To Employee No" column.
- Go through each row to ensure all direct reports of a manager are correctly entered in "Direct Reports Employee No" column.
- Validate each employee working at the department reporting to the same manager using "Direct Reports Employee No" column.
- Validate there are no empty cells in "Direct Reports Employee No" and "Reports To Employee No" columns.
- Validate there is no employee number entered more than once in "Direct Reports Employee No" column. In other words, no employee can report to more than one manager.
- Fix incorrectly entered relationships by editing the employee records not matching your organizational structure.
- If you made changes, export the data to CSV again and import using the Import tab after clicking on the Operations button.
If you're creating reporting hierarchies of a large organization, it is always a good idea to go department by department to avoid data entry errors.
Displaying organization charts
To display an organization chart:
- Create a WordPress page.
- Enter
[employee_orgchart]shortcode in the editor. - Publish and view your page.
For detailed instructions and examples of creating more advanced organization charts, visit the Employee Directory Pro demo site.
WP Cron is a task scheduler used by WordPress and our plugins extensively. WP Cron runs when someone visits your site. In other words, if no one visits your site, WP Cron does not run. In that case, the tasks scheduled by our plugins will not be executed or will be delayed until the next WP Cron run.
To make sure the scheduled tasks are executed in a reliable and predictable way, we have two options:
- Using operating system task scheduler
- Using an external webcron service
Before using any of the options above. You need to disable WP Cron from running by adding the following code to your wp-config.php file:
define('DISABLE_WP_CRON', true);
Using operating system task scheduler
You can use your operating system's task scheduler to trigger WP Cron at the specified intervals by following the steps below. Make sure to replace "Your_Site_URL" with your own domain URL.
Windows
There are multiple ways to schedule a task depending on your flavor of Windows. We've found that the easiest way to do it is the command line by using the schtasks command.
- Open a command prompt (Start > Programs > Accessories > Command Prompt)
- Enter the following code:
schtasks /create /tn "WordPress Cron Job" /tr "BROWSER_PATH http://Your_Site_URL/wp-cron.php" /sc TIME
Mac OS X/Linux
- Mac OS X and Linux have a time based task scheduler called cron. You can also use launchd service in Mac OSX. To start cron, go to command line and type in the following command:
crontab -e - Use the image below to create your cron task:

Each cron task must be created in a separate line per site. A cron task consists of five parts:
- minute
- hour
- day of month
- month
- day of week
For example, to run WP Cron at minute 5 every hour:
OR5 * * * * /usr/bin/wget -q -O - http://example.com/wp-cron.php?doing_wp_cronIf wget is not installed, you can use curl. The following command runs every 5 minutes.
*/5 * * * /usr/bin/curl --silent "https://example.com/wp-cron.php?" > /dev/null 2>&1Alternatively, you can use special strings to define the time part of your task:
String
Alternative Definition
Cron line @reboot
Run once, at startup.
@yearly
@annually Run once a year
0 0 1 1 * @monthly
Run once a month
0 0 1 * * @weekly
Run once a week
0 0 * * 0 @daily
@midnight Run once a day
0 0 * * * @hourly
Run once an hour
0 * * * * For example, to run WP Cron daily at midnight:
@daily wget -q -O - http://Your_Site_URL/wp-cron.php?doing_wp_cron
Please note that if you're using our plugins in multiple sites, you should create a task to run WP Cron for every site.
Using an external webcron service
If using operating system level task scheduler is not an option for you. You can use one of the many webcron services to trigger your wp-cron.php at the specified intervals.
Knowledge Center Enterprise Edition comes with fully featured, integrated content rating system. You can create different types of ratings for your articles, panels, embeds and documents. To create a binary content review like shown on this article, follow the steps below:
- Create 2 for Yes and No buttons and 2 more for the Yes button down and No button down images
- Go to KC settings and click on Ratings
- While in the "Article Section", Set the rating mode to "Up-down"
- Set the max rating to "2"
- Set the icon type to "Custom Image"
- Set the folder URL to the location where all your rating images stored
- Enter the "Rating up on" filename; this is the image that will show initially for positive rating
- Enter the "Rating up off" filename; this is the image that will show when the user hovers on or click on to rate positively
- Enter the "Rating down on" filename; this is the image that will show initially for negative rating
- Enter the "Rating down off" filename; this is the image that will show when the user hovers on or click on to rate negatively
- Make sure "Single" for single star selection is checked
- Make sure "Space" for putting space between icons is checked
- Enter the following code to the "rating text" field: [gist id="f8cfe0e84d3b1c931fd05cf7b333d1d6"]
- Empty the "rating stats" field
- Do the steps above for panels, documents or embeds if you need to and Save
- Click on KC Settings > Settings > Tools tab
- Enter the following code in the "Custom CSS" field: [gist id="dd2b7351fa7f453781b07504a90dcb99"]
- Click on Save button
- Check one of your articles to see how it looks and modify the code if you need to.
We update our products frequently adding new features. Each time, we add a new feature, the translation .pot files may get updated with new strings. If you see some of the strings not getting translated to your language and you translated all the strings you needed. It is possible that the translation file for your language is not up to date. In that case, it is time to merge new additions to your .po file and create a new .mo file. Here is the process, we use to update our own files:
- First make sure that gettext library is installed in your computer
- Run the following command from the console at the location where your .pot and .po files are:
msgmerge -vU empd_pro-tr_TR.po empd_pro.pot - Translate the new strings to your language using a text editor.
- Make sure to create a new .mo file after you finished using the following command:
msgfmt -o empd_pro-tr_TR.mo empd_pro-tr_TR.po
If you're using a .po editor or translation software or service, search if there is a function available to update .po files from .pot files.
If you prefer a GUI based approach, we recommend Loco Translate WordPress plugin.
If you have too many videos, it becomes harder and harder to find the right video or group of videos. EMD Advanced Filters and Columns addon helps search videos matching your criteria. It also allows you save your queries in case you need them again. EMD Advanced Filters and Columns addon is included in YouTube Showcase Pro.
If you have too many videos or your video information gets updated from external systems frequently , it may not be practical to create or update each video manually. The EMD CSV Import Export addon helps you bulk import and update video information from CSV. You can also export all your video to CSV and take a backup. This addon is included in YouTube Showcase Pro.
YouTube Showcase allows you to customize video pages with a few clicks from the plugin settings. I am going to change the location of the sidebar from the right to the left.
Next, let's change the base slug from videos to stories. It is important to visit the Permalinks page under WordPress settings. Otherwise, you will not see the change on your frontend.
To display widgets on a video page, Go Appearance > Widgets, drag and drop the widgets you need to EMD Widget Area. YouTube Showcase comes with Featured and Recent videos widgets. To display a video in the featured widget, check the featured field while you're creating a new video or updating an existing one.
To change the number of videos to be displayed, set the videos to show field with a new number.
To display your videos in a video grid page, go to Pages, find Video Grid page, hover on the page link and click on View. You will see all your videos. If you have more than 161 videos, a paged navigation is displayed. Click on a page number to go to that page.
To create a video page manually, first identify the YouTube video id. Go to the video's page and copy the letters and number after the equal sign. Go to WordPress dashboard, click on "Add New" button, paste the id to the key field, set the video title and other fields. Click Publish.
If you see "Please enter a unique value error", it means there is a video with the same id already published or put in trash. If you have the same video already published, you do not need another one. If it's put in your trash, empty it by opening the trash list in another browser tab and then click publish again.
Once you activate the plugin, you will see Setup assistant buttons. Click on "Setup YouTube Showcase Pages" button. It will create all the default pages automatically. If you clicked on "Skip setup". The setup assistant will now show again.
In that case, go to Video Settings > Tools and click on "Install pages" button. It will create the default pages for you.
Our plugins come with fully customizable image or file upload field settings page. Each upload field can be configured separately to support your unique business requirements. The following can be set for each file or image upload field:
- The maximum number of files that can be uploaded
- The file types allowed
- The maximum file size allowed
If you configured your field correctly based on your needs and still cannot upload certain types, the issue could be related to your WordPress configuration.
The following file types are allowed by WordPress.
- Images: .jpg, .jpeg, .png, .gif, .ico,
- Documents: .pdf (Portable Document Format; Adobe Acrobat), .doc, .docx (Microsoft Word Document), .ppt, .pptx, .pps, .ppsx (Microsoft PowerPoint Presentation), .odt (OpenDocument Text Document), .xls, .xlsx (Microsoft Excel Document), .psd (Adobe Photoshop Document)
- Audio: .mp3, .m4a, .ogg, .wav
- Video: .mp4, .m4v (MPEG-4), .mov (QuickTime), .wmv (Windows Media Video), .avi, .mpg, .ogv (Ogg), .3gp (3GPP), .3g2 (3GPP2)
Please note that not all hosting services allow all the file types listed above. Some may block one or more types. In addition, there may be restrictions on the maximum uploadable file size. If you have issues with your file uploads, we recommend checking with your hosting provider first.
If your file type is not supported by WordPress or you do not want to allow certain types by default, you can add or remove an allowed file type. Simply modify the following script and add it to your theme's functions.php:
[gist id="64dc183d9689144188cdafef04dbb5b0"]
YouTube Showcase Pro offers 3 ways to create videos;
- Manually creating each video: Use this feature:
- If you do not have too many videos
- The video information is not updated frequently.
- Bulk importing all videos and relationships from CSV: Use this feature:
- If you have too many videos to be imported
- If you already have information on each video, tags to be used and video to video relationships
- If you have your own custom content and excerpt or thumbnail on each video
- When you need to back up your videos
- If you regularly update or import the video information from external systems.
- Bulk importing all videos using YouTube API: Use this feature:
- If you have too many videos to be imported
- If you do not have your own custom content and excerpt or thumbnail on each video
- If you regularly get the video information from YouTube.
Bulk importing videos from YouTube is an easy and fast way of creating all your videos. YouTube Showcase Pro comes with a powerful yet easy to use bulk video importer.
To be able to bulk import from YouTube API:
- Get your YouTube API key first. It is available for free.
- Go to Video Settings > Youtube > Import Videos section.
- Type your YouTube UserName(s) in Youtube Username field. Separate additional YouTube users with a comma.
- Type your YouTube Playlist(s) in the Youtube Playlist Ids field. Separate additional YouTube playlists with a comma.
- Set the frequency of batch imports. You must have WP Cron enabled. (enabled by default in WordPress).
- Set the batch size if you need to. Depending on your hosting, you might want to consider in increments of 50 videos.
- Save Changes. You must save your configuration before importing videos.
- Click on "Import videos now" button to bulk import videos.
- Check the stats to make sure they make sense. If there are new videos in the channel or the playlists, they are imported. If there are existing already imported ones, they are ignored.
- Check the videos imported in the video list by clicking on All Videos menu link.
WP Cron is a WordPress function which runs unattended scheduled tasks. To enable WP Cron, go to the directory where your wp-config.php is and and add:
define('DISABLE_WP_CRON', false);
anywhere above the /* That's all, stop editing! Happy blogging. */
If you need to disable WP Cron for any reason, just set "DISABLE_WP_CRON" to true as shown below:
define('DISABLE_WP_CRON', true);
WP cron runs when a visitor comes to your site. If you did not have a visitor in the last hour, the tasks scheduled with WP Cron never kicks off. We recommend using operating system based cron or external ping service if you do not have an active site or if you own a server with many WordPress websites hosted.
To be able run WP Cron externally, follow the steps below:
- Disable WP Cron.
define('DISABLE_WP_CRON', true); - Create a operating system based Cron Job. For example, the following runs every 5 minutes in a linux based system.
*/5 * * * curl --silent "https://example.com/wp-cron.php?" > /dev/null 2>&1 - Test to make sure everything works as expected
Emd comments is a commenting system which extends WordPress post comments. Not all our WordPress plugins come with EMD comments so check with your plugin's feature page to see if yours has it.
The user responses submitted through emd comments are displayed in their own menu page. They are not mixed with the WordPress post comments and the comments submitted for other content types included in your plugin.
This helps you better manage the responses submitted by users responding to different content types. Each content type may have its own comment page link under your plugin's menu. For example, in our Software Issue Manager Enterprise WordPress plugin, we have separate comment pages for issues, projects, and members.
Emd commenting system allows ability to:
- accept private comments
- sort comments by date
- mark lastest comments
- upload files or images
- write rich text using a wysiwyg editor
- share permalink of a comment
- and some plugin specific functionality
Emd comments is a commenting system which is included in some of our plugins. Check your plugin's features page if yours has it. Users can submit private comments by clicking "Make this response private" checkbox when submitting their comments. Private comments are marked with a lock icon and has "This response is marked as private" text in it content area. You can translate this text to your own language. You may ask your users to submit private comments to send "private or personal" information such site logins, identification numbers or phone numbers.
Who can see private comments
Once a private comment is submitted as private, only the following users can see its content:
- Comment author: The user who wrote the private comment. This users may or may not be a logged-in user. Visitors can also submit private comments.
- Author: The user who is the author of the record(support tickets, issue, video, profile etc.) where the private comment posted to.
- Users with edit capability: The uses who can edit the record having a private comment. (Backend only)
- Administrators: WordPress administrators
Our plugins are designed to protect business data from user errors. That's why every new or existing record is checked before it's saved or updated. If your plugin detects that a record is not matching the predefined business rules of your plugin, it gives you "Please correct the errors highlighted below and try again" error.
For example, it is not allowed to create duplicate records or leave required fields empty. If the record is not matching the predefined business rules, it is not allowed and the plugin asks the user to correct the issue.
To avoid this error:
- Clean up your trash. if a record is not permanently deleted, it can technically be restored. So the plugin checks your trash before saving or updating a record.
- All required fields are filled out. The required fields are marked with a red asterisk.
- No duplicated values for unique fields. If there is a unique field in your plugin that is explicitly needed to be filled out, there can not be the same value in the other records. Our plugins automatically create all unique fields, if you create a record manually. However, if you restored or modified your data using an external process or third party plugin, there is no guarantee that your records are valid. If you need to bulk import/update records, please do not use third party products since they lack the logic required to create a valid record. Use your plugin CSV import/export/update module a.k.a operations.
- Check inactive tabs or accordions in the edit screen if you see where the error is. If there are too many fields, it is not easy to locate the problem field causing the issue.
- Check if you installed another plugin offering deduping functionality and deactivate it
User roles define what a user can do and have access to which records or pages after logging in. Administrators can assign roles to users using WordPress Users screen. Employee Spotlight Pro comes with "Employee" and "Employee Manager" user roles.
Employees can:
- Edit or update their own profiles
- View all employee profiles on the frontend of your site
- Assign employee tags, groups and locations to their own profiles
Employee Managers can:
- Create new employee profiles manually
- Edit or update all employee profiles
- View all employee profiles on the frontend of your site
- Manage employee tags, groups and locations
In a real life scenario, you may assign "Employee Manager" role to a manager or supervisor or a non-technical user without needing to give her administrator privileges.
To allow employees update their own profiles, admins should follow the steps below:
- Create a WordPress user for each employee
- Assign each user to "Employee" user role. Alternatively, you can assign a role to multiple users in bulk by checking the records and selecting the role from the "Change role to..." dropdown and click Change button.
- Create manually or bulk import the list of employees. If you manually create each profile, make sure that the author of each profile corresponds to the user name created at #1 by selecting the user name from Author dropdown
If your organization has many employees, creating each employee profile manually may not be feasible. In this case, you should consider bulk creating initial employee profiles at once using the integrated Import/Export/Update module.
One of the major benefits of using a dedicated customer support system compared to email based support is the ability to use ticket statuses. The ticket statuses show the milestones or journey that a support ticket goes through before it gets resolved. The ticket statuses also help better understand the performance of your support team, providing insight on how fast tickets move from one status to another.
WP Ticket uses the following core statuses for support tickets:
- Open: This ticket is in the initial state, ready for the assignee to start work on it.
- In Progress: This ticket is being actively worked on at the moment.
- Reopened: This ticket was once 'Resolved' or 'Closed', but is now being re-visited, e.g. a ticket with a Resolution of 'Cannot Reproduce' is Reopened when more information becomes available and the ticket becomes reproducible. The next ticket states are either marked In Progress, Resolved or Closed.
- Closed: This ticket is complete or solved.
Resolution Statuses
Every support ticket goes through a workflow before it gets closed. The closed status is the final status and may indicate that no further action is necessary to solve a ticket. Once a ticket is closed, you can allow to be reopened with or without enabling ticket responses from the plugin settings.
In more complex support requests or workflows, there may be a need to get help of multiple support agents or developers to resolve a ticket. The support staff other than the ticket assignee are called contributors. To document the actions of the contributors, WP Ticket comes with the default resolution statuses.
Resolution statuses are used to document how a ticket is closed. Let's think about a scenario where a support ticket needs multiple handoffs to be solved:
- A requester opens a support ticket
- A support agent is assigned to resolve the ticket
- The assignee assesses that a developer and subject matter expert (SME) is needed to resolve the ticket.
- A developer and a SME is assigned to the ticket as contributors
- The developer works on the issue and resolves it
- The developer sets the ticket status as "Resolved - Fixed"
- The SME assesses the resolution and confirms it
- The assignee asks the requester to verify and accept the resolution
- The requester accepts the resolution
- The ticket is closed by either the requester or the assignee
In more complex support tickets, there may be a need to create a fix or development project. In that case, the ticket is assigned to a project manager instead of a single developer. The project manager documents all the issues needed to be resolved, forms a team of developers, assigns the issues to the developers and circles back to the support agent (assignee) with a resolution.
You can use Software Issue Manager to create the project and manage it there. Software Issue Manager streamlines the ticket resolution workflow by using the same resolution statuses.
The following resolution statuses are provided out of the box to support multi-handoff resolutions.
- Resolved - Fixed: A fix for this ticket has been implemented.
- Resolved - Won't Fix: This ticket will not be fixed, e.g. it may no longer be relevant.
- Resolved - Duplicate: This ticket is a duplicate of an existing ticket. It is recommended you create a link to the duplicated ticket by creating a related ticket connection.
- Resolved - Incomplete: There is not enough information to work on this ticket.
- Resolved - CNR: This ticket could not be reproduced at this time, or not enough information was available to reproduce the ticket issue. If more information becomes available, reopen the ticket.
Response indicators
Response indicators are used to notify agents on who last responded to a ticket. Depending on the commenter's role, the different flags are displayed in the ticket list in WordPress dashboard. The following response indicators are provided:
- Red: Customer was the last to respond.
- Blue: Agent was the last to respond.
- Black: There is no response to the ticket
- Orange: Support team manager or supervisor was the last to respond.
Hovering on the indicator icon also shows the name of the user who last responded. Response indicators can be filtered using Smart Search Addon. WP Ticket Pro and Enterprise editions come with Smart Search out-of-the-box.
If you do not map a field by choosing "Do not map" option when you're importing or updating from CSV, the field is ignored.
WordPress Multisite, by default, allows sharing of plugins, themes and works on the same database. However, it does not allow sharing database tables among sites. This is by design. Each site is unique in terms of database table usage. For example, Site A and Site B can use the same plugin, theme and database but cannot share the same tables.
If you have specific usecase where a WordPress plugin installed in different sites and must use the same data, you should sync the data between the sites either using an external process or a plugin.
In YouTube, the related videos are displayed after the video is finished. On a website, this is very undesirable since you don't want users leaving your site or being shown videos of competitors. YouTube Showcase Pro allows disabling related videos per video. Follow the steps below:
- Login to WordPress admin and go to the video list
- Edit the video that you do not want to show related videos
- Click on "Player" accordion section and find "Display Related Videos" field and uncheck
- Update or Publish
This will remove the related videos section at the end the video. If you need to disable related videos in all videos, you do not need to do it manually. Do it in bulk using the integrated YouTube Showcase Pro import/export/update functionality:
- Click on Operations button while you're in the video list
- Click on Export tab and then "Export All Videos" button
- Import the downloaded CSV file into Google Spreadsheets
- Modify "Display Related Videos" column and change all "1" to "0" (without quotes)
- Click on Operations button, Import tab, choose file to import and click on Upload button
- Check "Update existing data based on unique field(s)"
- Click Import and Done
If you're using YouTube Showcase Starter edition, you can purchase Import/Export/Update addon.
If you’re getting the error below when you or users submit a form, It means that there is another plugin (social share, third party data submitters etc.) or your theme on your site, messing up the integrity of your session.
There was a problem with your submission! Possible causes may be that the submission has taken too long, or it represents a duplicate request.
All of the forms of used by our plugins are protected against spam and various types of attacks automatically. Third party plugins or themes usually trigger this issue by resetting and changing the session id after it is created by our plugins. If our plugin form code detects that the session id is modified or not the same, it may trigger the protection thinking that non-human user(robot) is trying to submit form data.
If you are using another protection method, you can disable, Cross Site Request Forgery protection per form by:
Plugin Settings > Form > select the form you want to disable> Find CSRF Check field and uncheck > Save
This will disable the protection for the form selected. The recommended approach is to the find what's causing the issue and fix it. You can find what's causing the issue by deactivating the plugins one by one or simply changing your theme and try again.
You can connect tickets to orders by making orders field in the ticket submit form required. You must have WooCommerce and Easy Digital Down addon installed in your site to use orders field. After a customer logins, all her orders will be populated in the ticket order field. After the customer chooses the order she wants to open a ticket for, the product field will be populated with the products in that order.
In addition, you can connect a ticket to an order after the ticket is submitted. Simply login to the WordPress dashboard and edit the ticket and connect the order from the Orders box. You can also create the same connection from WooCommerce or Easy Digital Downloads order using tickets box after editing the order record.
Although both WP Ticket and Software Issue Manager WordPress plugins are used to manage issues, there are major differences in terms of how these plugins are used in real life use cases.
WP Ticket is a customer support management system designed for multi-role support teams. Each issue is submitted in the form of a support ticket. Tickets are assigned to support agents. Agents are support team members who are tasked to resolve tickets to customer satisfaction. Tickets are not grouped under projects although you can group,tag and assign them to departments.
Software Issue Manager is a requirement management and analysis tool to support multi-role project teams. All issues are organized under projects. Projects can have versions. The main goal of Software Issue Manager is not to provide customer support but to develop qualified requests.
For example, a customer submits a support ticket using WP Ticket. Subsequently, a support agent is assigned to the ticket and qualifies the issue as a feature request (or defect) related to a product. If the issue is accepted by a product project manager, the manager creates the issue in Software Issue Manager and may decide to include the issue in a project. In that case, the issue is assigned to a developer who is tasked to resolve the issue. After the issue is resolved, the developer notifies the product manager. The manager asks the support team member to close the ticket and notify the customer.
- Create a WordPress user for each faculty, staff and student
- Assign each user to Campus Staff user role
- Create manually or bulk import the list of faculty, staff and students to People. Make sure that the author of each profile corresponds to the user name created at #1 by selecting the user name from Author dropdown.
- Edit and update their own profiles.
- Add new publications and edit their own publications.
- Add new courses and edit their own courses.
- View all publications, courses, and locations.
- View all people profiles in the frontend.
Triggers is a workflow component and can be accessed through plugin settings of the supporting plugins. It is used to automate execution of your business rules every time a record is created or updated. Major email clients include filters or rules functionality similar to triggers.
A trigger is composed of conditions, operators and actions. You combine these to create 'if' and 'then' statements.
There are two types of conditions:
- all conditions
- any conditions
The all conditions means ALL of your conditions must be met for a trigger to run. If one of the conditions are not met, the trigger does not run. The any conditions means only one of your ANY conditions needs to be true for the trigger to run.
Operators are used to compare or validate a single or set of values in conditions. For example, if the department is Marketing or if the campaign cost is greater than $1000. Actions are instructions or what you want to happen when the conditions you set are met or true. You can add multiple conditions and actions to a single trigger. You can also create multiple triggers which run in the order you set.
Avoiding trigger conflicts
The order that triggers run is very important. Every time a record is created or updated, all of your triggers run in an order against that record. The trigger at the top of your list runs first. You can set the run order of your triggers using drag and drop.
You should watch out for the triggers that undo or modify an action that was performed in another trigger. To avoid conflicting trigger runs, use the funnel method. Start with a broad trigger at the top of your list and then create more limited in scope triggers. Let's assume that you have two triggers.
- Assign all support tickets created through email channel to the email-handlers group
- Assign all support tickets created through email channel with critical priority to the critical-handlers group
The goal is to assign tickets received by email to the email-handlers group unless they are tagged as critical, in which case you want those tickets assigned to the critical-handlers group. If you run #2 trigger before #1 then no tickets will be assigned to the critical-handlers group because #1 rule will assign all tickets back to the email-handlers group.
Using the funnel method, #1 has a larger scope (all tickets through email) and #2 has a relatively narrower scope. That's why #2 trigger must run after #1. You can resolve trigger conflicts by reordering your triggers. If changing the trigger run order does not work for your use case, you'll need to modify or deactivate your triggers instead.
You can customize the event ticket template by modifying the single template for an attendee. Please follow the steps in the customization section of the WP Easy Events Pro documentation.
You can also contact us if you need Pro help.
- Create a dummy attendee by clicking Add New Attendee. You can use this attendee for all custom fields.
- Find custom fields section and click Enter New link
- Fill in Name and Value fields. For example, Name: Do you have a pet?. Value: Yes
- Click Add Custom Field button.
- Repeat this for all your custom fields.
- Click Publish or Update(if you're editing an existing attendee)
- Go Event Settings > Settings > Forms tab > Event Attend section
- Find the custom field(s) you created and enable them by clicking on Show ... field. For example, Show Do you have a pet?
- Click Save Changes button.
WordPress Administrators can add custom CSS or JavaScript code to the plugin pages from the plugin settings. The code included in these setting fields are only applied to the pages of the corresponding plugin which these setting fields belong to.
To add custom code to the fields, go to PLUGIN-SETTINGS > Settings and click on the Tools tab. You will see Custom CSS and JS fields, add your code and save. You can use these fields to fix plugin or theme related issues without modifying external files.
The code added here will be not affected from any plugin updates. Please note that "PLUGIN-SETTINGS" menu name can change based on the plugin you use.
WP Ticket WordPress plugin allows to set up a private, public, hybrid support ticket system. By default, support ticket authors, support managers, and agents can view submitted support tickets. In addition, all visitors must belong to the subscriber user role to submit a support ticket.
If you want all of your site visitors to submit, see and comment on all support tickets submitted by anyone, you can open WP Ticket support ticket system to the public. When you change the default system mode, please consider the privacy concerns of ticket authors. Let them know that their support ticket will be accessible by anyone so they cannot share private information such as login passwords, id numbers, etc on their support tickets.
In addition, the public tickets can be indexed by search engines such as Google or Bing. So anyone on the internet searching for a specific subject may end up a support ticket matching their search.
How to make a support ticket accessible to public
You can make tickets private or publicly accessible by changing the author of a ticket. If a customer logs in and creates a ticket, that ticket can not be seen by other customers. If you change the author of a ticket to Visitor, then the ticket can be seen by anyone visiting that page.
- Login to WordPress Dashboard as administrator.
- Click on Tickets > All Tickets.
- Click the title link of a ticket to edit it.
- Scroll down and find the "Author" dropdown. If you don't see the drowndown, click on "Screen Options" tab on the right top and enable it.
- Change the author to "Visitor"
- Click "Update" button to update.
How to make all support tickets accessible to public
By making WP Ticket system accessible to the public, you allow everyone visiting your site to submit, view their own and existing support tickets.
- Login to WordPress Dashboard as administrator.
- Click on WP Ticket > Settings > Ticket heading.
- Scroll down and find the "Remove Access Restrictions On Frontend" checkbox. By default, this checkbox is unchecked.
- Check "Remove Access Restrictions On Frontend" checkbox.
- Click "Save Changes" button to update settings.
Agents are support staff members who are tasked to resolve tickets.
To assign a ticket to an agent:
- Click on "Create Connections" link in the Assignee box
- Select an agent from the list by clicking on the plus icon
- Select the name of the agent while you are in the edit screen of a ticket.
- Click the Update button.
- After an agent assigned to a ticket, you will see the agent's name under the assignee column in the ticket list screen.
After an agent assigned to a ticket, the agent will get an email notification that can be customized from the plugin settings.
Please keep in mind that you must create a WordPress user having an "Agent" role. Otherwise, the "Agent" dropdown will not return any agent names.
You need to create a shortcode using Visual Shortcode Builder using the following steps:
- Tag the videos you want to include in the gallery or use an existing tag
- Pick the gallery view you want to use
- Create a shortcode using Visual Shortcode Builder limiting videos to the tag set
For example;
[video_wall filter="tax::video_tag::is::front;misc::posts_per_page::is::6;misc::has_pages::is::true;misc::orderby::is::menu_order;"]
The shortcode above creates a video wall gallery with 6 videos per page ordered by menu order (drag and drop the videos to change the order) limiting the videos to be displayed to "front" video tag.
You can see the output of the shortcode above in our demo site.
Instead of managing your videos individually, you can use the integrated CSV import/export/update addon. Here is what you need to do:
- Export all videos to a google spreadsheet(recommended)
- Modify the video information there and import them back in using the update option
By this way;
- You will have an external backup.
- Every video will be bulk updated with the new information without editing each one of them.
Displaying your employee or any entity in alphabetical order is very easy. Simply use the Visual Short Builder to create the shortcode selecting a view available in your plugin. For example, the following shortcode displays employees in alphabetical order using employee_circle_grid view available in Employee Directory.
[employee_circle_grid filter="misc::orderby::is::title;misc::order::is::ASC;"]
See the demo page to learn more
Employee Directory automatically displays scrollbars if your org chart goes out of its container. If you do not want to show scrollbars, you can try reducing the org chart size. See the page below for an example:
https://employee-directory.emdplugins.com/how-to-reduce-organization-chart-size-to-better-fit-your-page/
Yes. All our plugins support PHP 7. We routinely update our code base to assure we are up to date with new PHP features and compatibility requirements as well.
The customization of our plugins may be very easy or require professional help depending on your needs. Our plugins come with NextGen Customization module. NextGen is designed to meet most customization needs through plugin settings. If you're familiar with modifying template files, you can also follow the instructions in the customization section of your plugin documentation to implement more advanced cases. We also offer customization, installation and configuration services for our customers. Please open a support ticket if you need our help.
Please visit our customization page for more information.
Employee Spotlight is an employee profile management system. It is designed for organizations wanting to showcase their employees or talent but not requiring extensive directory search or reporting hierarchy views. Although Employee Spotlight provides an easy to use tag based search, its focus is on creating, displaying and managing staff profiles. That's why Employee Spotlight offers many more types of views to display staff members than Employee Directory.
Employee Directory, on the other hand, is a powerful company directory system which includes not only fully featured profile management but also organization chart drawing, extensive employee search, company event management capabilities and more. Employee Directory can also be used in the intranets with no access to internet.
You can use our shortcodes in WordPress text widgets if you'd like to display the shortcode output on your sidebars. There might be additional CSS code needed to fit the content to the space available or your theme's needs. In addition, if you're using WordPress 4.8, you need to add the following code to your theme's functions.php:
remove_filter('widget_text_content', 'wpautop');
The code simply removes the <br> and <p> tags added to the text widget content by WordPress 4.8.
Yes. If your organization grows and you need to upgrade your license, you can purchase a new license anytime from my accounts page. All license upgrades are prorated.
To upgrade your license:
- Login your account
- Under Purchase History Tab, click on View licenses link
- Click on View Upgrades button
- Pick the license you want to upgrade to and click on Upgrade License link
- Complete the check out process
In order to use our plugins, you must have a self-hosted WordPress site. Our software is designed and developed for businesses in mind. Although we optimize our software for performance considering limited hardware resources, cheap, shared hosting providers may not offer the performance you need. We recommend you to take a look what WordPress recommends before signing up for a hosting provider.
If you do not have a self-hosted WordPress site, we offer fully managed solutions for your business or organization for a flat monthly or yearly fee. Please contact us by opening a support ticket if you need fully managed solution.
Yes. All our plugins can be translated and localized to any language. Please check the localization section of your plugin documentation for details.
In some cases, you may experience issues related to our products on your site. These issues may be caused by your server configuration, the plugin(s) or theme installed on your site.
If you see the same issue on the demo site of the plugin you purchased, we will happily fix the issue for you. Please open a support ticket and provide the details of on which page you see the issue and what you did to produce it.
If the issue does not exist in the demo site but only happens only on your site, you're having a site specific issue. Solving site specific issues is covered by our expert service. Purchase a work order to get started.
To solve an issue in any software system, the issue must be first identified. The issue identification or debugging process could be very simple or very time consuming task. To be able to offer a solution, developers need to know the root cause of an issue.
In most cases, to be able to offer developers some hint about the root cause of an issue, you should always report the messages displayed in WordPress error or debug log following the instructions in WordPress debugging guidelines or in our article on this subject. Reporting a WordPress debug log item to developers helps them understand what an issue is caused by.
If you do not have access to WordPress debugging log or lack the technical knowledge, you can still follow the steps below to help our support staff:
1- Deactivate all other plugins except the product you purchased.
2- If the issue is still there, switch to a stock WordPress theme; any theme starting with "twenty-...".
3- If the issue goes away, after changing your theme to a default theme, the issue is related to your theme.
4- If the issue does not exist after disabling all the remaining plugins, even before changing your theme to a default theme, follow the steps below:
a- Activate one plugin, check if the issue comes back.
b- If the issue still does not exist, deactivate this plugin and activate the next plugin.
c- Check if the issue comes back.
d- Repeat the steps above until the issue starts happening again. Once you start experiencing the issue again, you found the plugin causing the issue.
A person or an employee counts as anyone you create a profile page for in the plugin. For example if you have 100 employees in your organization you should purchase a license supporting up to 100 employees.
Yes. We offer discounted pricing for non-profits. Please open a support ticket and tell us about your organization.
Yes. We offer customization, development and maintenance services to optimize your investment in our products. Lets get started.
Yes. We offer fully managed cloud hosting for businesses around the world. Please open a support ticket to get started.
To use one of our plugins on a WordPress multisite, you will need a license for each sub-site where you will be using it. For example:
- If you want to use it on 5 sites in a multisite then you will need a license for 5 sites.
- If your multisite contains 10 sites but you only want to use the plugin on 1 site, you will need a single site license.
You should enter the license key on the plugin settings page for each site where you want to use the plugin.
Yes. Please fill out our private demo request form to schedule a one-on-one, personalized demo with full WordPress admin dashboard access. Checkout the plugin menu on the top of your screen for the link.
Yes. All subscriptions get renewed at a 10% discount annually. You can cancel your subscription from your account page. If you renew your license manually, 10% discount is not offered.
Do you want to list your employees in alphabetical order? For example to display employee circle grid in alphabetical order , please use the below shortcode. You can change the employee_circle_grid to any other view shortcode you want to use.
Employee Spotlight or Employee Directory WordPress plugins:
[employee_circle_grid filter="misc::order::is::ASC;misc::orderby::is::title;"]
Campus Directory WordPress plugin:
[people_grid filter="misc::order::is::ASC;misc::orderby::is::title;"]
To better understand what's causing errors or warnings in your site, we may ask you to turn on debugging in your WordPress site.
To turn on debugging, the following code should be written in your wp-config.php file BEFORE /* That's all, stop editing! Happy blogging. */ in the wp-config.php file.
// Enable WP_DEBUG mode
define( 'WP_DEBUG', true );

// Enable Debug logging to the /wp-content/debug.log file
define( 'WP_DEBUG_LOG', true );

// Disable display of errors and warnings
define( 'WP_DEBUG_DISPLAY', false );
@ini_set( 'display_errors', 0 );
As a best practice, you should turn off debugging in a live or production site. To turn off debugging, simply add // before every line in the code above if it does not exist.
Once added, WordPress will log all errors, notices, and warnings to a file called debug.log in the wp-content directory but will hide the errors so they do not interrupt page generation. Simply report the content of this file when asked.
When you scan the QR code for an attendee of one of your events , you need to have a page with the shortcode: [wpee_process_checkin] If you don't have this page created you will get the error: "The event checkin processing page has not being created. Please deactivate WP Easy Events Professional and activate it again and click on "Setup WP Easy Events Professional Pages" button." .
You could create this page in 3 different ways.
- Go to Settings page under your Event Settings menu page. Under Tools tab , you will see "Install pages" button , this will create all the setup pages needed for your plugin if they are not already created.
- Go to Pages menu and create a page manually and enter the shortcode in the content.
- Deactivate and activate your plugin which will show the button at top.
We recommend using the first option which is much easier and faster.
Please uninstall and delete the starter edition of your plugin before installing the premium edition.
Before you start, please download your plugin clicking on the download link in your purchase receipt or from My Account page after logging in. All our plugins must be installed manually using one of the following applicable methods.
Manual Installation Type 1
- Login to your website and go to the Plugins section of your admin panel.
- Click the Add New button.
- Under Install Plugins, click the Upload link.
- Select the plugin zip file from your computer then click the Install Now button.
- You should see a message stating that the plugin was installed successfully.
- Click the Activate Plugin link.
- Enter your license key in the licenses page under Plugin settings menu before start using it.
Manual Installation Type 2
- You should have access to the server where WordPress is installed. If you don't, see your system administrator.
- Copy the plugin zip file up to your server and unzip it somewhere on the file system.
- Copy the "Plugin folder" folder into the /wp-content/plugins directory of your WordPress installation. Plugin folder is the top folder after you unzipped the plugin zip file.
- Login to your website and go to the Plugins section of your admin panel.
- Look for "the plugin label you purchased" and click Activate.
- Enter your license key in the licenses page under Plugin settings menu before start using it.
Uninstallation of Plugins
To uninstall one of our plugins:
- Go to Plugins screen.
- Find the plugin you wish to deactivate and uninstall.
- Click Deactivate.
Yes. We're are a full service store. To help you before and after your purchase of our products, we offer:
- A fully functional demo site where the latest version of your plugin installed
- Free, fully functional starter edition to test the basic plugin functions in your own site
- Free and accessible presales support service
- Accessible product support service (valid license required)
- Expert support service to fix site specific issues related to third party products (check availability)
- Turn-key software installation and configuration service (check availability)
- Personalized, one-on-one, private demo service with admin access (select plugins only)
- Extensive plugin documentation and plugin knowledge base
- Live chat service for presales questions or simple directions (business hours only)
- On-boarding service for organizations having greater than 400 employees
- Dedicated account manager for organizations having greater than 400 employees
Loco Translate WordPress plugin offers an easy way to translate our plugins to any other language if you prefer a GUI based solution which is integrated with WordPress. Alternatively, go to docs.emdplugins.com and click on the link pointing to your plugin's documentation. Go to the Localization (l10n) section to see the instructions for manually creating po and mo files.
Every emdplugins.com WordPress plugin comes with two pot files. These files are located under the lang directory of your plugin. To be able to translate our plugins using Loco Translate, you need to create two translation sets and corresponding language files.
Follow the instructions below to get started:
Create the first translation set
- Click on Loco Translate menu Plugins page.
- Find the plugin you want to translate from the list and click on the link.
- Click on Advanced tab and add a set.
- For the first set, enter a project name or the translation pot file name.
- For the plugin text domain, enter the name of the pot file name without the .pot extension. For example, for WP Ticket Enterprise it is "wp-ticket-ent".
- Enter the text domain value for the File prefix.
- Enter lang/POT-FILE-NAME for the template file. For example, for WP Ticket Enterprise it is "lang/wp-ticket-com.pot".
- For the domain path, Enter "lang".
Create the second translation set
- For the second set, enter a project name or the translation pot file name.
- For the plugin text domain, enter "emd-plugins".
- Enter "TEXT-DOMAIN-emd-plugins" for the File prefix. For example, for WP Ticket Enterprise it is wp-ticket-ent-emd-plugins. In other words, use the pot file name without the ".pot".
- Enter lang/POT-FILE-NAME for the template file. For example, for WP Ticket Enterprise it is "lang/wp-ticket-ent-emd-plugins.pot".
- For the domain path, Enter "lang".
- Click on the "Save config" button.
Create the language files
- Click on the Overview tab.
- Click on the "New language" link to create a new language file for each translation set.
- Choose your language from the dropdown or type in your custom language.
- Leave the location as Custom to protect the translation files of your plugin from getting deleted during plugin updates.
- Repeat this every language you want to translate the strings to.
Start translating the language files
- Click on the language file for a translation set.
- Start translating the strings one by one.
- Save
Upgrading the plugin translation files
If you followed the steps above correctly and chose the recommended custom location, your translation files are safe from the plugin updates. To update the pot files to another version, click on a language link and click on the Sync button.
Customization of plugin strings
If your main language is English and prefer to change certain strings to customize the plugin to your need, you can create a new dialect of English language and set your WordPress language to that language.
For example, you can create English (United States) language and then change "Employees" to "Associates" or "Events" to "Happenings". Once you save the translation file and your changes will start displaying immediately.
To learn more, check out the loco translate plugin instructions.
Priority support is designed to resolve site specific, theme related issues. Theme related issues are usually caused by obstructive code, unorthodox markup or CSS code included theme's style sheet. Please note that themes are usually designed for a specific purpose such as blogging, marketplace(ecommerce) or magazine style publishing although there are multi purpose themes.
All our plugins come their own style sheet which is hardened against possible theme related issues. We also include some tools in plugin settings to resolve specific theme related issues. So take look and try them first.
If nothing helps and you still see design elements not getting displayed as they are displayed in the plugin's demo site including but not limited to;
- Unrelated text is getting displayed
- Font sizes or element colors are not matching the rest of the site
- Images or text bleeding out of their containers
- Single, archive or taxonomy pages are not getting displayed properly
- Nothing is happening when a button clicked
- Spacing is off between and/or among design elements
.. then you're having theme related issue. Fortunately, theme related issues are easier to identify and resolve and our support team is here to help you out.
Expert support service scope is limited to the tasks identified and priced during the initial hour. If new issues are identified and needed to be resolved, a new project needs to be started but initial support hour purchase is not required.
Expert support is implemented as mini projects at a fixed price basis. To start up a expert support service project, you need to purchase the initial, non-refundable support hour at the rate advertised in the priority support purchase page. The initial, non-refundable support hour you purchased is used to identify the issue and possible resolutions.
If you have a large list, you need to display all the records in one page to set their display order. Follow the steps below:
- Click on the Screen Options tab at the right top of the screen while you're in the employee list in the admin area
- Under Pagination field, set Number of items per page to the total number of records.
- Click Apply. This will show you all employees.
- Drag and drop the employee records in the order you need.
- Please login if you have an account. We will auto-fill all your information.
- Select "Presales Questions" from the topics field
- Select the product you need support from the Products field
- To include a screenshot to your ticket or comment, please follow the instructions here
- Fill in the other fields
- Please login to your account first
- Select "Questions related to your order" from the topics field
- Enter your Order number which can be found on your purchase receipt
- Select the product you need support from the Products field
- To include a screenshot to your ticket or comment, please follow the instructions here
- Fill in the other fields
We have a demo site for every Pro or Enterprise WordPress plugin on our site. Our plugin demo sites always use the latest version of the software and are our benchmark for plugin-related issues.
Any issue related to the look and feel and/or functionality of a plugin that can not be reproduced in the plugin's demo site is a site-specific issue.
Site-specific issues are not covered by our complimentary (Free) support which comes with your purchase. You can access our complimentary support as long as you have a valid and active license.
There are two categories of site-specific issues:
- The issues related to third party theme or plugin configuration, WordPress configuration or installation.
- The issues related to environment where WordPress resides such as web server, database service, operation system, hosting service configuration.
We offer Expert Service to resolve site specific issues.
add_filter('wpee_pro_modal_content','wpee_pro_change_modal_content');
function wpee_pro_change_modal_content($modal_content){
//your html goes here
}
WP Easy Events Pro comes with CSV Import/Export functionality which can used to bulk import attendees from third party products and send event tickets via email. To be able to do bulk event sent in WP Easy Events, you must purchase eMD CSV Import/Export plugin.
If you do not want to send emails but bulk import attendees, you must first uncheck Active field from Event Settings > Notifications > Attendee Tickets collapse before following the step below.
To bulk send event tickets to attendees, follow the steps below.
- Create a sample attendee and export it to CSV using Operations > Export tab.
- Import the attendee CSV file in google spreadsheets.
- Modify your attendee data in google spreadsheets making sure that;
- "Check-in" column is set to 0 to be able to check that attendee in with QR on the event location.
- The Ticket ID field is unique for each attendee.
- Fill in all the other fields as they are in your sample attendee data. All records must be in "publish" status
- Create a separate CSV file for event attendee relationships and import it to Google spreadsheet. Make sure "Attendees Ticket ID" column has the correct Ticket ID and every ticket id is matched with the correct event title. Otherwise, either no ticket notifications will sent or wrong people will get tickets.
- Export attendees and event-attendees to CSV from google spreadsheets
- Import Attendees first by clicking on Attendee list operations button and selecting Import tab
- This step is very important. So make sure that your data is correct before completing this step. Import Event Attendee relationships by clicking on Events list operations button and selecting Import tab. As soon as each record is imported, a ticket will be sent to the attendee email. If a Ticket ID is already connected to an event, the ticket will NOT be sent again. If you need to resend a ticket to an existing event attendee, delete it from the Attendee list and create it from CSV file.
WP Easy Events support events hosted by multiple organizers. If you do not need multiple organizers, just link your event to the only one you use.
You can use Visual Shortcode Builder to create simple or complex shortcodes to display different events. The prefered way to use a shortcode is putting it in a page. Most shortcodes work if you put them in a text widget if you'd like to display them in your sidebars.
WooCommerce or Easy Digital Downloads must be able to support subscriptions. If the tickets are configured to supporting subscription payments, you can display them WP Easy Events.
WP Easy Events is an event management and registration system. WooCommerce WordPress plugin is an ecommerce system which can handle ticketing for WP Easy Events. WP Easy Events WooCommerce Extension allows you to use WooCommerce along with WP Easy Events.
In other words, if you'd like to use WooCommerce for ticketing, you must have WooCommerce Extension to make it work. Easy Digital Downloads WordPress plugin is an alternative ecommerce system which can be used for ticketing as well.
Parent events are events that control the flow of other one to many events. For example, you can one main session in Miami and multiple sessions in New York, Los Angeles at the same or different times. When users go the main event page, they can also see the other sessions as well.
Ticketing is handled in WooCommerce not in WP Easy Events. WP Easy Events displays the ticket information coming from WooCommerce in Events pages through WP Easy Events WooCommerce Extension. If you can configure them in WooCommerce, it works in WP Easy Events.
Both Employee Spotlight Pro and Community editions have Locations taxonomy. The locations taxonomy can be used to categorize employees by location and display them on the frontend. There are two ways to do this:
- Using a shortcode
- Creating a link to Locations taxonomy view pages
Before you start implementing the following methods, make sure you assign each employee to a location using the employee edit screen in the admin area.
Using a shortcode
Use the following shortcode to display employee belonging to a location. In this example, we use Miami slug as a parameter. You can find the slug of any taxonomy by going to the taxonomy page in the admin area. Just copy the value corresponding to your desired location under Slug column.
[employee_circle_grid filter="tax::office_locations::is::miami;"]
Creating a link to Locations taxonomy view pages
To create link to a location taxonomy value,
- Go to Appearance > Menus
- Click on Locations accordion.
- Check the value(s) you need and click on Add to Menu button to move them under Menu Structure
- While in the Menu Structure panel. Drag each item into the order you prefer. Click the arrow on the right of the item to reveal additional configuration options.
- Save your menu
This is a WordPress bug introduced with version 4.7.1 and will be fixed with 4.7.3.
Please look at the info on below pages:
- https://wordpress.org/support/topic/error-message-cant-upload-any-csv-file-in-media-library/
- https://wordpress.org/support/topic/read-this-first-wordpress-4-7-master-list/?view=all#post-8521428
The suggestion is to use Disable Real MIME Check plugin and remove it as soon as 4.7.3 is released.
All CoSponsor contributors must be able to:
- Provide requirements or features to be developed.
- Respond to requirement clarification requests(RCR) from development manager.
- Test the product's features to be developed.
- Provide feedback on the tasks they are assigned to within 72 hours of initial assignment.
- Comply with our support policy.
Open up a support ticket and select CoSponsor from the topic list. In your message:
- Explain the project in detail
- Specify type of CoSponsor account you'd like to open. The CoSponsor account type you open will be used in the calculation of the initial investment you need to make.
Once we approve you as a CoSponsor contributor, we will post the details for the next steps on the ticket.
By applying for a CoSponsor account, you fully accept our terms and conditions including our support policy.
You can cancel your CoSponsor account and get your initial investment back before you receive CoSponsor Development Notice(CDN) from us. CDN is a notice posted as a comment to the initial CoSponsor ticket. We post a CDN anytime within 5 days of your approval as a contributor starting from the receipt of your contribution. A CDN basicly means the project has started and developers are working on it.
If you decide to cancel after you received a CDN, you can not get your initial investment back and loose every right to the plugin being developed.
eMarket Design can also cancel your account anytime if we think you are not able to meet your responsibilities as a contributor. In that case, your initial investment stays in the development funding pool and you loose every right to the plugin being developed. We send you a Request for Task Completion(RTC) before we intend to cancel your CoSponsor account. RTC is a comment for your eyes only posted in the initial ticket and outlines the requests we asked you to complete and still due. After we posted a RTC for you and you are still not able to meet your responsibilities outlined in the RTC, we may decide to cancel your account.
- The complexity of the project
- The type of CoSponsor account
- The size of the development funding pool
We will let you know your contribution amount after we know the overall development cost. You should expect to contribute $500 at minimum.
We offer the following CoSponsor account types and the corresponding discount percentages:
- Silver: 10% discount
- Gold: 20% discount
- Platinum: 30% discount
- Diamond: 40% discount
Please tell us what type of CoSponsor account you'd like to open in your request. All discount percentages are valid for 1 year starting from the initial release of the plugin.
The CoSponsor account type you open will be used in the calculation of the initial investment you need to make.
If you have a plugin idea that you want us to develop or you work for a client who has needs which can used by others without making significant initial investment, CoSponsor is for you.
CoSponsor is a cofunding program which you contribute a percentage of the overall development cost. You decide the percentage of the overall cost you'd like to contribute by selecting your CoSponsor account type. The more you contribute the more discount and other privileges you get.
CoSponsor program is not a consulting project and does not have deadlines. If what you need is a part of a project with specific deadlines and scope, open a support ticket selecting WPAS Consulting Request from the topic list. We offer fixed pricing and affordable rates. If your CoSponsor project gets accepted, you are allowed to submit 1 set of requirements which will be used to calculate your stake in the project.
In summary, contributors
- Get 10%-100% discount every time they purchase the plugin within the first year of the plugin's release.
- Have right to provide initial requirements to the plugin to be developed.
- Have right to provide feature requests for the maintenance releases
- Have right to be listed as a Plugin sponsor in the plugin page if the contributor has the biggest share and choose to do so.
- Can not resell or redistribute the developed plugin with our explicit permission.
- Has no intellectual property rights on the developed plugin.
By applying for a CoSponsor account, you also fully accept our terms and conditions including our support policy.
Yes, we do. Please check for availability by opening a ticket with WPAS consulting request selected from the topic list. One of our team members will contact you.
All of our plugins are updated like any other WordPress plugins.
- Login to your WordPress dashboard.
- Navigate to the plugins list.
- Click to update the plugin. Once the update has finished, WordPress will notify that the plugin update was successful, and that the plugin also reactivated successfully.
Alternatively, you can download the new version from your account. A valid license is required. Please follow the steps below:
- Download the new version's zip file to your computer.
- Deactivate the previous version
- Delete the previous version
- Install and activate the new version
Get more information on how to manage your plugins
If you're not able to get update notices in Plugins page, make sure:
- Your license is activated and valid. Go to the settings menu of your plugin and click to Licenses page. The text next to your license key should say "Valid".
- If you are behind a firewall, the outgoing connection is open.
- License text is entered without any preceding or trailing space.
- License text is entered correctly.
- php-curl module is installed and enabled. When you type in
php -m |grep curlin the command line, it will show curl. - Type in the command line : curl -s https://emdplugins.com , it should return text
The plugin is yours and you are allowed to modify the code. However, if you modify the code, the app signature will broken and the plugin will become unsupportable, non upgradable per our support policy
Our support engineers are not allowed to provide and make comments on any custom code which breaks the plugin's app signature.
You are not allowed to resell or distribute our plugins without our explicit permission.
You are not allowed to redistribute our plugins to any repository without our explicit permission.
We do not outsource our platform support and committed to providing quality support to our customers.
Free support response times are based on the system load. Although, we try to respond to every support within certain time frame sometime you may need to wait extended period of time.
If you need more uniform response times please upgrade to premium support with SLA.
There is no limit on the number of generations as long as you have a valid license. There is no fee per generation.
To upgrade from one edition of a plugin to another:
- Purchase the edition that you'd like to upgrade to.
- Login to your WordPress site as an administrator.
- Go to the Plugins page.
- Deactivate your current edition and delete it.
- Upload the zip file of your new plugin and activate it.
- Under the plugin settings menu, go to the Licenses page.
- Enter your plugin's license key. Your license key is located at the purchase receipt sent to your email after you purchased the plugin.
- Click on the Save button.
- Click on the Activate button. Make sure it says "Valid". If your license key is NOT "Valid", make you have the correct key.
- Now you will see the menus of your plugin in the WordPress Admin.
- Enjoy your plugin
We're a US based company and do not collect VAT. To be able to create your invoice with VAT number after your purchase:
- Login to your account and click on "Generate Invoice" link
- Enter your company name, VAT number and other details
- Click on "Save Billing Details and Generate Invoice" button to generate your invoice
If you have image URLs in your CSV file, these images are downloaded locally and then WordPress generates different image sizes which are specified in your WordPress Media settings. This process may take long time. You may see a white screen depending on the number of records to be imported or if you have multiple images per record.
In this case, do not navigate away from the screen, open up a browser tab screen and go to Media Library and see more images are getting created. If no more images are getting created, refresh the white screen, count the number of records imported. If the record number matches the number of records in your CSV file, check if the records were imported correctly. If not, repeat the same process but this time, check the update button in the import mapping screen.
There could be many issues preventing your plugin function or look & feel as it does in the plugin's demo site. These issues mainly fall into the following categories:
- One or more plugins installed on your site are conflicting with our plugin
- The theme installed on your site is conflicting with our plugin
- There are issues in your WordPress installation and/or configuration
- There are issues in your Web server
- There are issues in your PHP library collection or configuration
If your issue falls into one of the categories above, it is categorized as a site specific issue. Although, we test our products thoroughly, it is not cost effective and possible to test them out in every configuration scenario.
Site specific issues are not covered by complementary support. You need to purchase priority or expert support and give us full access to your site if choose us to resolve site specific issues.
All of our plugin's have extensive documentation and demo sites. In our demo site, we use the latest version of our plugins to make sure they work and comply to their intended designs.
To be able to categorize an issue as "the plugin not functioning as advertised", we must be able to reproduce the same issue in the plugin's demo site. If the issue you're having exists in our demo site as well, it is considered as "design" or "code" defect.
If your issue is categorized as code or design defect, we automatically assign the issue to the highest priority, upgrade your support to priority support and get core developers involved to resolve the issue to your satisfaction as fast as possible.
- I want to change the color of borders around the photos
- I want to hide Tab or Accordion A in single record page
- I want to remove Box A in admin
- I want to change the label of Field A in one of the forms
- I want to add a chart
- I want to change the grid size or page layout
Customization is not covered by Free Support. If you need to customize our plugins, we provide more details on customization page. Another resource to look for is the plugin's demo site where we offer customization tips, mini tutorials and answer FAQ type questions.
Most customization issues can be resolved by changing or adding CSS rules to your theme's style.css file. If you're a developer and not familiar with how to modify and write CSS rules, check out the primers on CSS or better yet google it.
Customization of our plugins by modifying the theme template files may require knowledge of PHP, JavaScript and HTML in addition to WordPress specific functions. In addition, our plugins use relatively advanced markup and structures to meet the needs of enterprise level use cases.
If you're not familiar with these languages, WordPress specific API, debugging and how our code is structured we strongly suggest you to hire us to do the work for you.
Please also note that modifying any plugin's source code will automatically cancel your support license since it will compromise our ability to generate the source code from the corresponding plugin's design.
We list all customization options and methods in our customization page. We suggest you watch the customization videos we provide on plugin pages to get used to NextGen customization module we use in our plugins. The NextGen customization module offers ability to modify frontend pages from plugin settings without modifying template files. In the future, we will add more functionality to this module but in its current state it's very powerful.
If you need plugin specific step by step instruction please check your plugin's documentation first. We provide detailed instructions specific to your plugin there under Customization section.
Customization steps in generic terms
All of our plugin pages can be customized by modifying HTML section of layout files. Please follow the steps below:
- Create "emd_templates" directory under your theme's directory.
- Copy the layout files that you want to customize into "emd_templates" directory which you created in step 1 from PLUGIN-ROOT/layouts directory
- Modify the file based on your needs
The layout files you added in the "emd_templates" has always precedence over the plugin's layout files. If the customized files get deleted, the layouts which came with your plugin are displayed. We recommend that you create a child theme if you'd like to minimize the risk of accidental deleting of the "emd_templates" directory because of theme updates.
The following layout file types can be customized:
- Single view page
- Archive view page
- Taxonomy view page
- Search form result page
- Standard list page
- Integration page
- Org chart record and tooltip layout page
Labels and messages can be customized to better match your needs through language files. The customization is very similar to localization but recommended for US English users only. If your language is different than US English, you should localize instead of customize. The customization can be done for the strings included in PLUGIN-NAME-emd-plugins.pot and PLUGIN-NAME.pot files.
The following steps cover the string customization of labels and messages.
- PLUGIN-NAME-emd-plugins.pot file is for the translatable strings of components used in PLUGIN-LABEL.
- PLUGIN-NAME.pot file is for the PLUGIN-LABEL specific strings that need to be translated.
Follow the steps below to fully customize PLUGIN-LABEL labels and messages:
- Copy PLUGIN-NAME-emd-plugins.pot as language specific .po file such as PLUGIN-NAME-emd-plugins-en_US.po.
- Copy PLUGIN-NAME.pot as language specific .po file such as PLUGIN-NAME-en_US.po.
- Use your favorite PO file editor or plugin and complete customization of strings in the .po files you created.
- When customization are completed, create .mo file of each .po file.
- Create wp-content/languages/PLUGIN-NAME directory.
- Put customized .mo files and .po files in the directory above to protect them from getting deleted during plugin updates.
- Repeat the process until you get all strings customized. If you do not need a string to be customizes, leave it as it is.
Check the localization section of your plugin documentation first to get specific instructions. The below are generic instructions for all our plugins.
Our plugins can be translated into any language by editing PLUGIN-NAME-emd-plugins.pot and PLUGIN-NAME.pot files.
- PLUGIN-NAME-emd-plugins.pot file is for the components used.
- PLUGIN-NAME.pot file is for the specific strings that need to be translated.
Follow the steps below to fully translate your plugin into the desired language:
- Copy PLUGIN-NAME-emd-plugins.pot as language specific .po file such as PLUGIN-NAME-emd-plugins-tr_TR.po.
- Copy PLUGIN-NAME.pot as language specific .po file such as PLUGIN-NAME-tr_TR.po.
- Use your favorite PO file editor and complete translation strings in the .po files you created.
- When translations are completed, create .mo file of each .po file.
- Create wp-content/languages/PLUGIN-NAME directory
- Put translated .mo files and .po files in the directory above to protect them from getting deleted during plugin updates.
- Change the language to the translated language from Settings > General > Site Language.
- Repeat the process until you get all strings translated.
If you prefer using a WordPress plugin for translation, we recommend Loco Translate. We are not affiliated with the plugin and do not provide any support on plugin usage.
This error happens when you try to activate Pro Edition of your plugin while the community edition is active or vise versa. You can not activate the two different editions of the same plugin at the same time.
Please deactivate the one that you do not want to use and the error will go away. If you made changes, your changes will not be lost.
Yes, your subscription can be cancelled at anytime from your account page. Please follow the steps below:
- Login to your account
- Go to Subscriptions page
- You will see view invoice and cancel links under Actions column.
- Click on cancel link
You will retain access to support and updates until your license key expires, one year from the purchase date. Please note that once you cancel your subscription, you will lose access to the product updates and support.
This error means your site’s PHP version is below 5.6. These versions have reached official End Of Life and as such may expose your site to security vulnerabilities. We always update and upgrade our code based on WordPress recommendations. WordPress recommends at least 5.6. Please read.
When you customize any of our plugins, your own edition of the plugin is developed. We offer three ways to customize our plugins:
- Do it yourself
- Consulting service
- Plugin customization service
Visit customization services page for details.
All of our plugins can import or export plugin data to or from CSV files using a import/export/export module. If you're using a starter plugin or the plugin you purchased does not include this module, you can always purchase it as a separate plugin. If your plugin comes with the Import/Export/Update module, you should see "Operations" button in app list screen next to the "Add New" button in the admin area when logged in as admin.
The Import/Export/Update module uses the metadata included in the plugin code to work. The module ensures your plugin works as expected by;
- Checking data rules(unique,required, default fields).
- Checking app design rules(taxonomies, relationships and associated fields).
The enforcement of the data and app rules ensures that your data is properly represented and can be modified when needed. You can also use the module to backup, restore or reset your data.
Please do not use the third party CSV importers since they lack the logic to properly import, export or update your data.
How to bulk import your data
The easiest way to start the bulk importing of your data is to manually create a couple of records and export them to a CSV file. You can then fill out the rest of the records correctly based on the ones in the CSV file. Follow the process below to properly export and import your data:
- Export your records to a CSV file. Simply click on the Operations button > Export tab > Export button.
- Import the CSV file to a spreadsheet app. We recommend using Google Sheets; freely available for Google account holders.
- Follow the guidelines below when adding and modifying your data:
- Make sure that all the unique and required fields are not empty. The unique fields must be unique for each row of your data and are required. The unique fields are color coded as red. If there is more than one field marked as unique, you need to make sure that the combination of these fields uniquely identifies a row. For example, if the first name and last name of a contact is marked as unique, you must make sure that there is no other record in your data with the same first and last name. There can be contacts having the same first name or last name but not the same first and last name. The required fields that are not unique fields are color coded as blue and must have a value. If a required field is empty, the whole record is ignored to protect data integrity.
- If your plugin has date fields, these fields must be formated as shown in the export file. We detect and convert most date formats but it is recommended to have the proper format at the first place.
- If your plugin has auto-increment field, make sure it's incremented in the required way.
- Custom fields can be imported as other fields. Add additional columns to your file to accommodate the custom fields if needed.
- Import your records from the CSV file, simply click on the Operations button > Import tab > Import button. You will see the field mapping screen. This is the screen you create the field mappings from the CSV file to your plugin. If you need to update your data, check "Update existing data based on unique field(s)." field. If you do not need to import a field, select "Do not map this field" option. When this option is selected, the field is ignored.
- After the import, check the stats to make sure they make sense; the numbers matches the CSV file and valid records. If your data is not formated correctly based on the plugin requirements or if the records already exist in WordPress and the update option NOT selected, you will see that these records ignored during the import.
- Follow the same process to export and import any plugin relationships.
- Reset your data using the Reset tab, fix the issues and start over if the data was not imported correctly.
Our plugins come with a glossary page accessible in your plugin settings. You can check this page to get more information on certain fields. The glossary file provides the metadata about the data fields included in your plugin.
Our plugins come with 1 year free access to support and updates. To be able to get plugin updates and access to our support services, you need to have a valid license at all times.
Like everything else in our life, software we use changes. Bugs get fixed, new features are added, existing features get updated, security issues get discovered.
All of these changes may affect your ability to keep your software in working condition and protect yourself and/or your organization against issues which may cause financial loss. Although you can never totally eliminate risk, you can minimize it by keeping your software updated.
We continuously update and improve our plugins by:
- Fixing plugin related defects
- Fixing WordPress related defects
- Improving and modifying code base to be compatible with existing and future WordPress releases
- Patching security issues reducing vulnerability space
- Adding new features and/or improving existing features
- Improving code efficiency and compatibility with other WordPress plugins and themes
Let's face it, people have more important things to do than keeping track of when a plugin license is going to expire. That's why we offer optional subscription based recurring payments to simplify things for our customers.
Recurring payments get the guess work out of the process and protects your software investment. If you do not want to continue receiving product updates or do not need support and risk it all, you can cancel your subscription anytime. It is totally up to you.
If you decide to unsubscribe or not purchase renewal license after 1 year, you can also keep the plugin as long as you need. As a final note, we always recommend updating your software whether it is WordPress, our plugin or else. Plain and simple.
No. We do not provide complementary support on issues related to third party plugins or themes. There are so many of them and it is not possible to resolve all of them. Identifying these issues and resolving them may take so much time and we're not willing to reflect the cost of providing such support in our product prices.
If you have a theme or plugin related issue which is preventing your plugin to display properly:
- Ask us to provide you a quote for identifying and resolving issues. Each issue resolution is priced separately depending on the issue complexity
- Hire a third party to resolve issues on your site.
If you see the same issue in your plugin's demo site, we are happy to help and resolve it immediately.
Main goal of our complimentary support is to ensure the product you purchased looks and feels like the product demo when installed on your site. You can visit a product's demo site by clicking on "Demo" link on the product toolbar in any product page. If the product is an extension, please refer to the screenshots provided.
Our support staff offer suggestions on:
- Configuration
- Installation
- How-tos or tips
- WordPress best practices, guidelines
- Quick fixes on possible defects
For WP App Studio WordPress Development Platform related questions or support go to WP App Studio Knowledge Center
- WPAS App Studio Development licenses
- FreeDev Development license
- ProDev Development license
- Plugin licenses
- Plugin Design licenses
- Plugin Support licenses
Simply browse to the product you want to purchase, and click on the Buy button and select your license or package. You'll then be taken to our checkout page. Follow the instructions to complete your purchase.
There are two ways to download your plugin once your order is complete:
- Click on the download link on your purchase receipt email. This link is valid for 72 hours. After the link is expired, you can use #2 method.
- Login to your account and click on the download link under purchase history tab.
Installation and configuration of WordPress enterprise software can be a complex task. It requires expertise not only in WordPress but also in database and system administration. Installation and configuration services are not included in your software purchase.
Depending on your site configuration, the complexity of your software, hosting service setup, and your experience level, you should decide if you need professional help. If you prefer to get professional help, we recommend you contact your software vendor and ask if installation and configuration service is offered. Nobody can know the software you purchased better than its vendor or developer.
Getting professional help not only guarantees smooth software deliverability, it also offers you a secure, optimized environment to run your software. Please do not assume that because it is WordPress, it is easy or anyone can do it.
Just like you do not hire anyone to fix the plumbing in your house, you should not trust anyone with the installation and configuration of enterprise software on your site. Things can go wrong, rookie mistakes made, and all come back to you with significant costs and downtime.
In general, if you run into an issue that requires a developer to check your database, web server, or WordPress site configuration (installation, configuration, plugins collection and theme installed etc.), fixing these types of issues is not covered by Free support and not included with your software purchase.
These types of issues require a developer specialized in a certain area to login and work on your site. For the services not covered by Free Support, we offer expert services. Please purchase a work order if you need the following services:
- Any source code modification, addition, or deletion for any reason.
If you modified, removed, or added any code from/to the original plugin source for any reason, it will break the integrity of our plugin designs. Breaking our ability to reproduce code will automatically make your plugin unsupportable from our end. Please refer to our support policy for details.
- Any site specific issue related to your site's theme or plugin collection. (Supported by expert service)
- Any issue on any code introduced to WordPress core (Supported by expert service)
- Any issue on your WP App Studio plugin design specific to your project (Supported by expert service)
- Any issue on your site's web server configuration (Supported by expert service)
- Any issue on your site's MySQL server configuration (Supported by expert service)
- Any customization on a plugin's appearance and functionality (Supported by expert service)
All of our products are released as-is and developed covering major use cases and computer configurations. Since there are thousands of themes and plugins out in the wild, it is not possible to support every combination. In some cases, we may provide suggestions to where you need to look into or debug but you are responsible for identifying and fixing the issues.
Unfortunately, we do not offer phone support.
In the following cases, paid expert service consultants may give you a call:
- To communicate a security issue
- To confirm you are the legitimate account owner
- To get verbal authorization before an action on your site
All calls are made in U.S. Eastern Standard Time (EST) during business hours. We may choose to record communications.
Please use the file upload button in the support request form if you purchased a subscription from us. If you'd like to provide a screenshot or video for any freely available, starter edition product, please use an image or file hosting service like:
To include an image in the ticket content, click insert image icon and paste the link pointing to the image.
Please do not choose image sharing services with:
- A lot of ads on page
- Temporary image storage - images expire after a period of time
- Too many clicks to view images
Site login service is a feature of Priority support and not included in complementary support.
However, if we think that the issue may affect all our customers, we may choose to login to your site. All login information must be provided in a private comment. You can make a private comment by checking Make this response private box.
Software Implementations are time-consuming processes that typically trigger frustration and unrest. We offer installation services for our plugins to alleviate issues that may occur. Our installation specialists make sure our product functions, looks and feel like the product demo regardless of your site's specific configuration. Installation service is not customization or consulting service. If you need customization or configuration not supported by out-of-the-box, we offer affordable customization or development services.
Please see the details on the Plugin Installation Service page.
Here is what we need from you to get started:
- Full URL of the site's login page. For example, https://xyz.org/wp-admin
- Administrator's user name for the site the plugin to be installed
- Administrator's password for the site the plugin to be installed
- Full access to the site's wp-config.php directory through FTP.
- Full access to the site's wp-content/plugins directory through FTP
- User name and password for FTP access
- Data to be installed from the CSV file if you need data to be installed. You must prepare the CSV file before the installation starts.
- Technical contact access if we need additional info or work to do on the server-side.
Please make sure every item above is covered so that we can complete the installation as soon as possible.
We pride ourselves on offering highly rated, fully-featured, easy-to-use, and performant software.
That's why our products are used by more than 100k users all around the world in addition to many Fortune 500 companies and select institutions.
To help our customers purchase with confidence, we offer:
- live product demo sites where the latest version of our software installed.
- fast, proactive product support.
- extensive knowledge base and documentation.
- developer assisted live demo on select products.
- expert services to resolve possible conflicts with third-party products. (sold separately)
- installation and configuration service. (sold separately)
- live chat with our developers. (for enterprise support customers only)
As we are offering non-tangible digital goods, there is no way to get our product back, prove you deleted, or stopped using our software. That's why we do not generally issue refunds after the purchase has been made.
Below is the extract of our refund policy from our terms and condition of sale. Click to see all of our Terms and Conditions of Sale.
There is no reason to get frustrated because you could not figure it out for the first time. It happens and you're not alone. We are here to help. Open a support ticket. It is the easiest way.
When we offer refunds
You MUST MEET ALL OF THE CRITERIA below to be eligible for a refund.
- You are within the first 15 days of the purchase of the plugin.
- You worked with the product support team; followed the instructions given and allowed to perform debugging activities on your site - still could not get the product to perform its basic functions.
When we do not offer refunds
- You request a refund after the first 15 days of the original purchase.
- You did not terminate your subscription to the service or cancel your Account prior to the end of Your then effective Subscription Term.
- You request a refund after your subscription payment is processed by your bank.
- You lack the ability or willingness to follow instructions.
- You decide to discontinue using the software for whatever reason.
- You do not have the technical or non-technical knowledge to install or configure our software.
- You request a refund because our product does not work with a third-party product such as a plugin, theme, or any other component required by WordPress.
How to mitigate conflict before it starts
- Read and understand our sales terms and conditions before you purchase.
- Software installation and configuration is complex. It may require a certain skill set and knowledge. So please read the documentation available, ask questions to our support team, request a live demo (for select products).
- Please check the emails we send you. We notify our customers 14 days before any payment is due as a courtesy.
- Our system automatically renews your subscription unless you cancel. We cannot refund a subscription payment already processed. If you do not want to continue your subscription, please do not wait until the end of a billing or subscription period to make a cancellation. Go to My Account simply cancel it. Easy and done.
We use WP App Studio theme (WPAST) in our demo sites. We also regularly update WPAST optimizing the theme's functionality for our plugins. WPAST is freely available at github.
Yes. Please open a support ticket to get started.
All our licenses are sold as yearly subscriptions and renewed automatically. You can cancel your subscription anytime from your account after logging in or by opening a support ticket. We send reminder emails before the renewal as a courtesy.
The plugin will continue to work after your license expired as long as it works. If there is a breaking change due to WordPress code base update or deletion or if any third party code included in your plugin is not updated to meet the current web standards, it will stop working.
Basically, by using a plugin with an expired license, you assume the responsibility of maintaining the code base to keep the software in working condition. We always recommend keeping your software up to date to keep it in working condition at all times. If you do not renew your subscription and your license expires, you will not receive product support and software updates for your plugin any longer.
Some plugins offer limited customization such as attribute label and visibility changes. If the plugin has this capability, it is shown on the plugin page. All other customizations are done using WP App Studio plugin and a ProDev account
Starter(Community) plugins are for users who do not have advanced requirements and would prefer to add functionality through extensions overtime.
Professional plugins are usually for users who work in a single role team structure with relatively more advanced requirements than a starter user.
Enterprise plugins are for multi-team, multi-role organizations with complex requirements. Enterprise plugins come with very advanced functionality that are not offered in any other edition.
To be able to compare the editions in a product group, click on the Compare link in the navigation toolbar.
The plugin support is given to the primary account holder who initially purchased the product.
No, it does not. The development accounts have different licenses and are sold separately.
No, it does not. The plugin designs have different licenses and are sold separately.
On a WordPress Multisite, all plugins are stored in one location. When you update your plugin in the Network Admin, all sub-sites will receive the update. In order to access support and updates, you'll need one license for each site where the plugin/extension is activated.
Unfortunately, we don't. We offer our products globally and can not take phone calls at this time. If you need support or have a question, please open a ticket.